Table of Contents
- Prerequisites
- GitHub Account
- Configure GitHub as an identity provider
- Add GitHub identity provider to a user flow
- Google Account
- Configure Google as an identity provider
- Add Google identity provider to a user flow
- Microsoft Account
- Configure Microsoft as an identity provider
- Add Microsoft identity provider to a user flow
- Successful Sign in
- Cloudapp-dev, and before you leave us
In this last story of a series of three, we will focus on possible Identity providers for our Azure B2C Tenant because we would like to remove every obstacle for our users during the login process. Since we will also add comment functionality in the upcoming stories, we need the login to be as handy as possible. So let's start with the ID Providers from Github, Google and Microsoft.
In the last three stories, we did:
We will now add three Identity providers, allowing our users to log in very quickly via their existing account (Social Login).
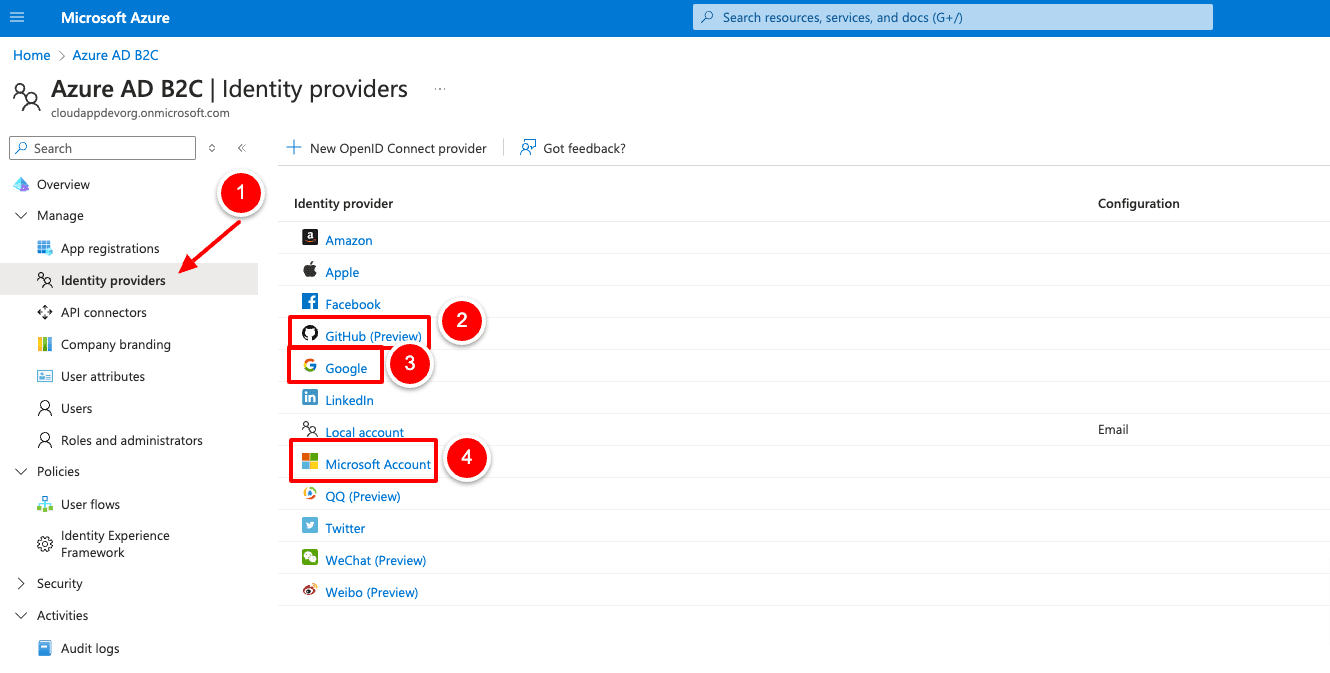
To add new identity providers to our B2C Tenant, we open the Azure B2C Tenant and then select “Identity providers” on the left. We will now see all possible providers but focus on the three mentioned at the beginning.
Prerequisites
(are identical for all three ID providers)
Create a user flow, what we already did in our first story
GitHub Account
Create a GitHub OAuth application
To enable sign-in with a GitHub account in Azure Active Directory B2C (Azure AD B2C), you need to create an application in GitHub Developer portal. For more information, see Creating an OAuth App. If you don’t already have a GitHub account, you can sign up at https://www.github.com/.
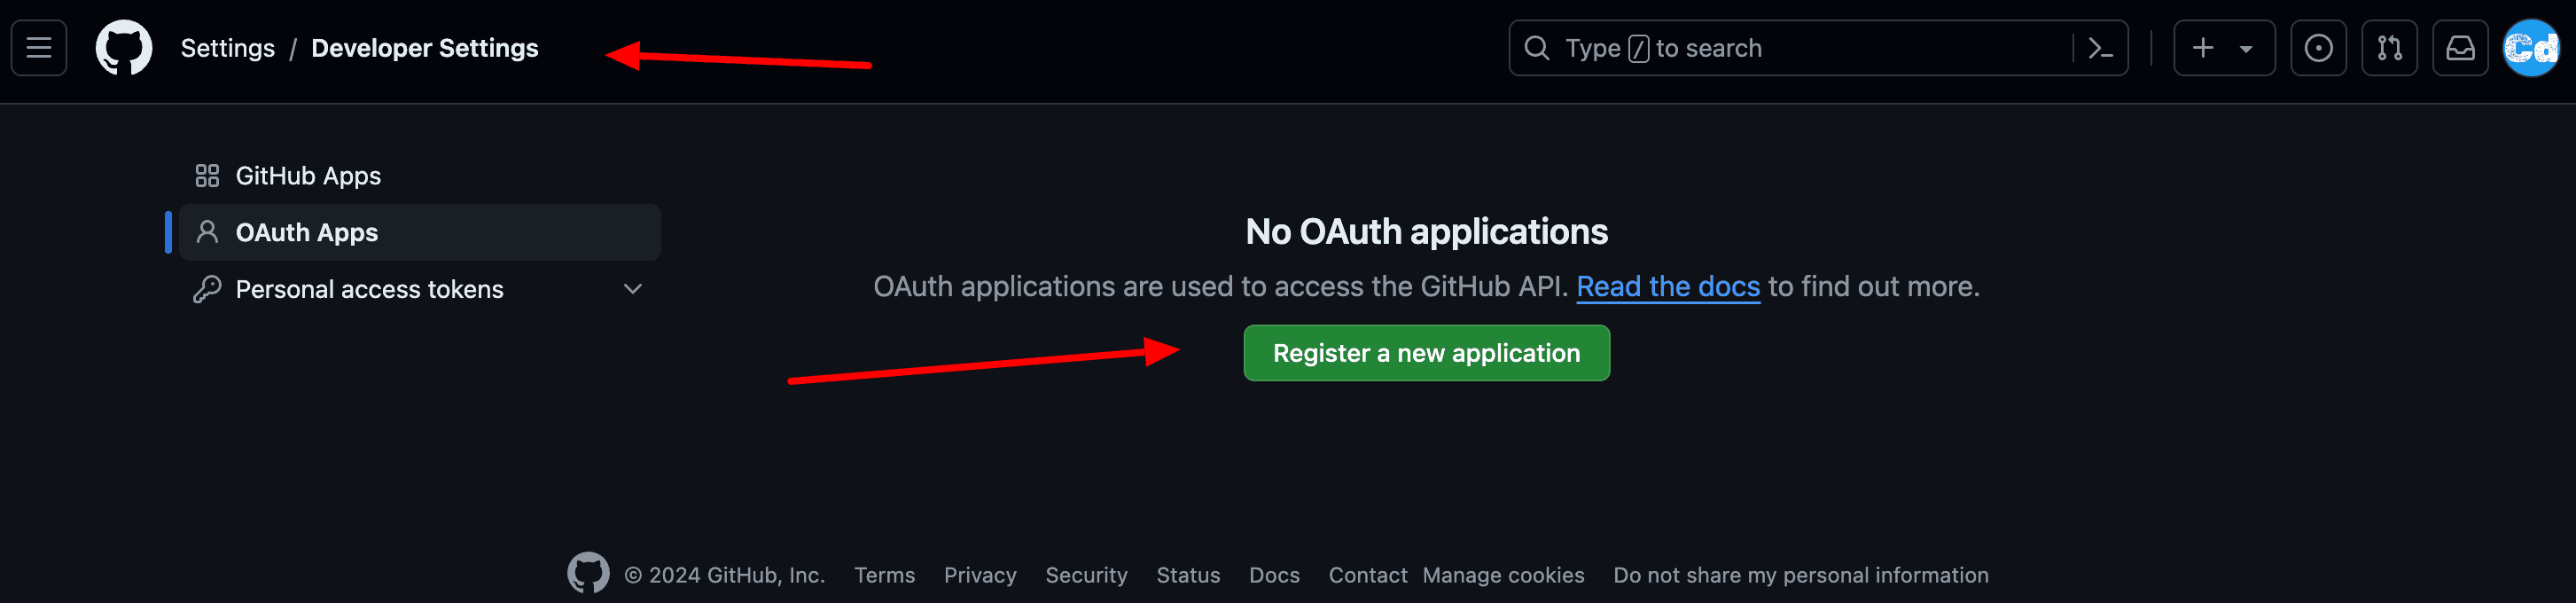
Sign in to the GitHub Developer with your GitHub credentials.
Select OAuth Apps and then select New OAuth App.
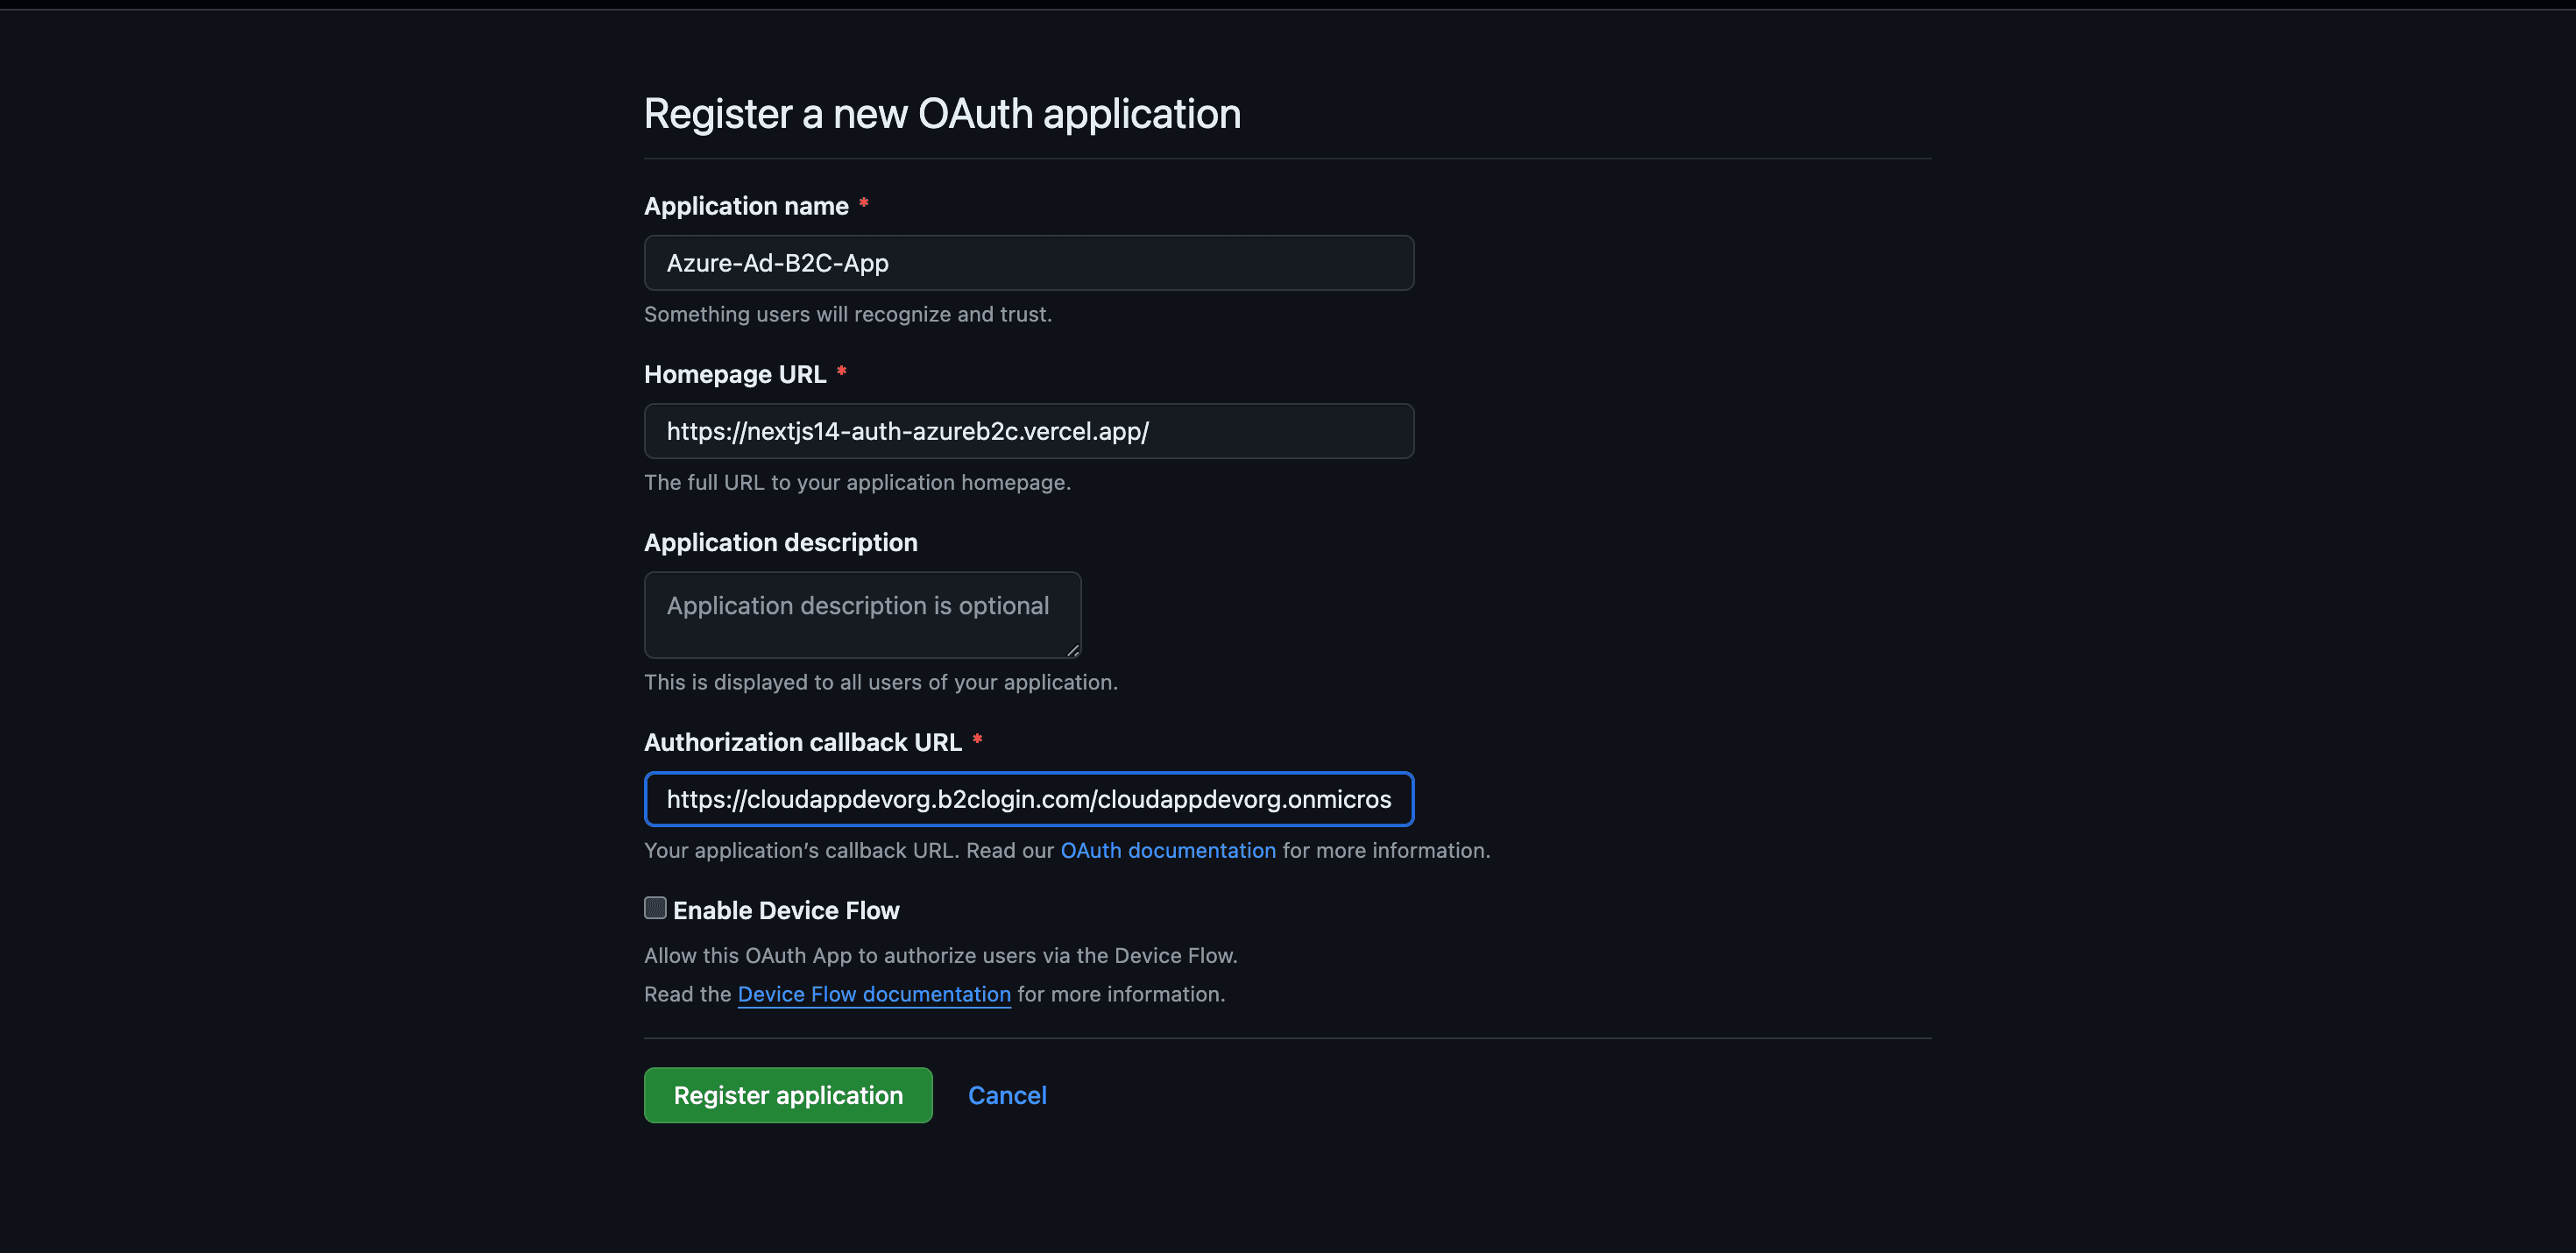
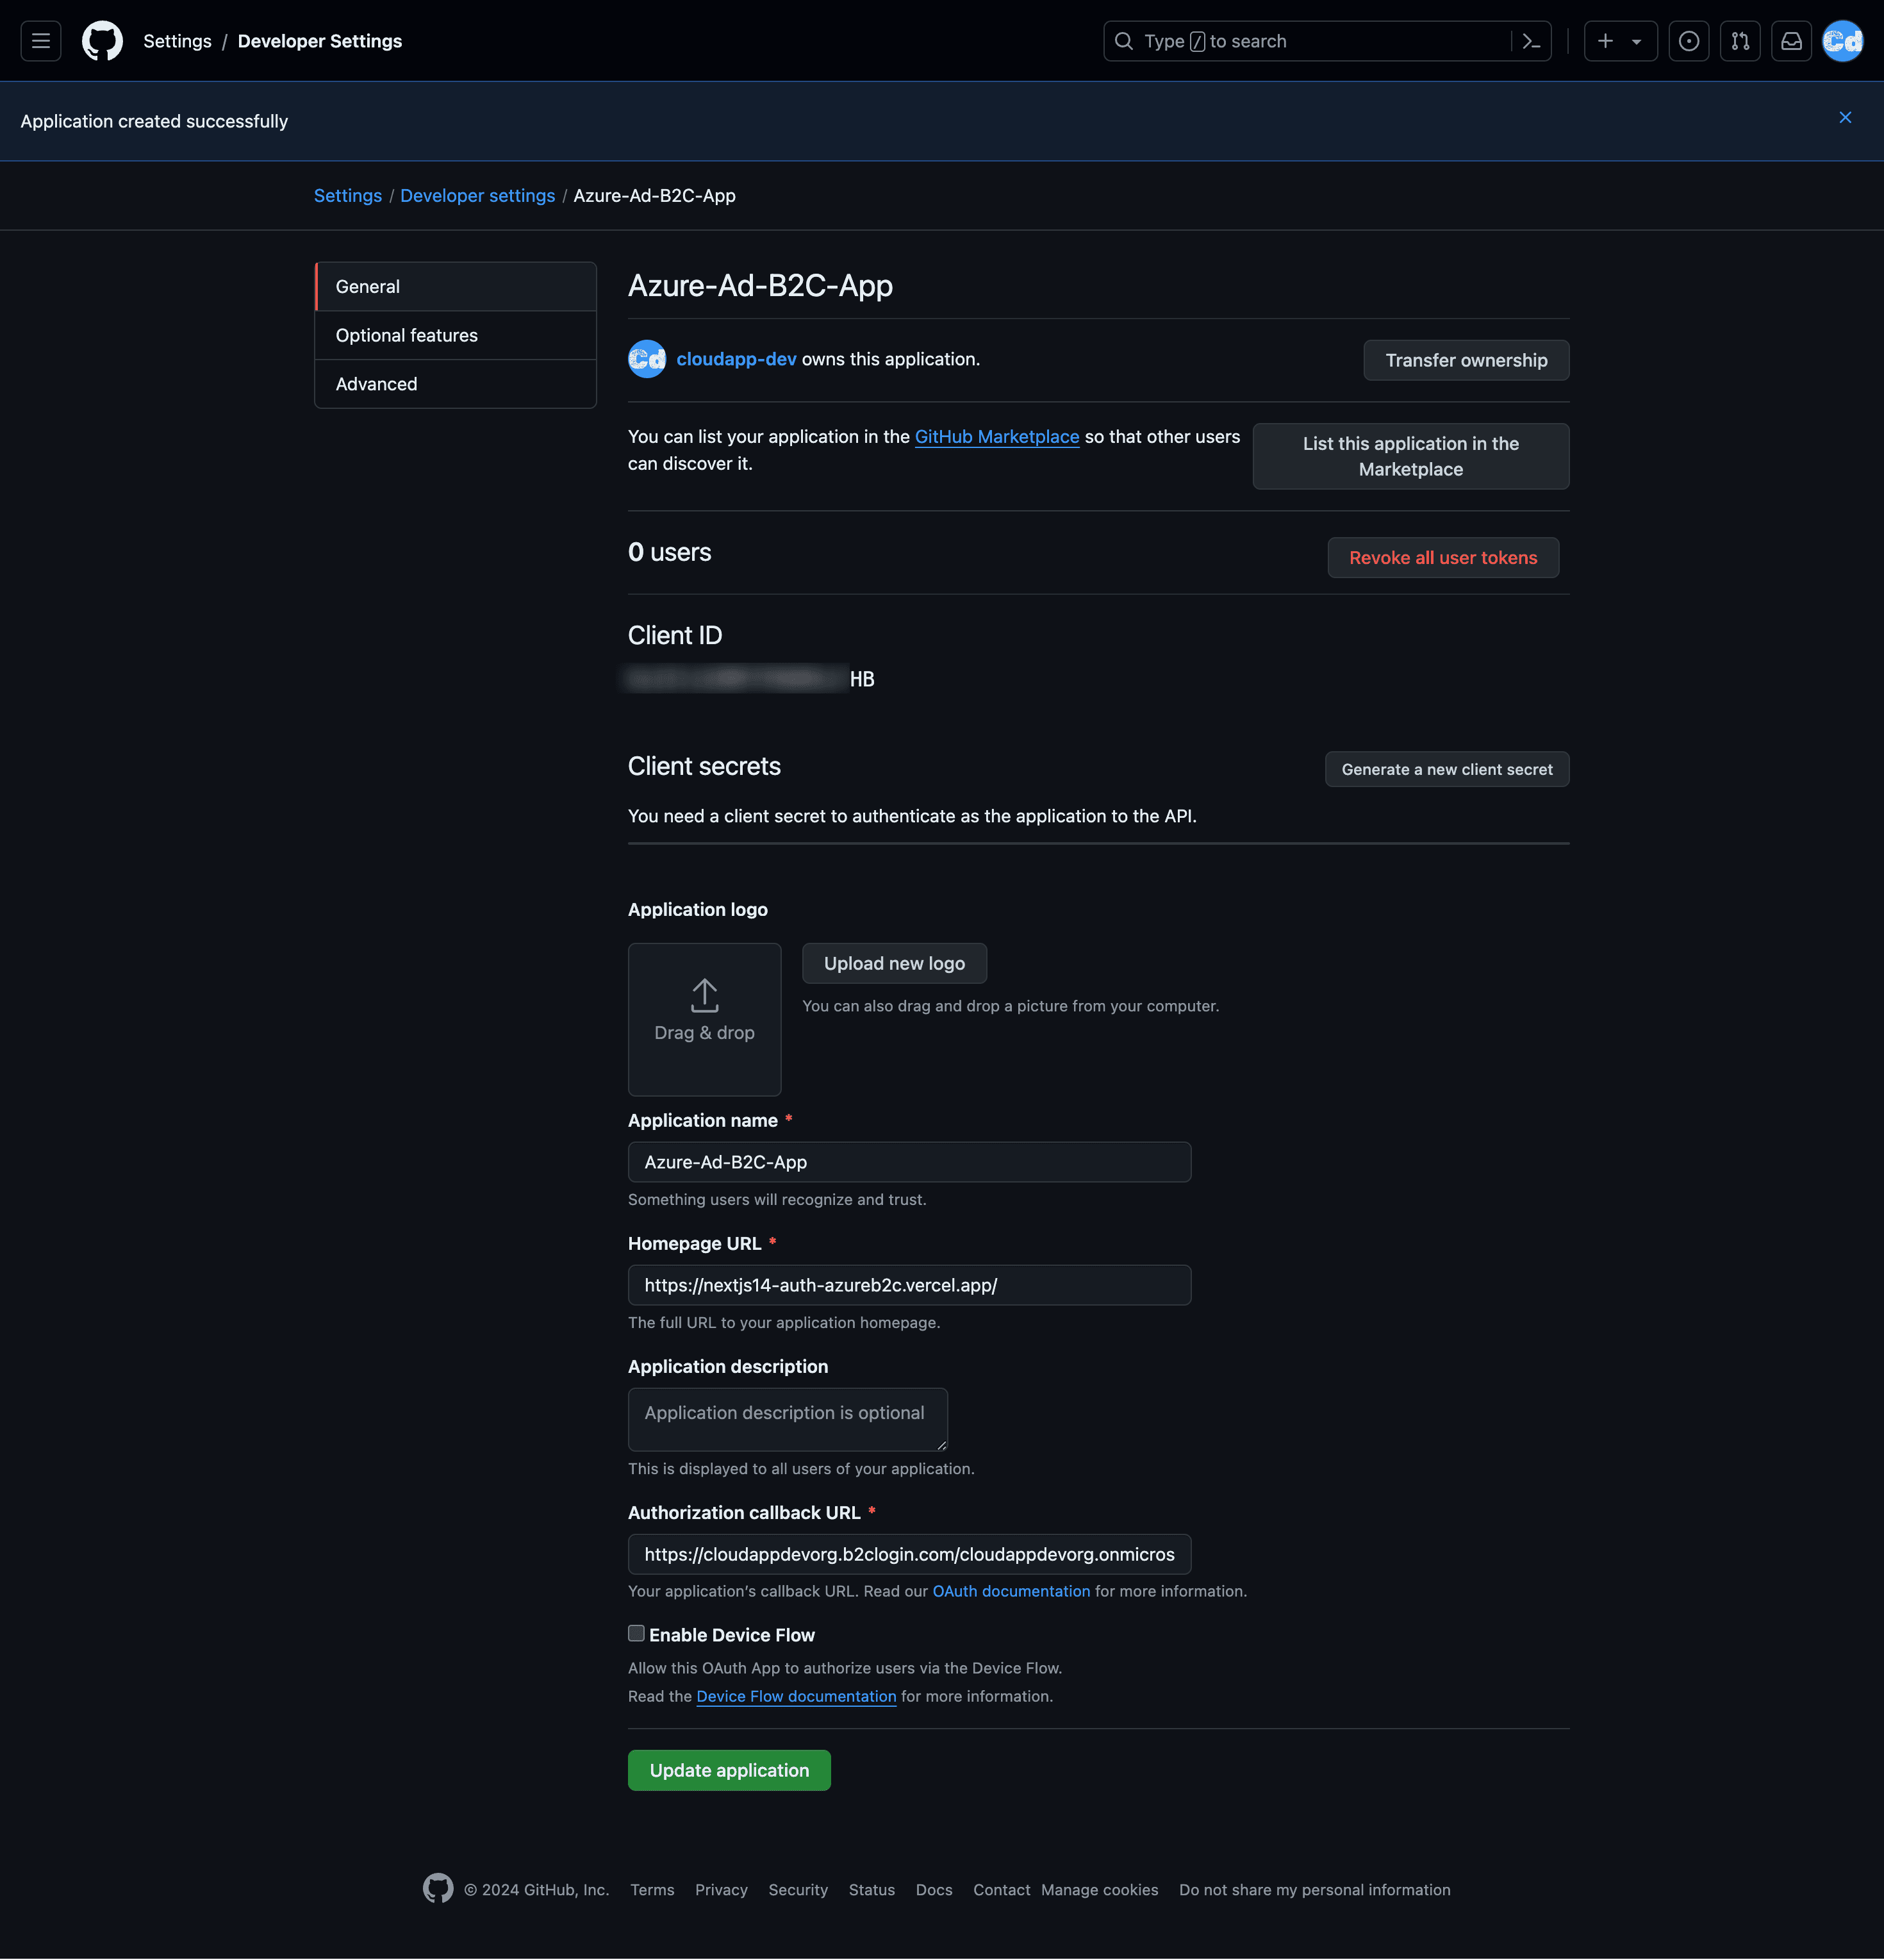
Enter an Application name and your Homepage URL (in our case, we use our example URL from the Vercel deployment -> https://nextjs14-auth-azureb2c.vercel.app/)
For the Authorization callback URL, enter https://your-tenant-name.b2clogin.com/your-tenant-name.onmicrosoft.com/oauth2/authresp (For my use case -> https://cloudappdevorg.b2clogin.com/cloudappdevorg.onmicrosoft.com/oauth2/authresp). If you use a custom domain, enter https://your-domain-name/your-tenant-name.onmicrosoft.com/oauth2/authresp. Replace your-domain-name with your custom domain, and your-tenant-name with the name of your tenant. Use all lowercase letters when entering your tenant name, even if the tenant is defined with uppercase letters in Azure AD B2C.
Click Register application.
Copy the values of Client ID and Client Secret (You have to create a new secret with the CTA -> generate a new client secret). Save the values, especially the secret, in a safe place. You need both to add the identity provider to your tenant.
Configure GitHub as an identity provider
Sign in to the Azure portal and go back to our Azure AD B2C Tenant (Url should be ->
https://portal.azure.com/#view/Microsoft_AAD_B2CAdmin/TenantManagementMenuBlade/~/overview)
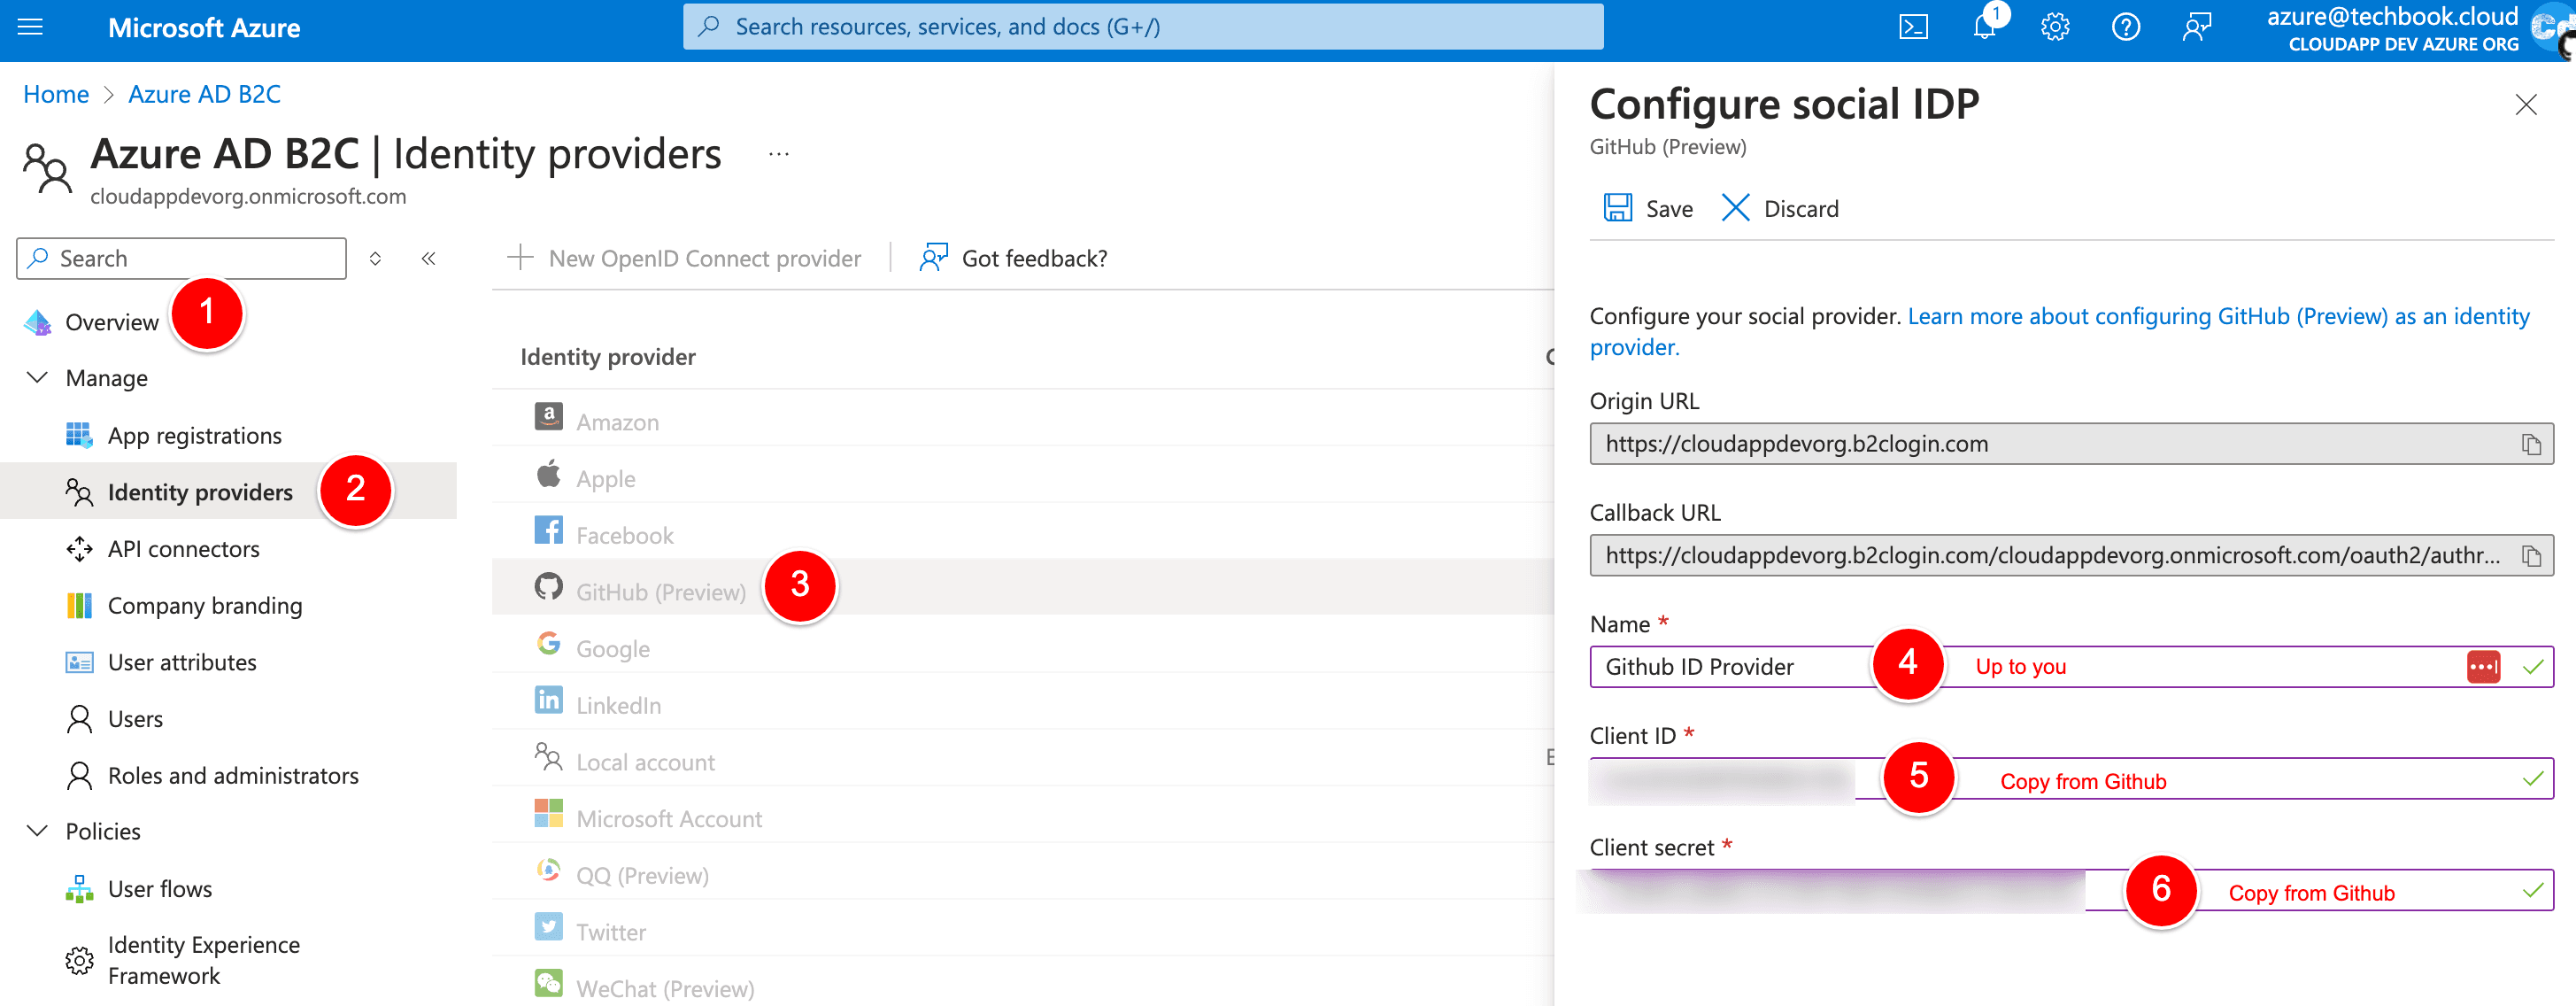
Select Identity Providers, then select GitHub (Preview).
Enter a Name. For example, GitHub ID Provider.
For the Client ID, enter the Client ID of the GitHub application you created earlier.
For the Client secret, enter the Client Secret that you created earlier and recorded.
Select Save.
Add GitHub identity provider to a user flow
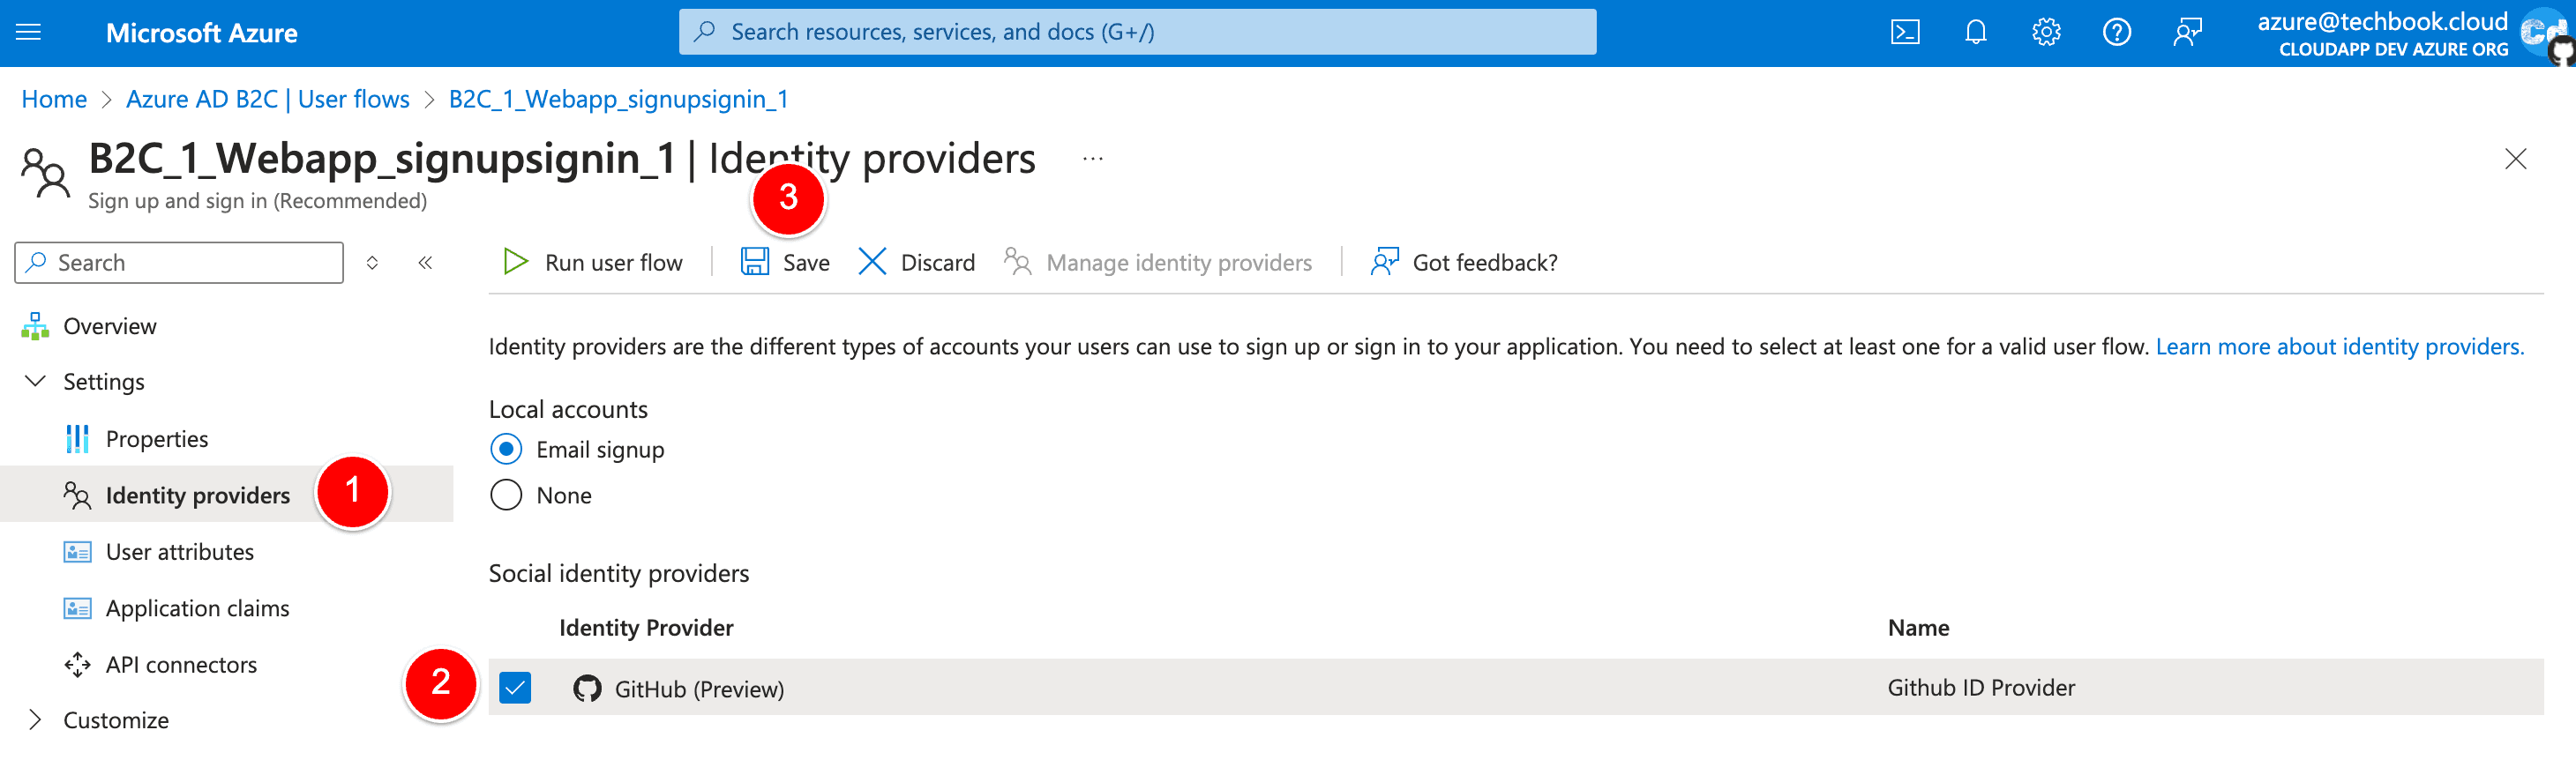
At this point, the GitHub identity provider has been set up, but it’s not yet available in any of the sign-in pages. To add the GitHub identity provider to a user flow:
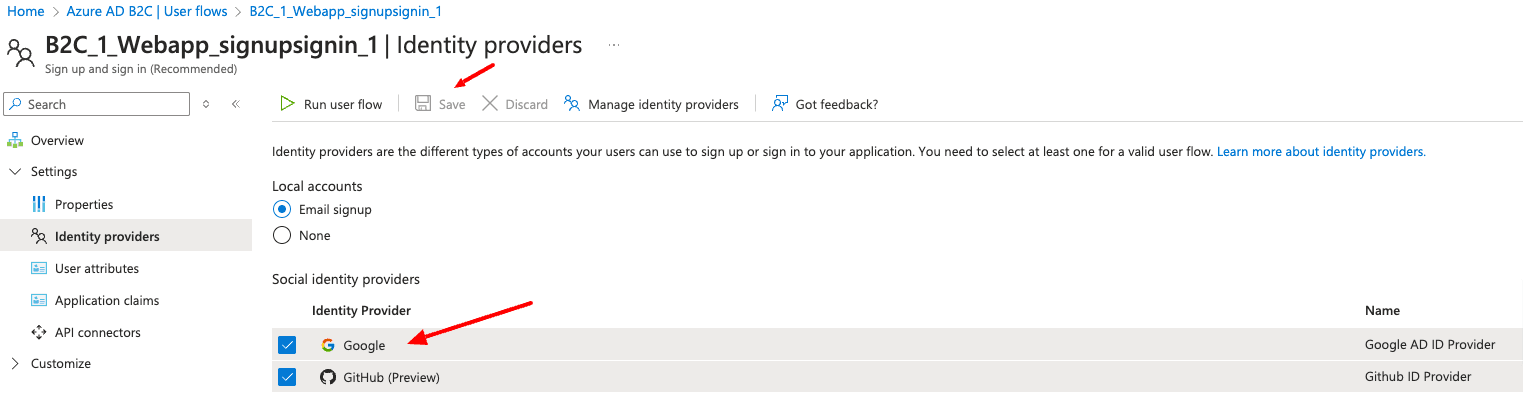
In your Azure AD B2C tenant, select User flows.
Click the user flow that you want to add to the GitHub identity provider.
Under the Social identity providers, select GitHub.
Select Save.
To test your policy, select Run user flow.
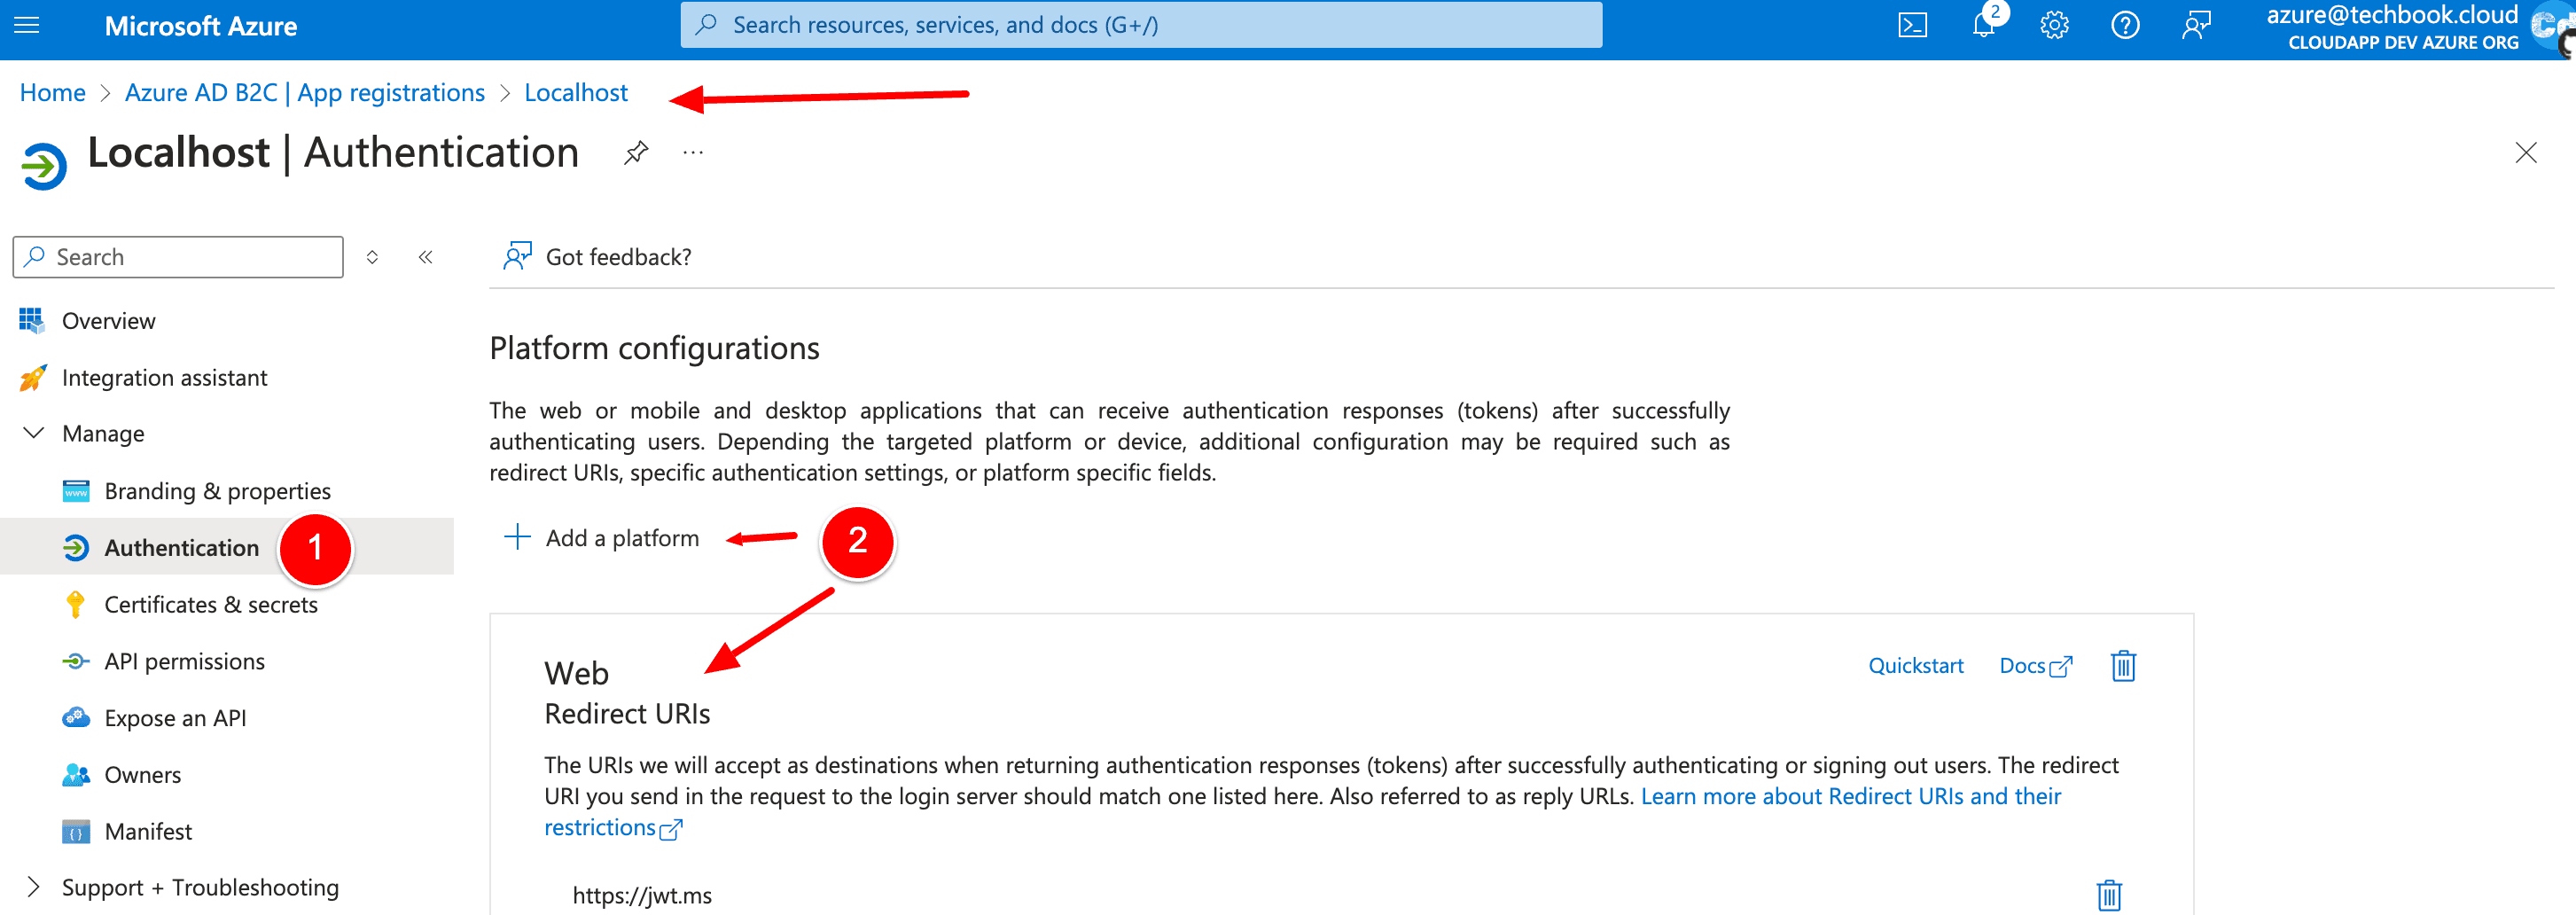
For Application, select the web application named Localhost that you previously registered. The Reply URL should show https://jwt.ms.
Select the Run user flow button.
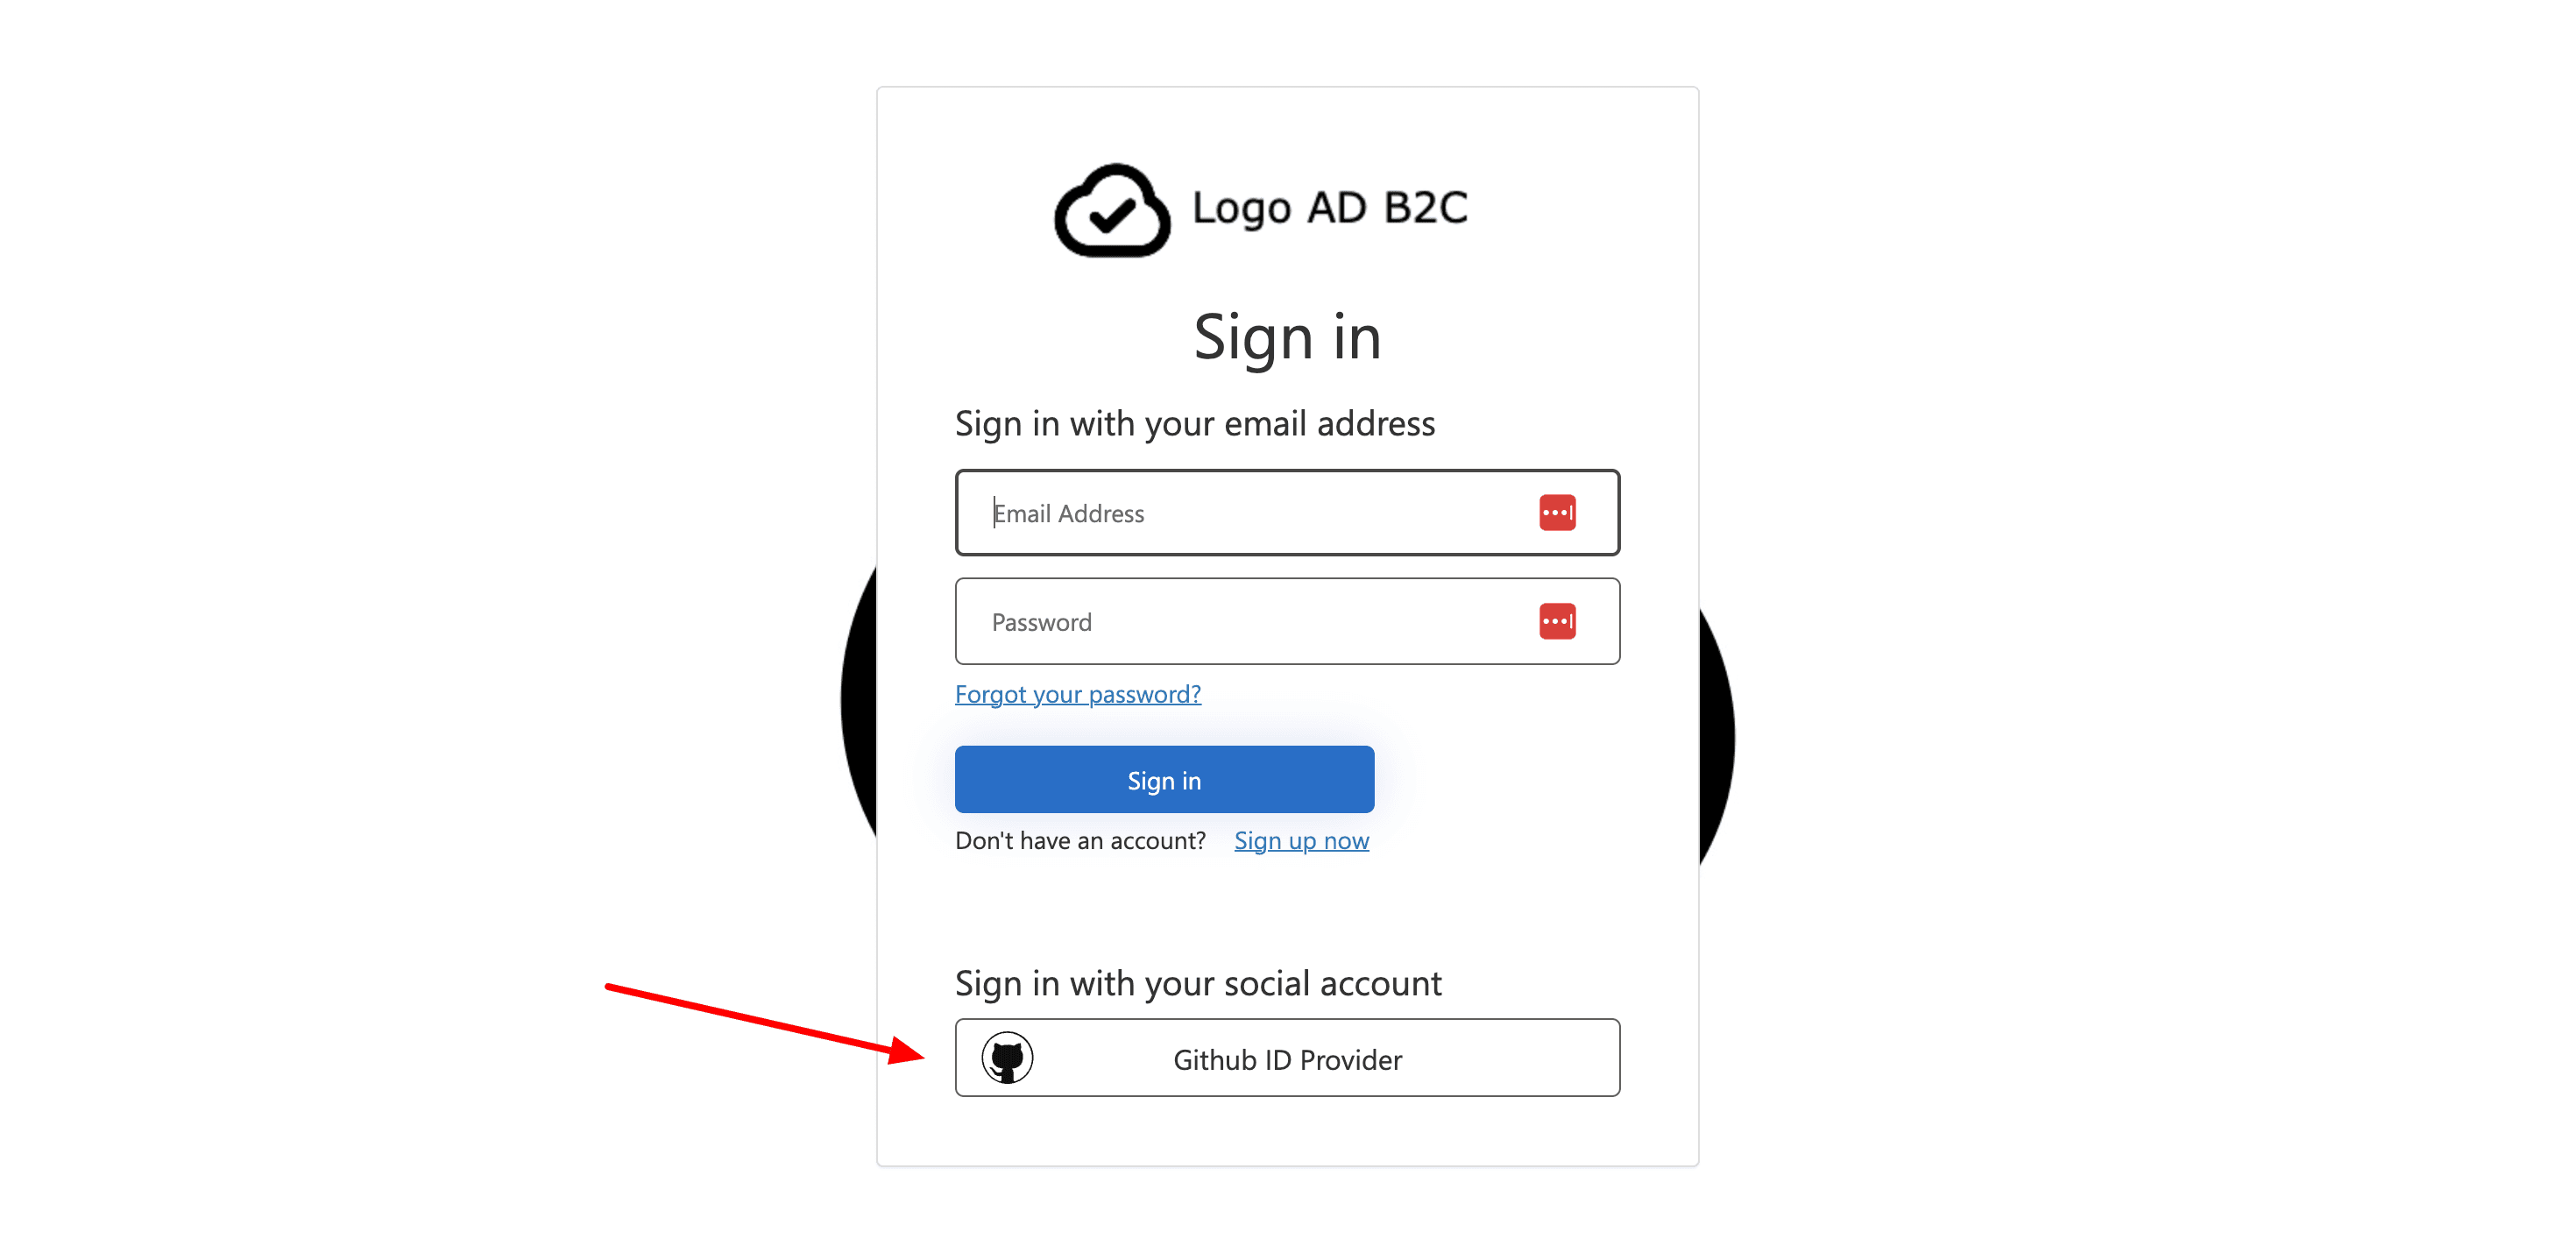
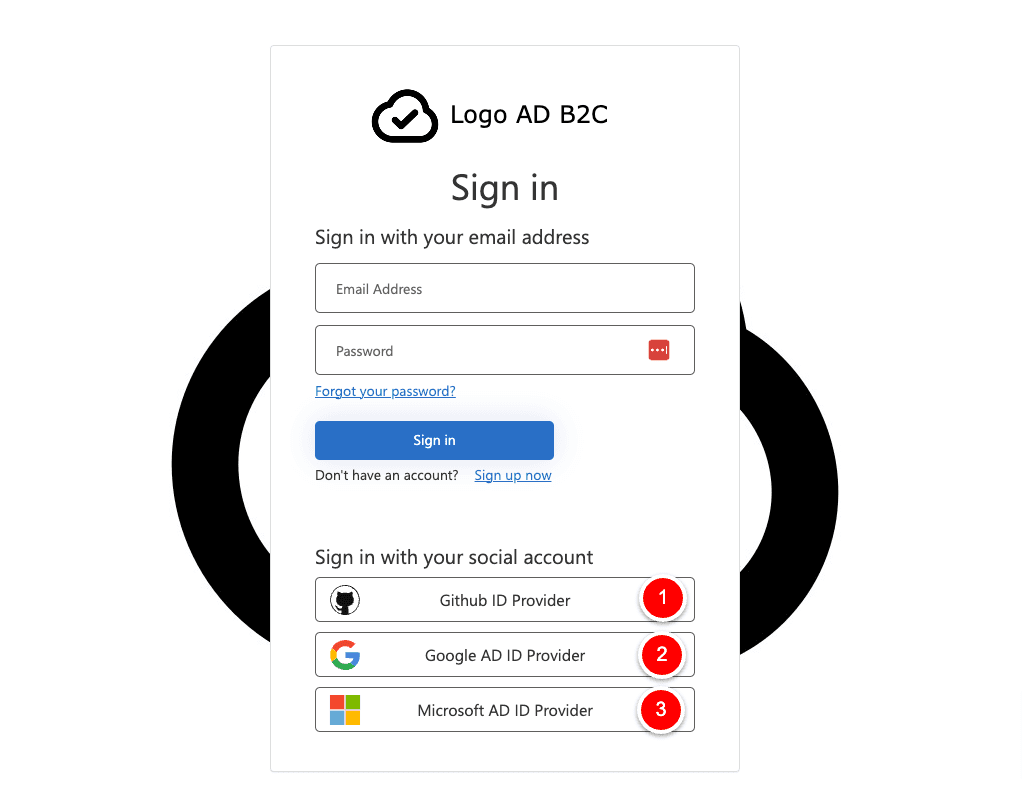
From the sign-up or sign-in page, select GitHub to sign in with GitHub account.
If there is no “https://jwt.ms” available on the right flyout, you have to go back to the “Localhost” app registration, and you must add a new “Authentication Platform” of type Web and with URL “https://jwt.ms.”
Great, now we are done with GitHub. Let’s continue with Google and then Microsoft.
Google Account
To enable sign-in for users with a Google account in Azure Active Directory B2C (Azure AD B2C), you need to create an application in Google Developers Console. For more information, see Setting up OAuth 2.0. If you don’t already have a Google account, you can sign up at https://accounts.google.com/signup.
Sign in to the Google Developers Console with your Google account credentials.
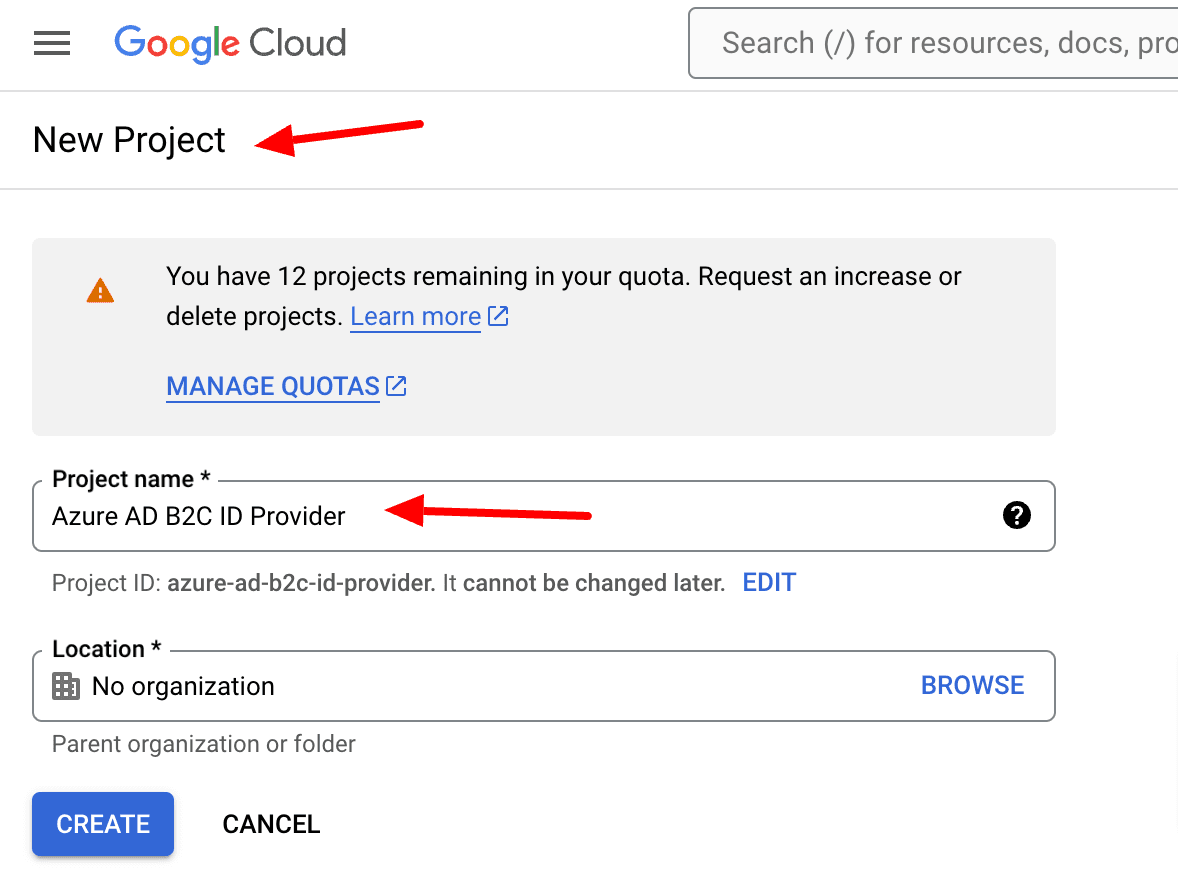
In the upper-left corner of the page, select the project list, and then select New Project.
Enter a Project Name, select Create.
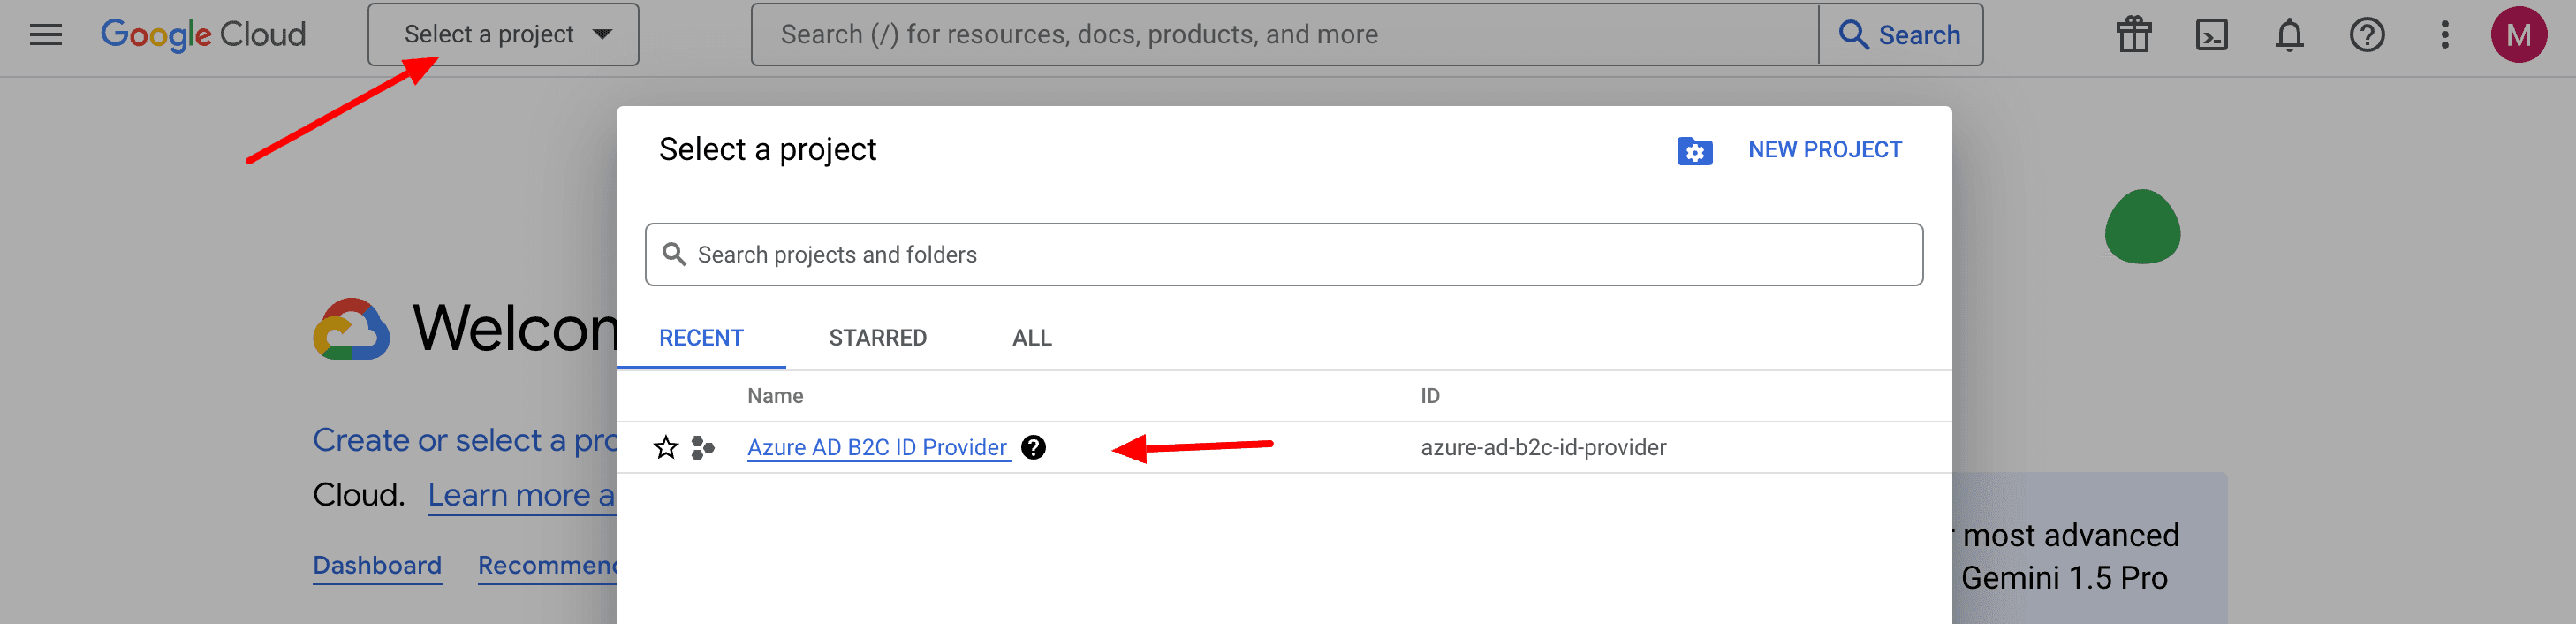
Make sure you are using the new project by selecting the project drop-down in the top-left of the screen. Select your project by name, then select Open.
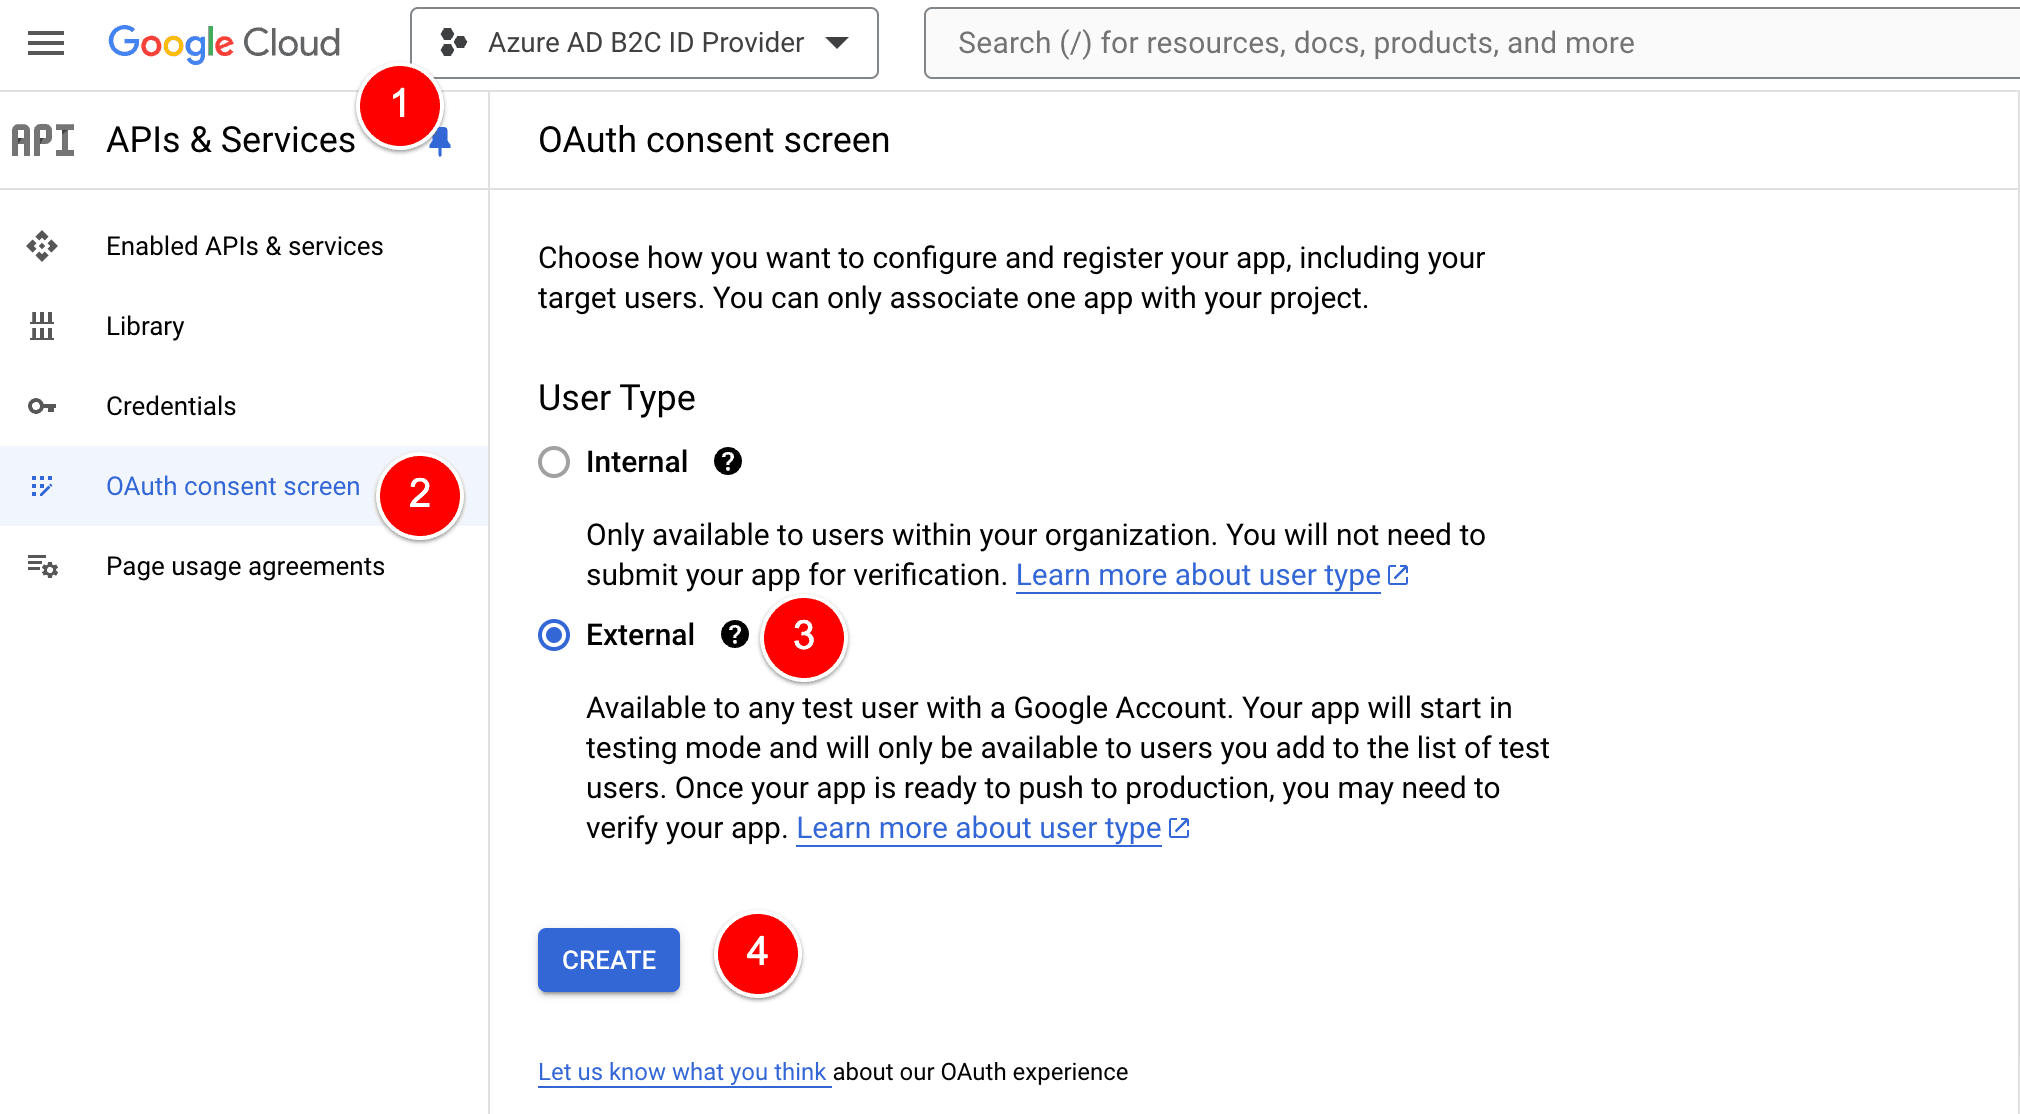
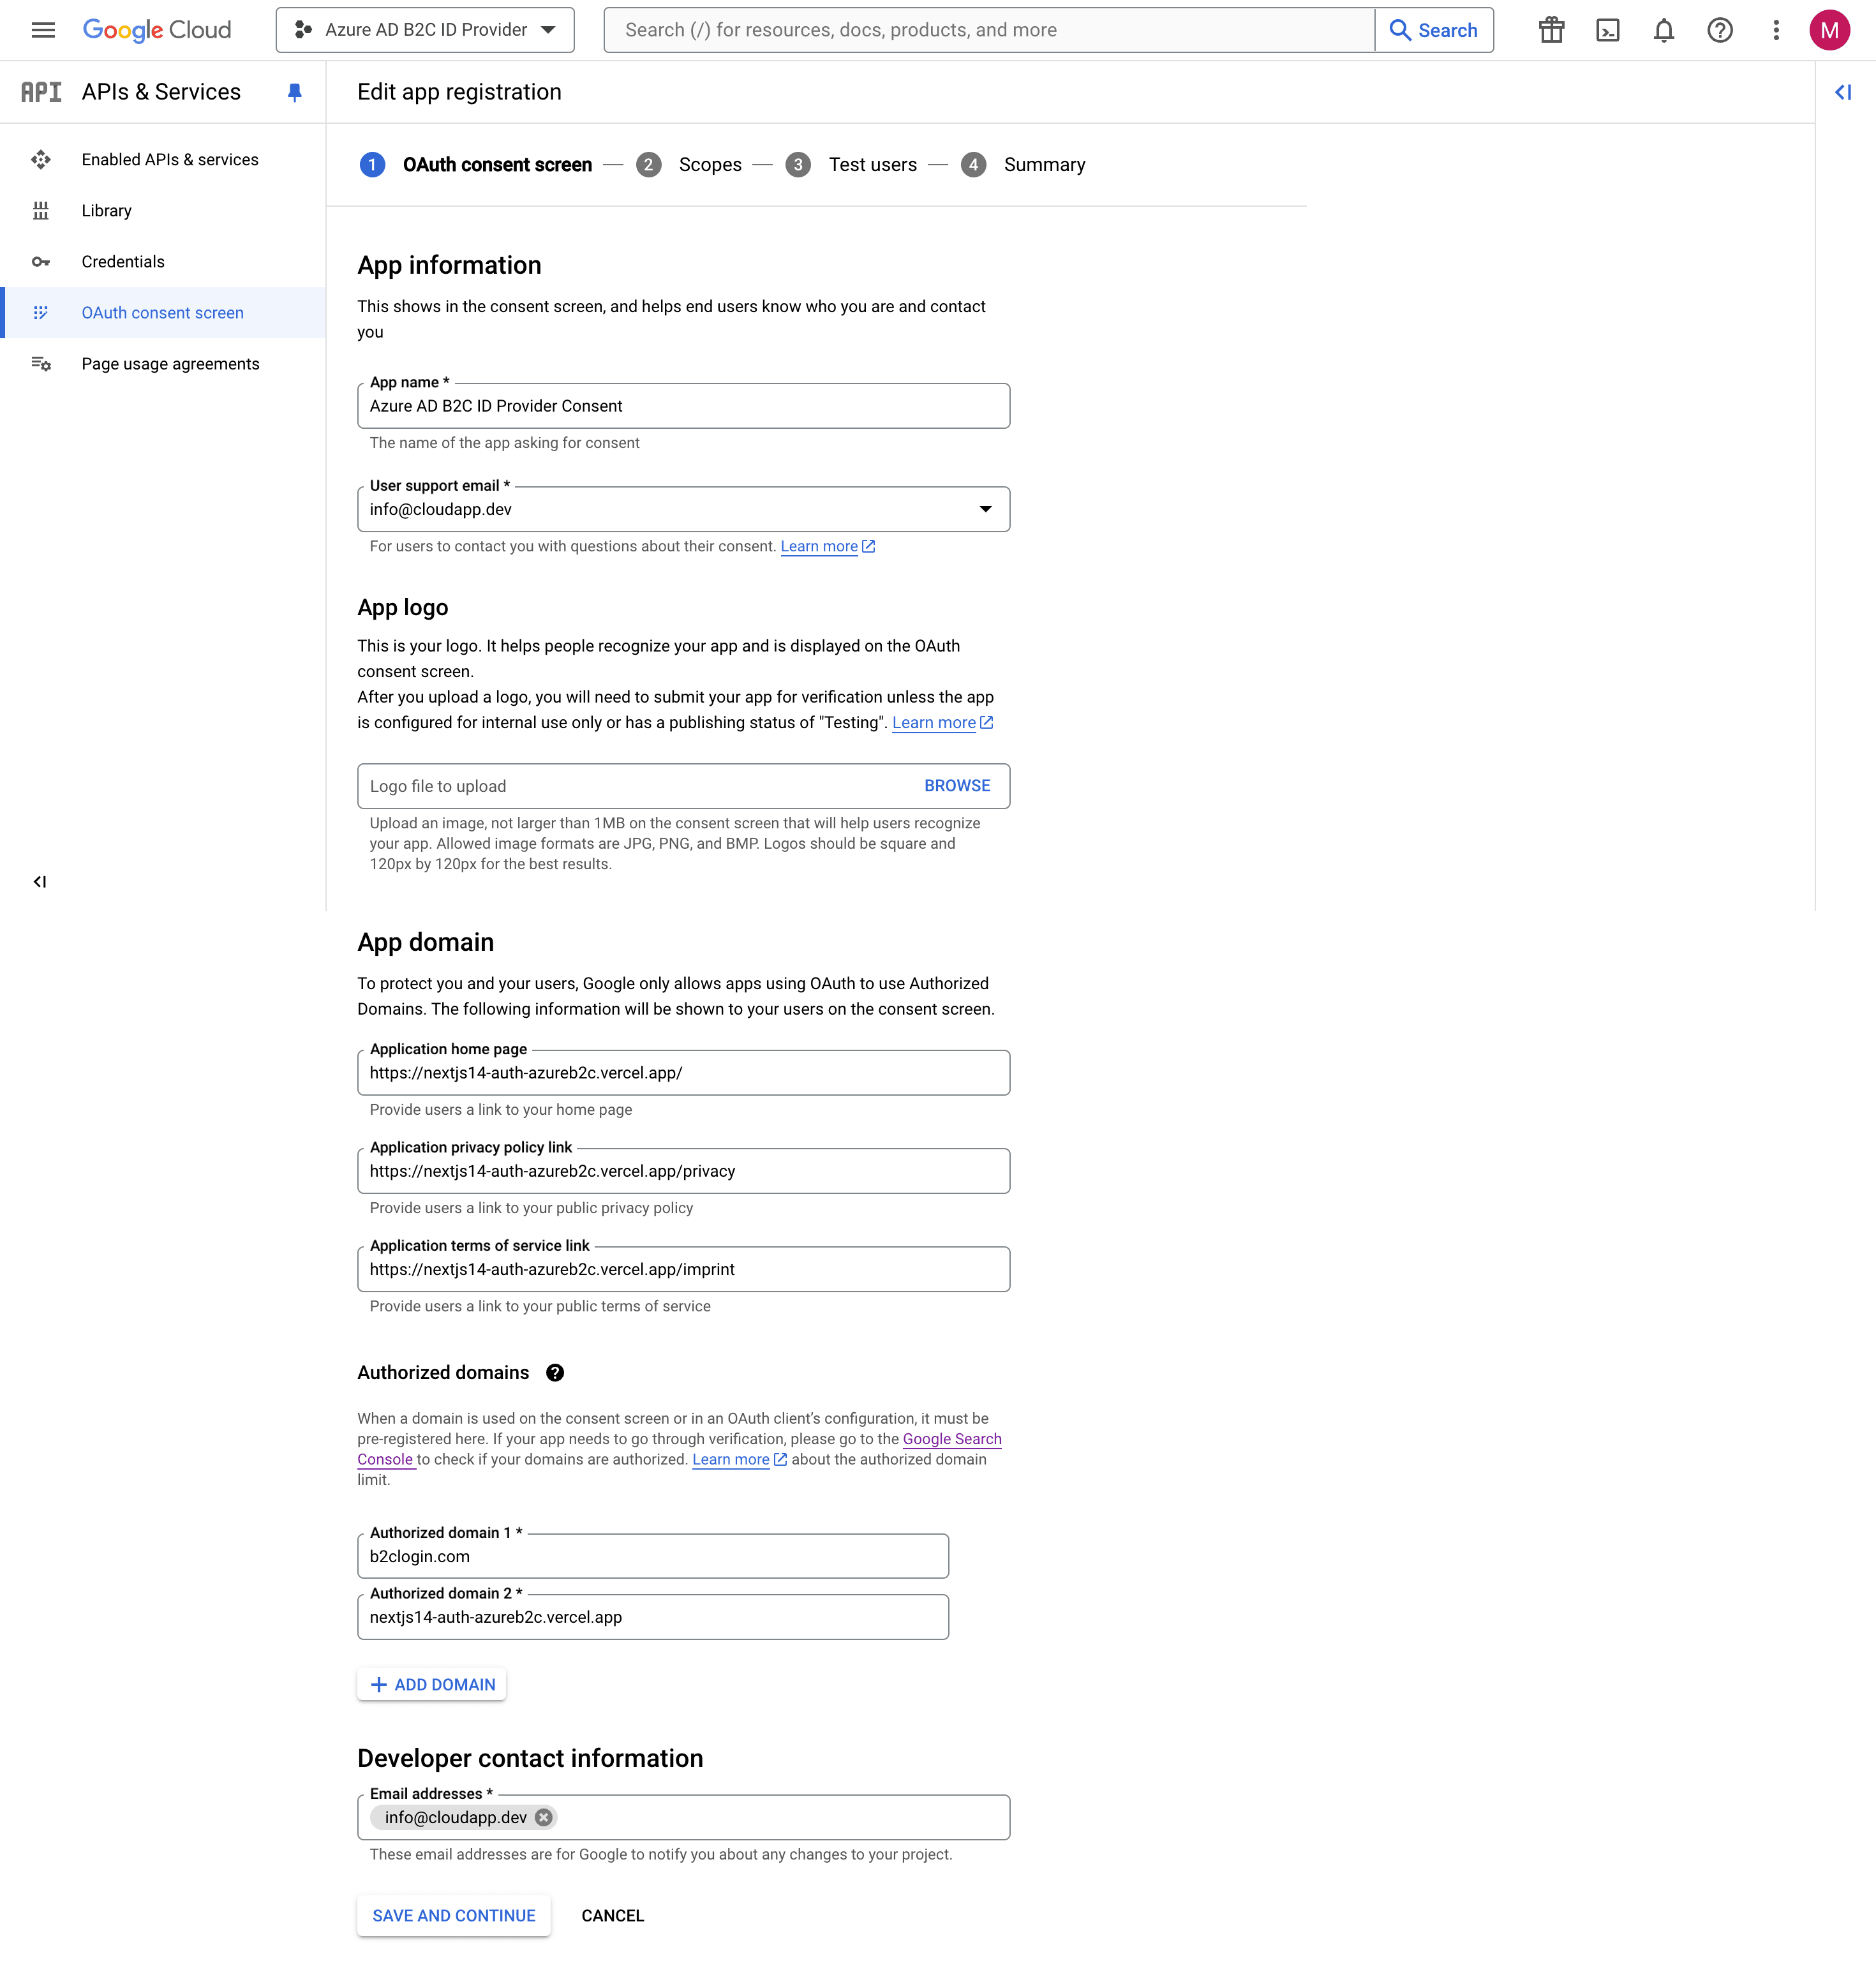
In the left menu, select APIs and services and then OAuth consent screen. Select External and then select Create.
Enter a Name for your application.
Select a User support email.
In the App domain section, enter a link to your Application home page, a link to your Application privacy policy, and a link to your Application terms of service.
In the Authorized domains section, enter b2clogin.com and nextjs14-auth-azureb2c.vercel.app (example domain)
In the Developer contact information section, enter comma-separated emails for Google to notify you about any changes to your project.
Select Save and Continue
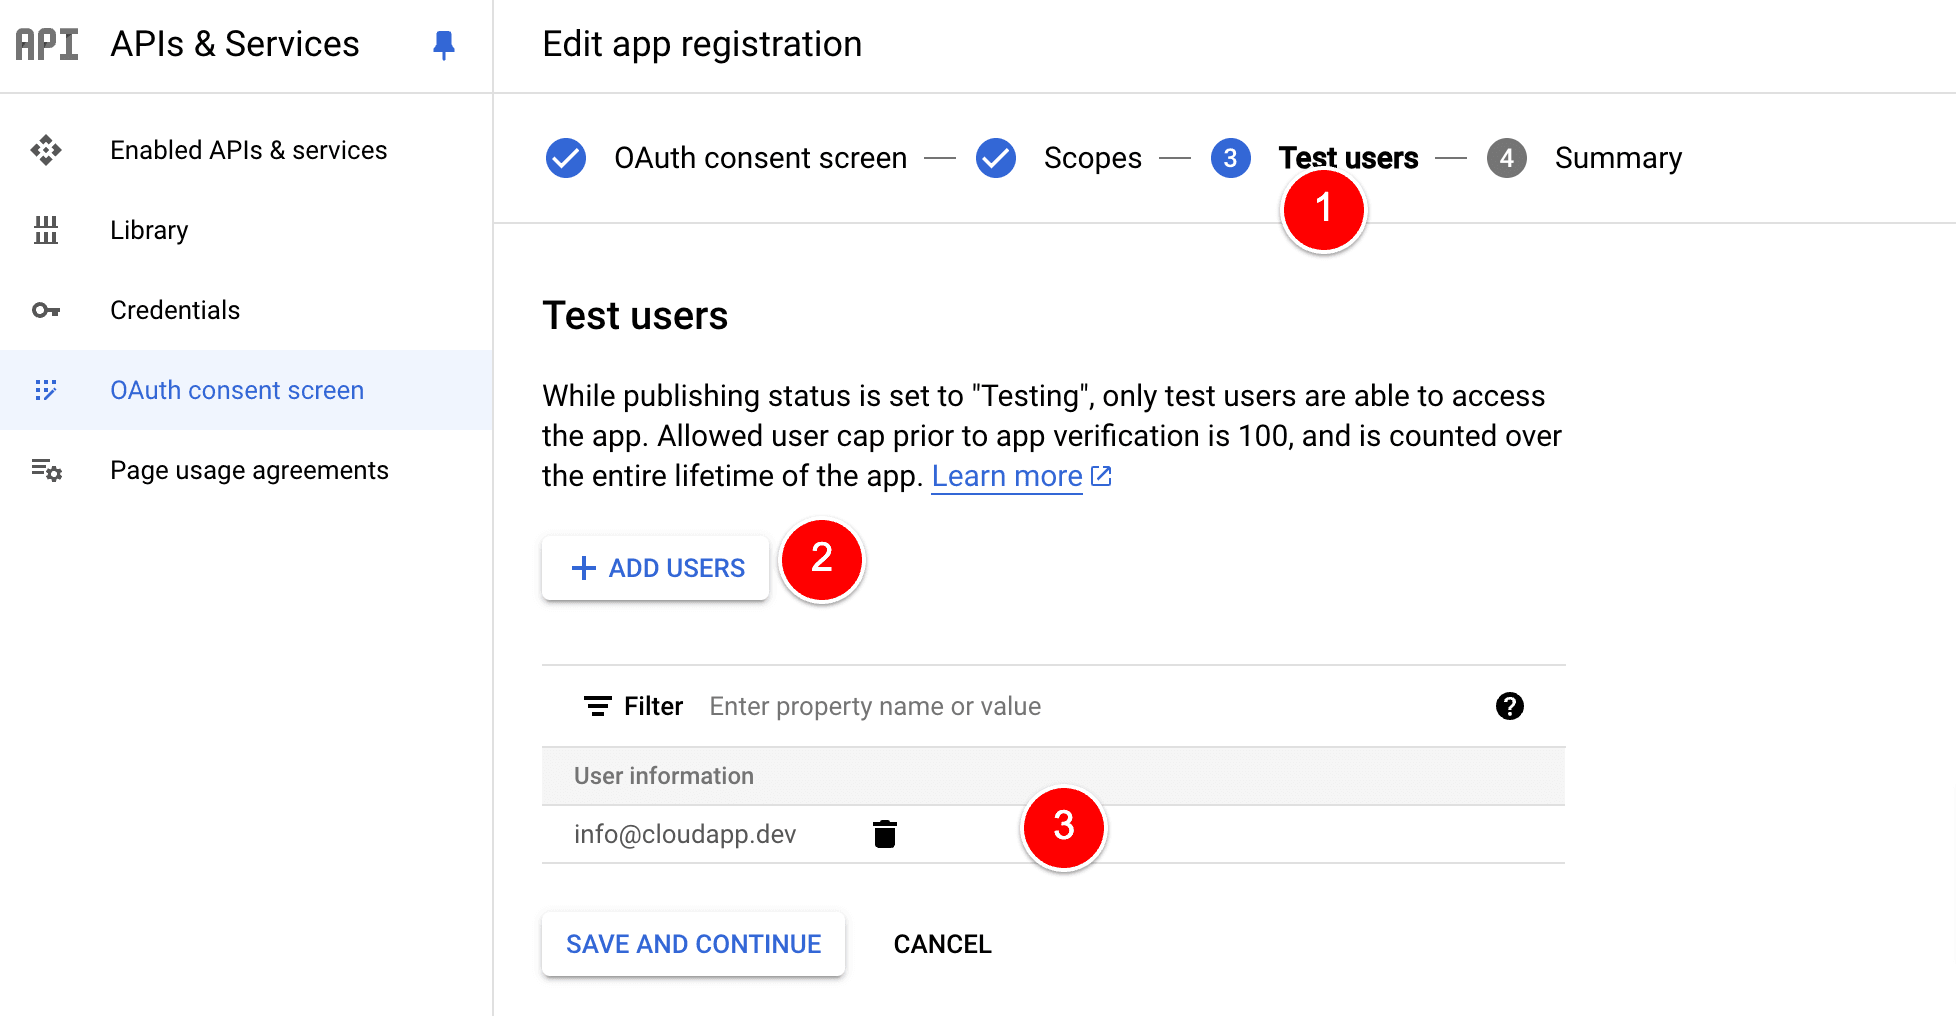
Let’s add one Testuser and Select Save and Continue again
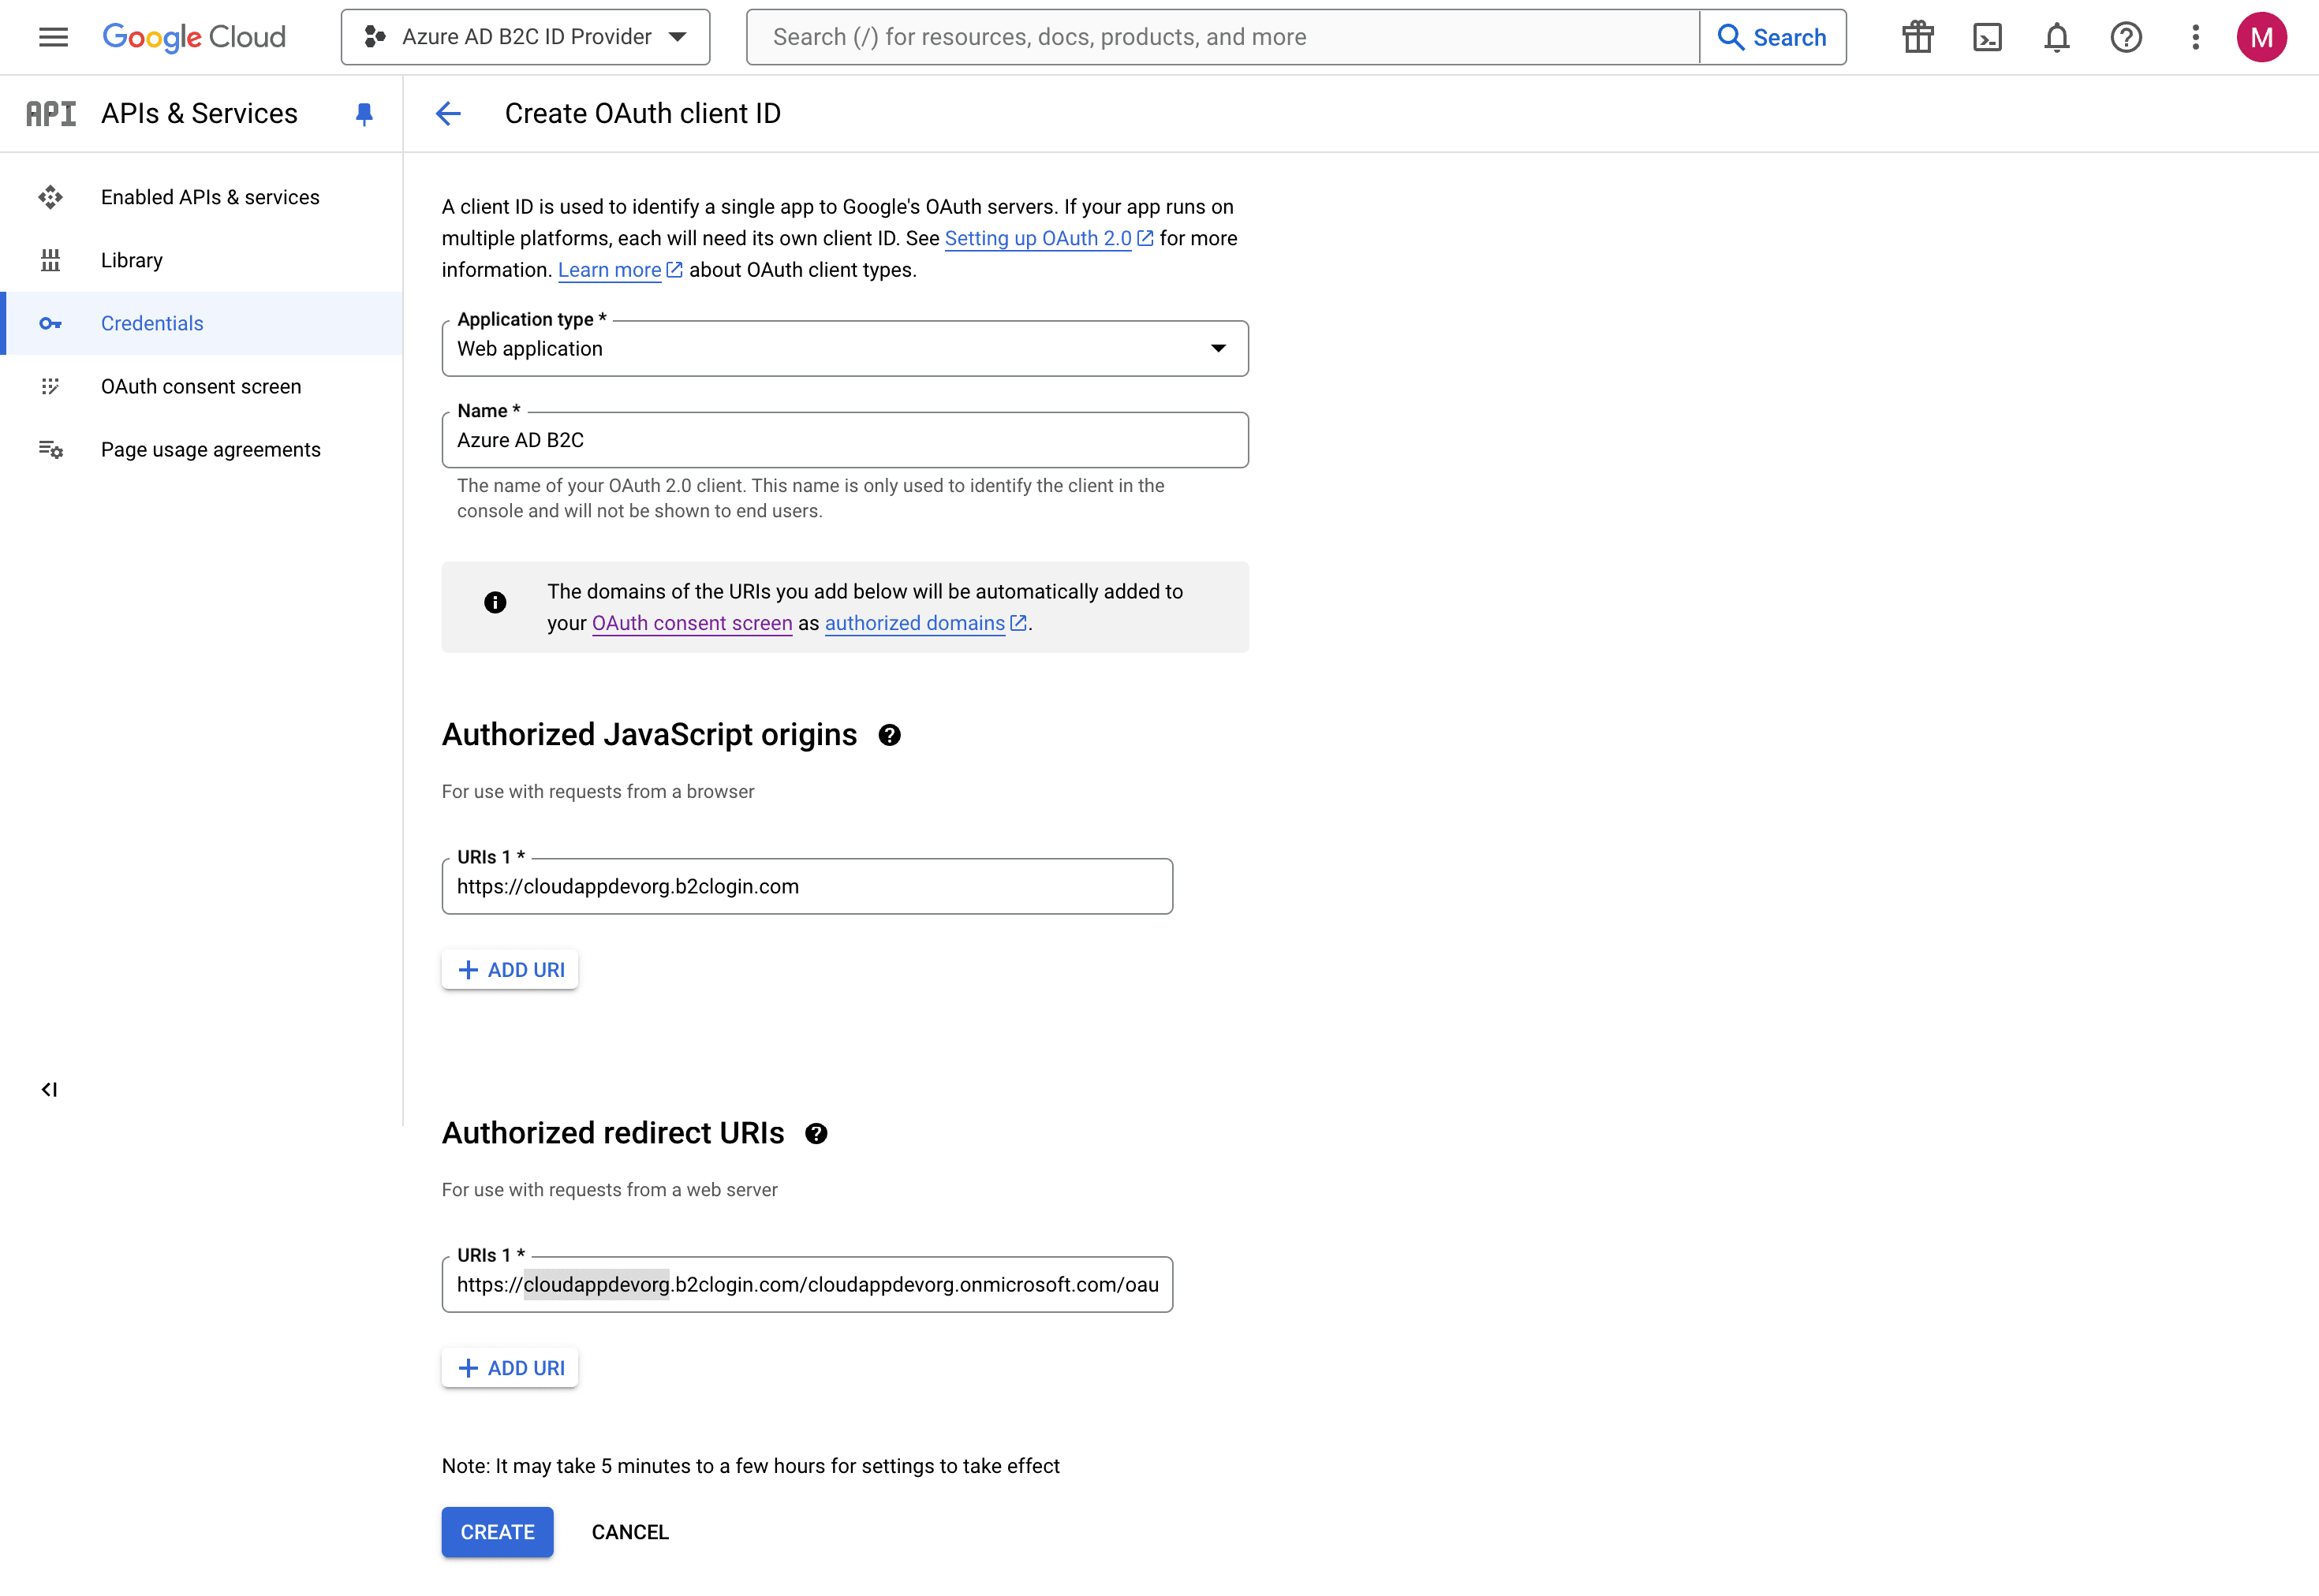
Select Credentials in the left menu, then select Create credentials > Oauth client ID.
Under Application type, select Web application.
Enter a Name for your application.
For the Authorized JavaScript origins, enter https://your-tenant-name.b2clogin.com. (https://cloudappdevorg.b2clogin.com in my case). If you use a
For the Authorized redirect URIs, enter https://your-tenant-name.b2clogin.com/your-tenant-name.onmicrosoft.com/oauth2/authresp. If you use a custom domain, enter https://your-domain-name/your-tenant-name.onmicrosoft.com/oauth2/authresp. Replace your-domain-name with your custom domain, and your-tenant-name with the name of your tenant. Use all lowercase letters when entering your tenant name, even if the tenant is defined with uppercase letters in Azure AD B2C. In all instances, replace your-tenant-name with the Directory (tenant) subdomain. We always use cloudappdevorg
Select Create.
Copy the values of Client ID and Client secret. You will need both of them to configure Google as an identity provider in your tenant. Client secret is an important security credential.
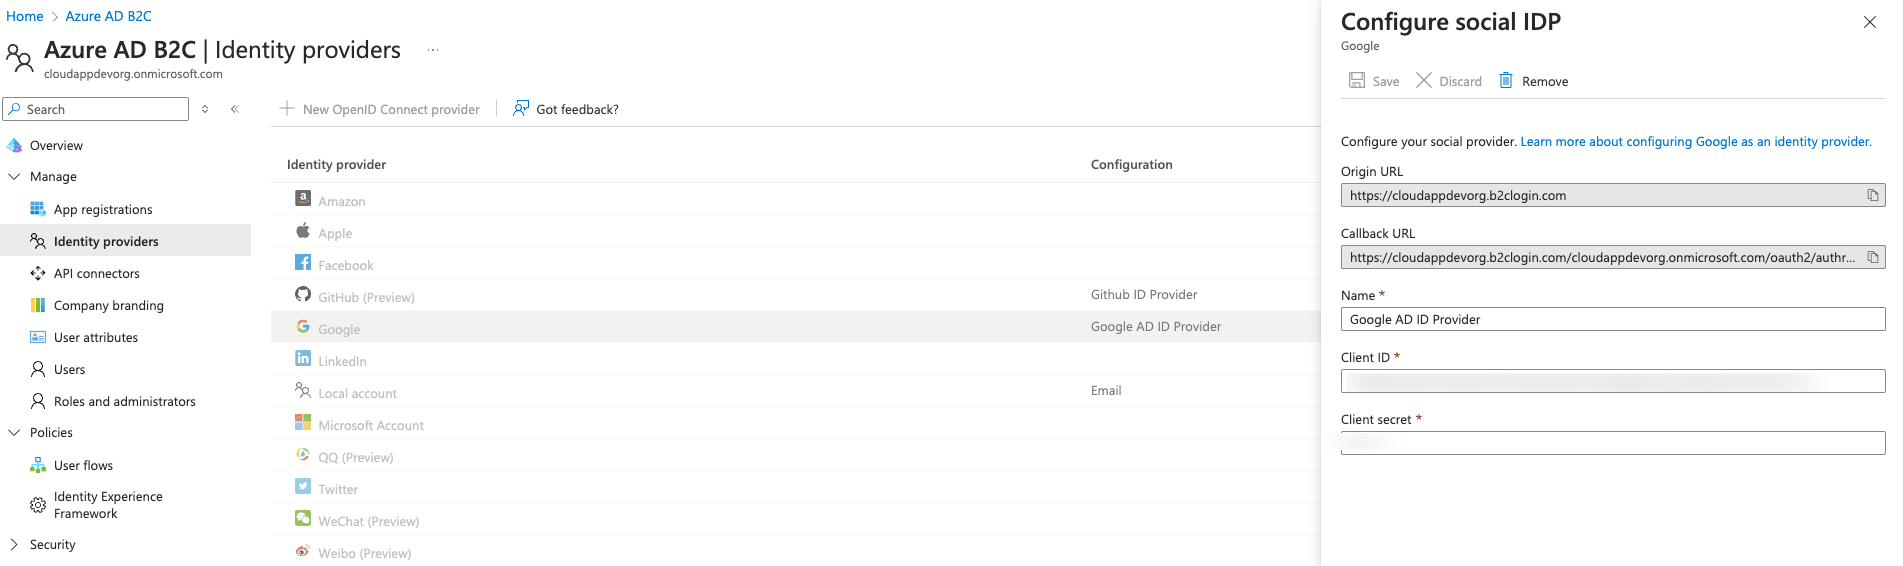
Configure Google as an identity provider
Here, you can follow the steps mentioned before for GitHub.
Add Google identity provider to a user flow
The Google identity provider has been set up at this point, but it’s not yet available on any of the sign-in pages. To add the Google identity provider to a user flow:
Here, you can follow the steps mentioned before for GitHub.
Microsoft Account
To enable sign-in for users with a Microsoft account in Azure Active Directory B2C (Azure AD B2C), you need to create an application in the Azure portal. For more information, see Register an application with the Microsoft identity platform. If you don’t already have a Microsoft account, you can get one at https://www.live.com/.
Sign in to the Azure portal.
If you have access to multiple tenants, select the Settings icon in the top menu to switch to your Microsoft Entra ID tenant from the Directories + Subscriptions menu.
Choose All services in the top-left corner of the Azure portal, and then search for and select App registrations.
Select New registration.
Enter a Name for your application. For example, Azure AD B2C ID Provider.
Under Supported account types, select Accounts in any organizational directory (Any Microsoft Entra ID tenant — Multitenant) and personal Microsoft accounts (e.g. Skype, Xbox)
Under Redirect URI (optional), select Web and enter https://your-tenant-name.b2clogin.com/your-tenant-name.onmicrosoft.com/oauth2/authresp
. If you use a custom domain, enter https://your-domain-name/your-tenant-name.onmicrosoft.com/oauth2/authresp. Replace your-tenant-name with the name of your Azure AD B2C tenant, and your-domain-name with your custom domain.
Select Register
Record the Application (client) ID shown on the application Overview page. You need the client ID when you configure the identity provider in the next section.
Select Certificates & secrets
Click New client secret
Enter a Description for the secret, for example AD B2C APP Reg Secret, and then click Add.
Record the application password shown in the Value column. The client secret is needed when you configure the identity provider in the next section.
Configure Microsoft as an identity provider
Here, you can follow the steps mentioned before for GitHub.
Add Microsoft identity provider to a user flow
At this point, the Microsoft identity provider has been set up, but it’s not yet available in any of the sign-in pages. To add the Microsoft identity provider to a user flow:
Here, you can follow the steps mentioned before for GitHub.
Successful Sign in
What is valid for all three Identity providers is the fact that if the sign-in process is successful, your browser is redirected to https://jwt.ms, which displays the contents of the token returned by Azure AD B2C. You can add as many Identity providers as you want. The process is always the same.
Cloudapp-dev, and before you leave us
Thank you for reading until the end. Before you go: