Table of Contents
- After federating with an identity provider during sign-up
- Before creating the user
- Before including application claims in the token (Preview)
- Azure AD B2C API Connector Creation
- New Packages for Prisma and Neon.tech
- New Env-Variables
- Prisma Schema
- Solution: Using globalThis object
- API Route Creation Next.js 14 Project
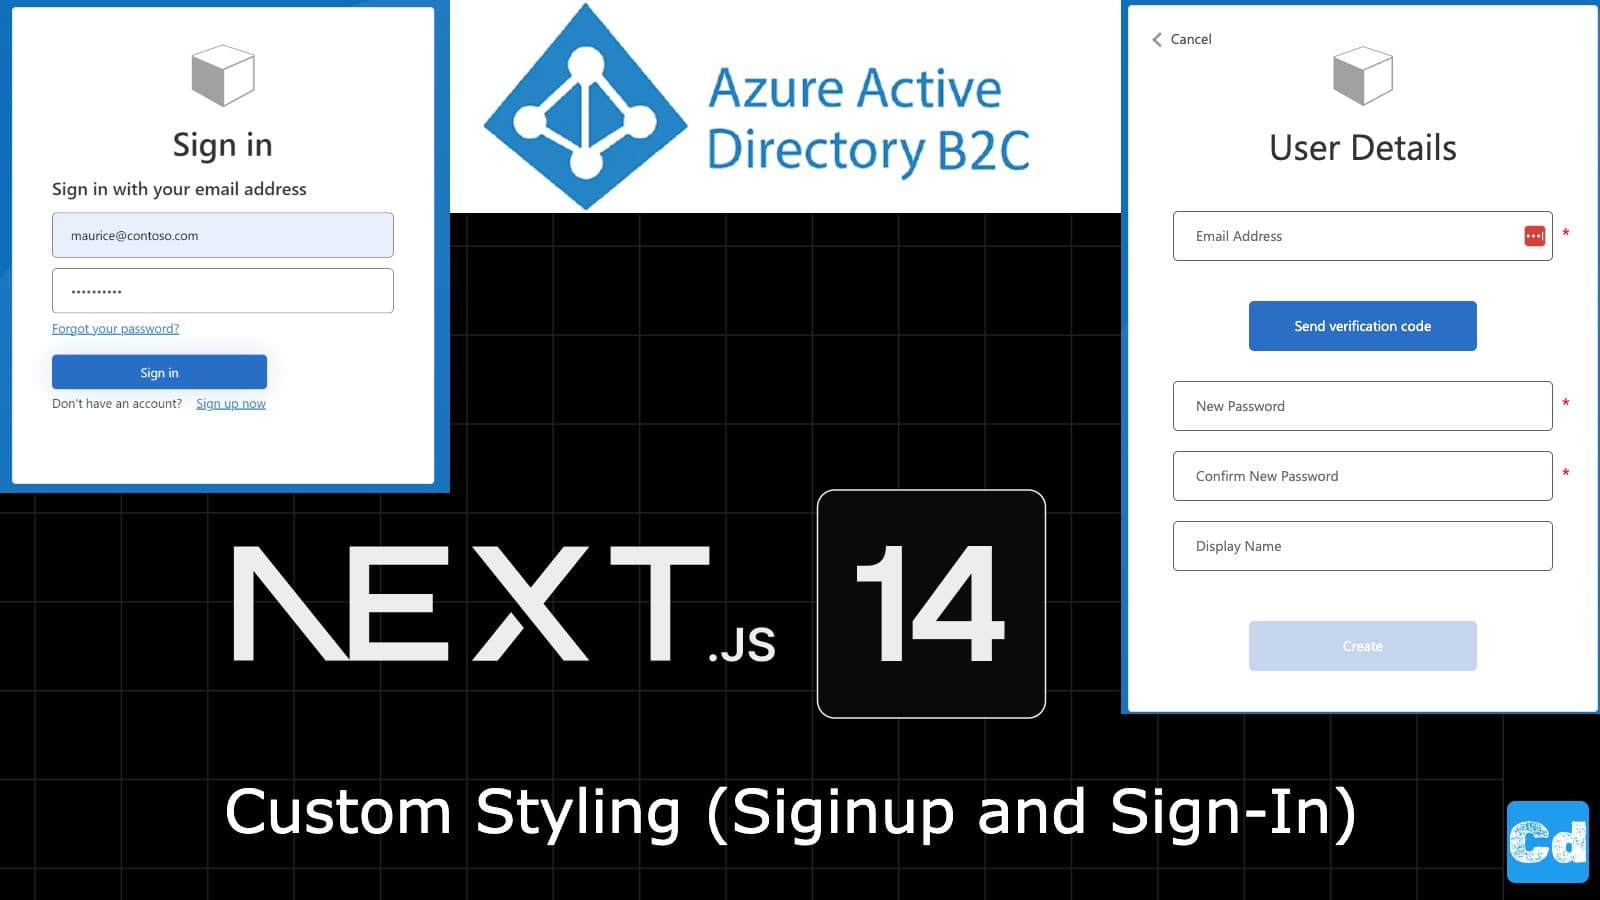
In the previous stories, I created an Azure AD B2C tenant and provided a step-by-step guide regarding the integration into your Next.js 14 project.
Based on that, I first changed the styling of the sign-in / signup page and, lastly, added three Identity providers (Google, GitHub, and Microsoft) to the AD B2C tenant.
Here is the GitHub repo with the full code
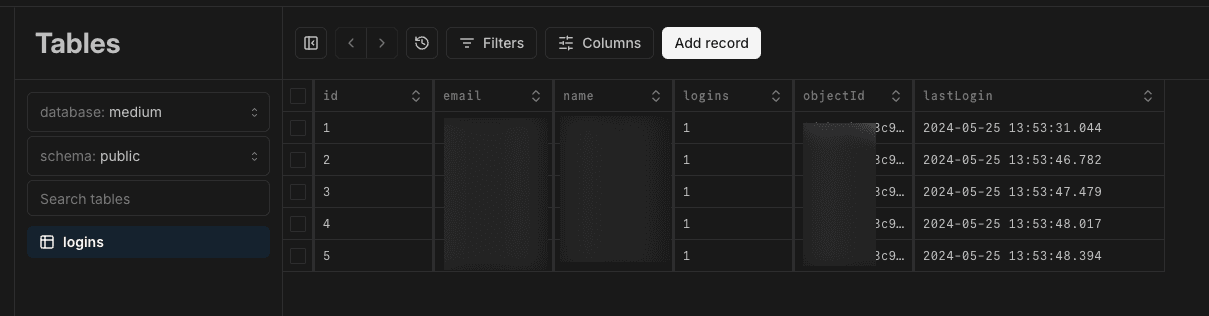
With that foundation in place, I will move to custom logging. I want to track login attempts to support users if they face issues and better understand what is happening during login.
But how can we get this data? Azure offers a smart way to implement some logic, making it easy. Let’s return to our User flow in Azure, which we built during the Tenant creation.
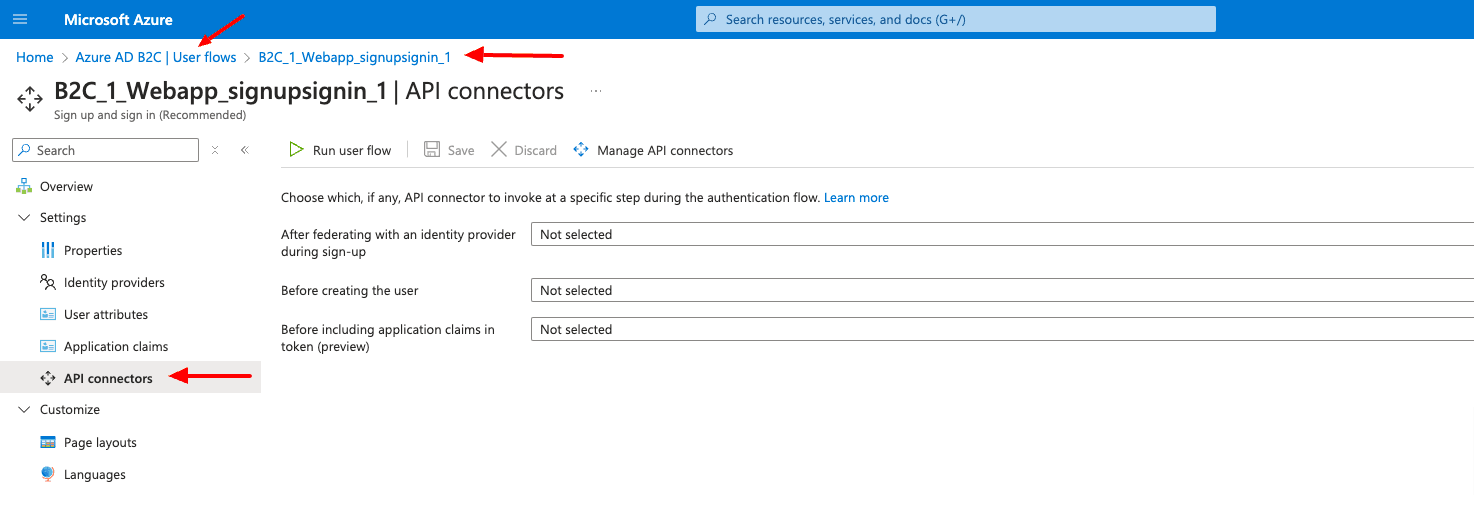
We can set up an API Connector for three different steps during the authentication flow:
After federating with an identity provider during sign-up
At this step in the sign-up process, an API connector is invoked immediately after the user authenticates with an identity provider (like Google, GitHub, and Microsoft Entra ID). This step precedes the attribute collection page, the form presented to the user to collect user attributes. This step isn’t invoked if a user registers with a local account. The following are examples of API connector scenarios you might enable at this step:
Use the email or federated identity that the user provided to look up claims in an existing system. Return these claims from the existing system, prefill the attribute collection page, and make them available to return in the token.
Implement an allow or blocklist based on social identity.
Before creating the user
At this step in the sign-up process, it is invoked after the attribute collection page if one is included. This step is always invoked before a user account is created. The following are examples of scenarios you might enable at this point during sign-up:
Validate user input data and ask a user to resubmit data.
Block a user sign-up based on data entered by the user.
Verify user identity.
Query external systems for existing data about the user, returning it in the application token or storing it in Microsoft Entra ID.
Before including application claims in the token (Preview)
An API connector at this step in the sign-up or sign-in process is invoked before a token is issued. The following are examples of scenarios you might enable at this step:
Enriching the token with attributes about the user from sources different than the directory, including legacy identity systems, HR systems, external user stores, and more.
Enrich the token with group or role attributes you store and manage in your permission system.
Applying claims transformations or manipulations to values of claims in the directory.
Azure AD B2C API Connector Creation
Since we have no API connector available, we have to create one.
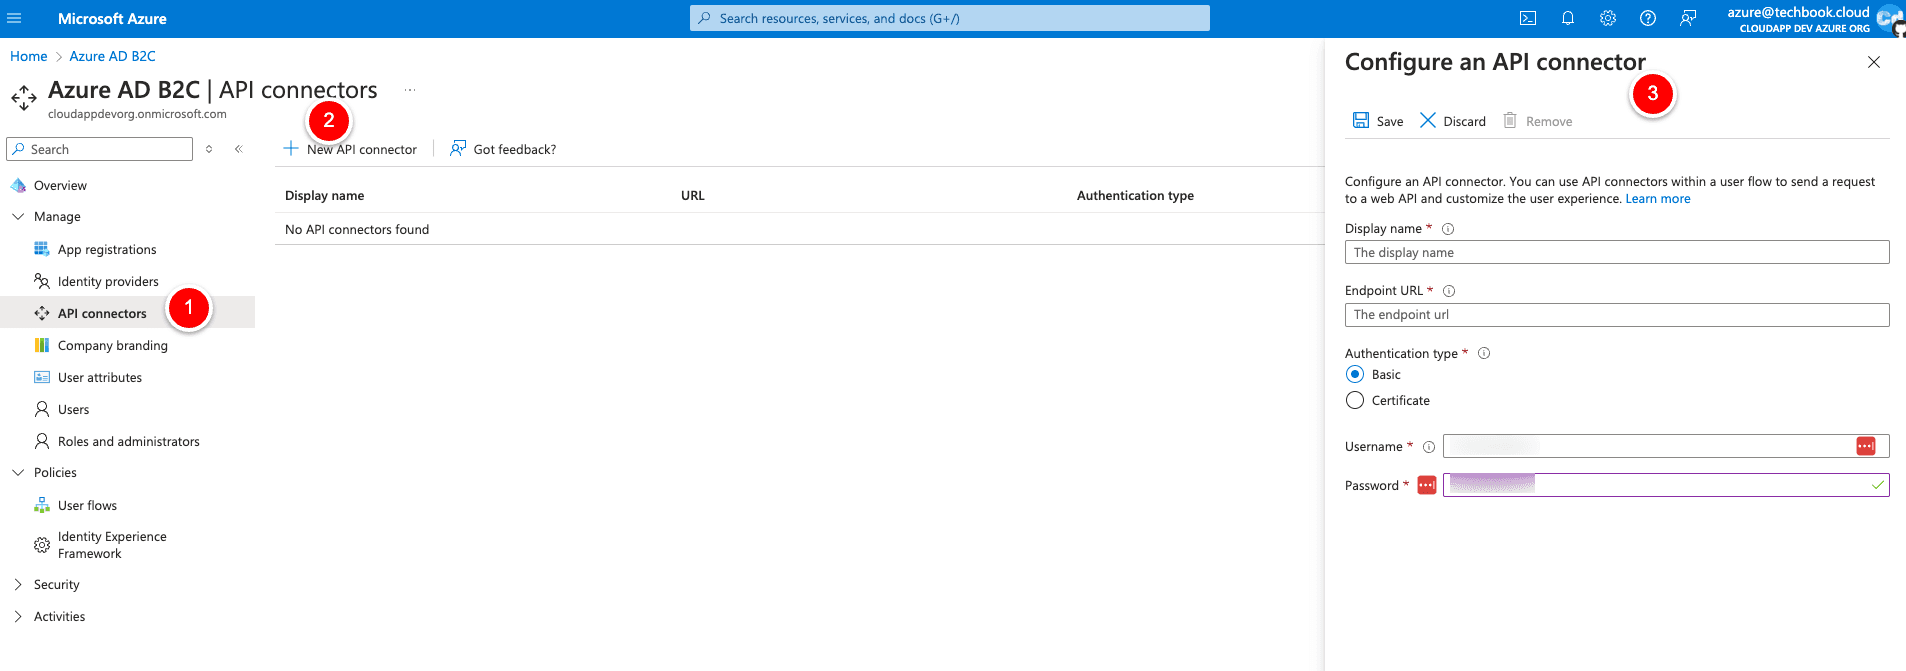
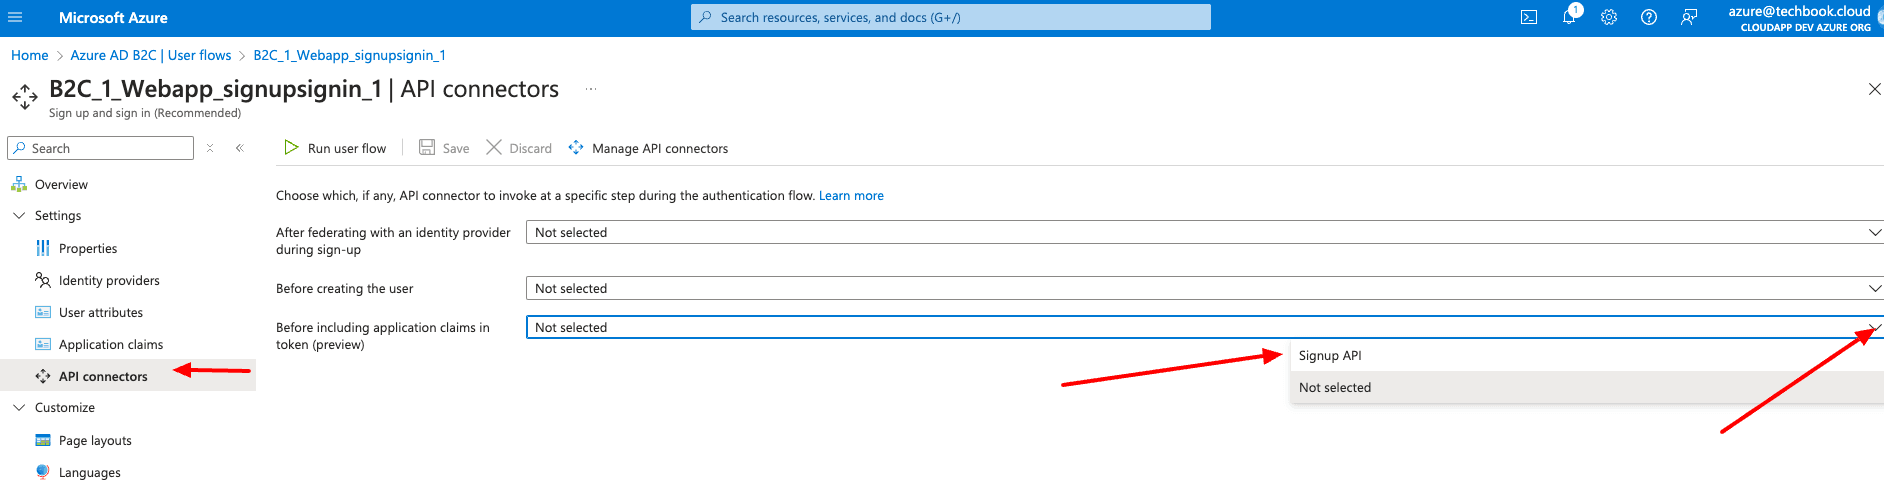
You can choose a custom Display name (I used Signup API), and we use “https://www.example.com/api/signup” for the Endpoint URL. We choose “Basic” for the Authentication Type, and we use “Test” for the username and “Test” for the password. (We will correct the data later).Then select Save (Top).Now we have an API Connector in place, which we will use on the previous screen, so let’s go back and select “Signup API” for the point “Before including application claims in token.”
Now that the setup within Azure is done, we have to create the API Endpoint in our Next.js 14 project.
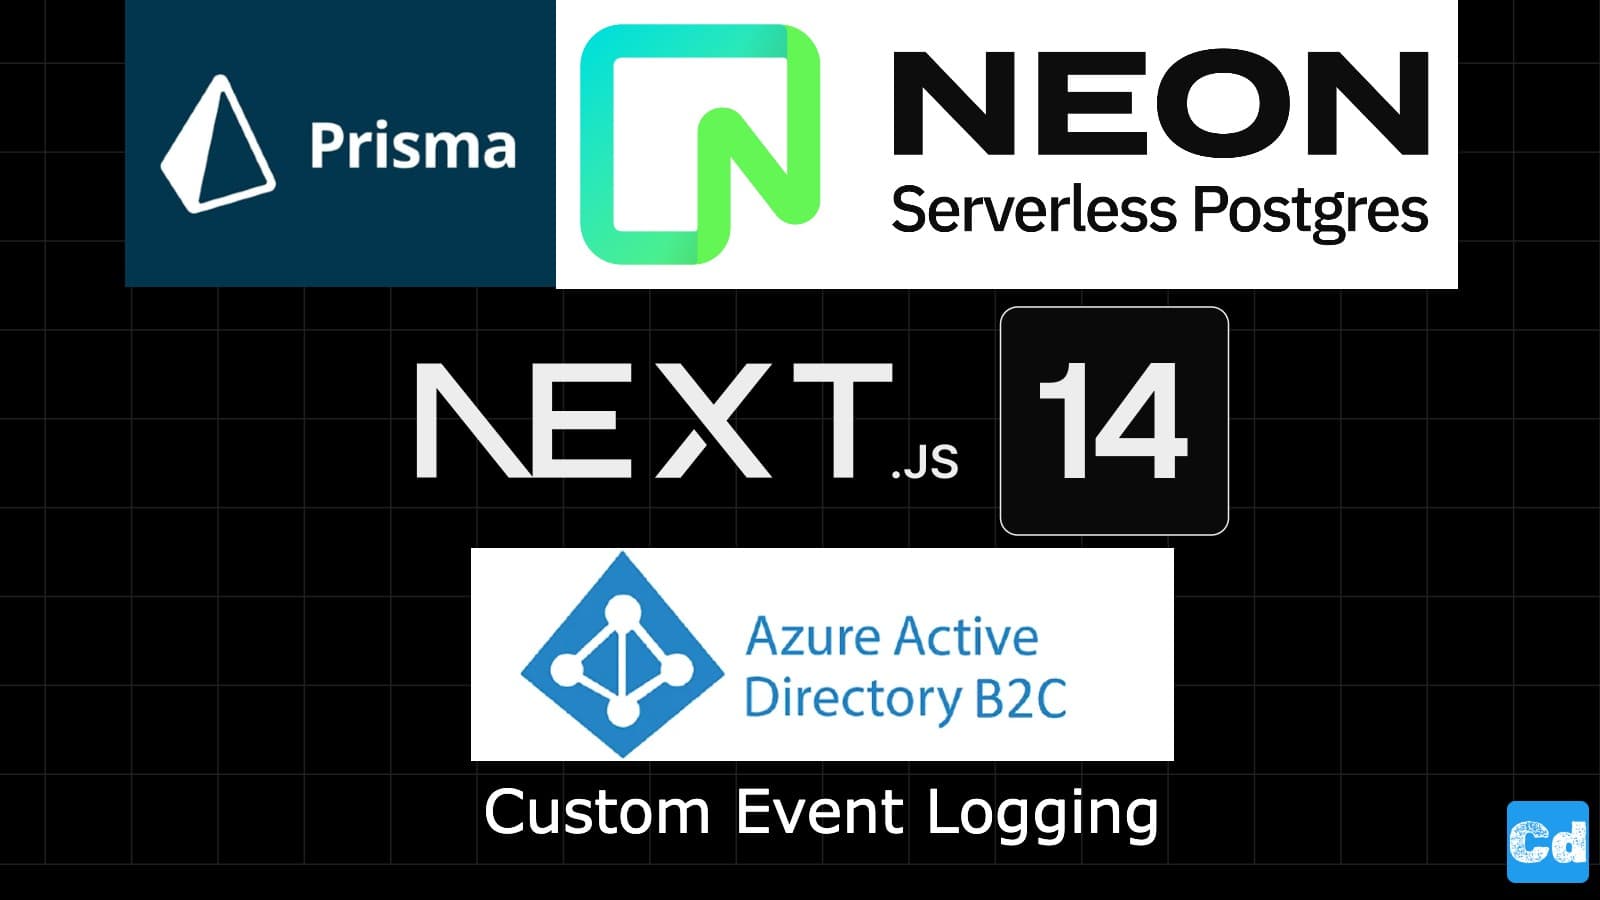
New Packages for Prisma and Neon.tech
First, we must install these new NPM Packages (I used version 5.14.0)npm i prisma @prisma/client @prisma/adapter-neonIn the file package.json, I also modified the build command so that the build process creates the Prisma client package on every run."build": "prisma generate && next build",
New Env-Variables
We need three new Env Variables in our .env.local
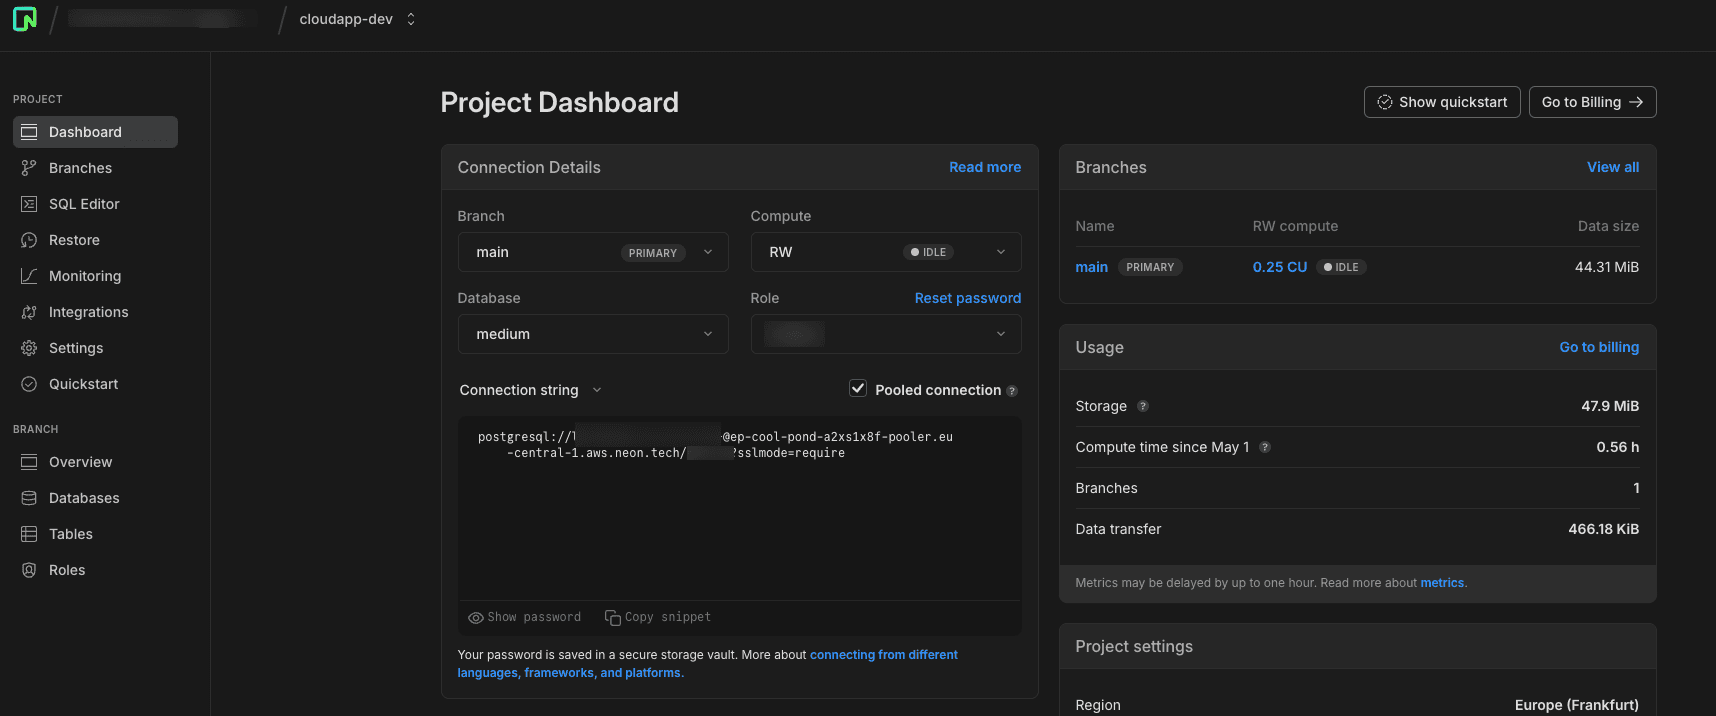
For the DATABASE_URL, we have to register a free account at https://neon.tech/. You can log in with your GitHub account and then create a new project. On the project dashboard you will find the “Connection String”, which we use for this Env-variable.
Prisma Schema
We need a Prisma Schema, so we create the file prisma.schema in the folder prisma under root. In the schema file, we define our table for PostgreSQL, where we want to store our login data.
So that prisma runs as we want it, we create a file named prisma.ts under “src/lib”
But why do we do this?
In development, the command next dev clears Node.js cache on run. This in turn initializes a new PrismaClient instance each time due to hot reloading that creates a connection to the database. This can quickly exhaust the database connections as each PrismaClient instance holds its own connection pool.
Solution: Using globalThis object
The solution in this case is to instantiate a single instance PrismaClient and save it on the globalThis object. Then we keep a check to only instantiate PrismaClient if it's not on the globalThis object otherwise use the same instance again if already present to prevent instantiating extra PrismaClient instances.
API Route Creation Next.js 14 Project
As a last step, we have to create a new API Route to do the heavy lifting of getting the data from Azure AD B2C and then storing it in PostgreSQL.
After the successful deployment, you have to configure the API Connector in Azure AD B2C so that it uses the new API Route (https://xxx.xxx.com/api /signup) and the new Username/Password for the basic auth.On the next login, you will see the data in the Neon.Tech DB.
Cloudapp-dev, and before you leave us
Thank you for reading until the end. Before you go: