Table of Contents
In the previous post, I provided a step-by-step guide on creating an Azure AD B2C tenant at no cost. We will focus on integrating this tenant into a full-fledged Next.js 14 project. As a foundation, we will take the example which we created the past stories, which is based on the headless CMS Contentful, the on-site-search Algolia, etc.
Here is the GitHub repo with the full code
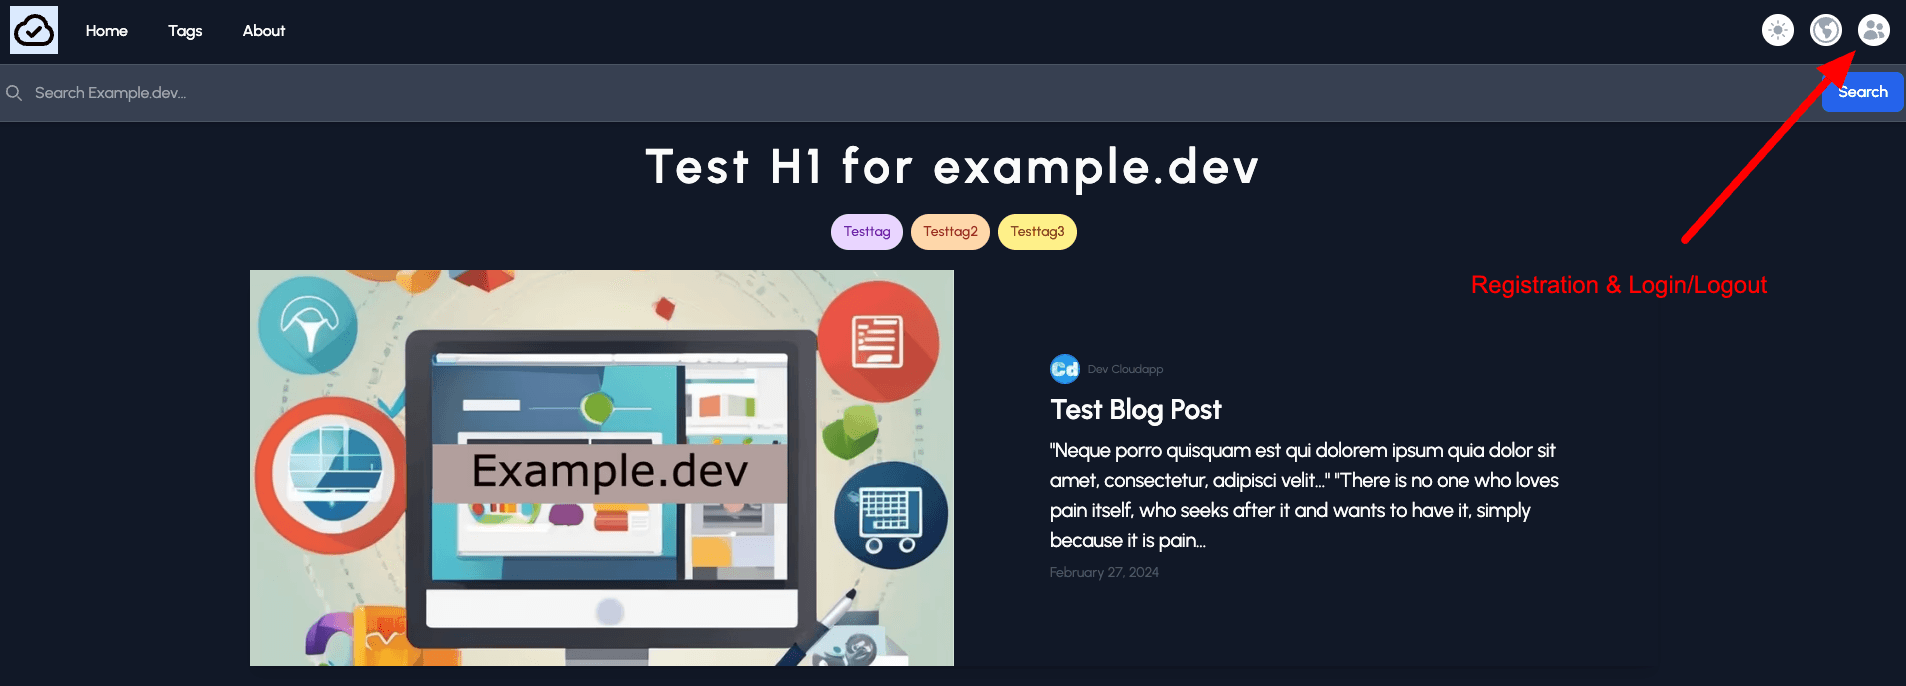
And here is a spoiler to the front end, with the integrated Azure AD B2C Auth Solution.
As a first step, we retrieve the key from Azure AD B2C and use it in our .env.local file.
Env Variables
Then, we install a new package, “next-auth,” version 4.24.7, which is the base of the integration. Additionally, we add two new env-variables for next-auth
You can use this website https://www.lastpass.com/features/password-generator to generate a new and safe secret (NEXTAUTH_SECRET).
Changed and added files
Here is a list of all files we will add or change.
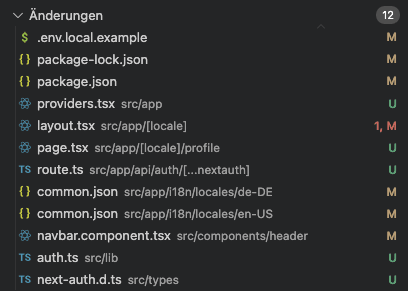
Now we create a new file under src/app with the name providers.tsx
which we then use as a wrapper in the layout.tsx file under src/app/[locale]. This allows us to have the next-auth protection available everywhere.
The main file handling the logic is located under src/lib, called auth.ts. Here, we define Azure AD as an Auth Provider, and we define the needed details for the integration, as well as a custom sign in page. Here, you can see the Env-Variables we get from Azure AD B2C.
We define the two scopes “offline_access” and “openid” and we read the “token.role” and assign it to “session.role”, so that we can use it throughout our project.
With the main config in place, we can create the needed API route under src/app/api/auth/[..nextauth]/route.ts
Since the project is based on typescript, we have to provide a file for the used types as well. So let’s create one under src/types/next-auth.d.ts
The background logic is now ready, so we will adapt our header component because we need to show a new icon for log in/registration and logout. Therefore, we will adapt the navbar.component.tsx under src/components/header. Below is the complete file.
What changed from the last post, in which we added the Contentful tags to our project?
Since we added “useSearchParams” as an import, Next.js 14 will complain during the build process with the error
so we have to wrap the navbar component into a suspense boundary in the header component
Since we link to a profile page in the menu dropdown, we have to create it under src/app/[locale]/profile/page.tsx
Since introducing new labels, we must also adapt the translation file (common.json) for every language under src/app/i18n/locales/…..
That’s it. Now we have the base integration, and you can already test it in your local environment with
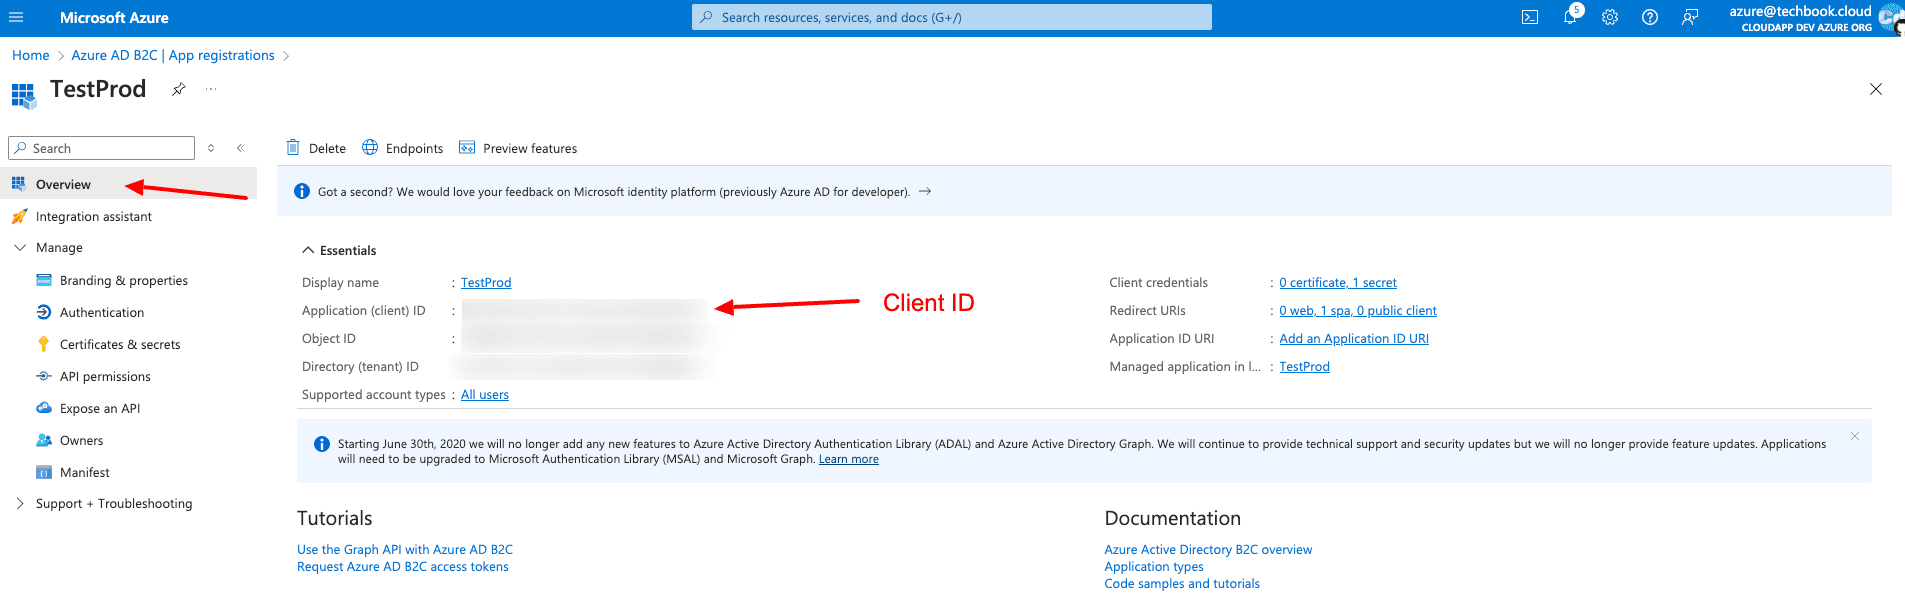
In the previous post, we created the Azure AD B2C tenant by creating only one app registration, “Localhost.” For the live deployment, we have to create a second app registration that will be used for the Vercel deployment.
Name of App Registration (in this case, “TestProd”)
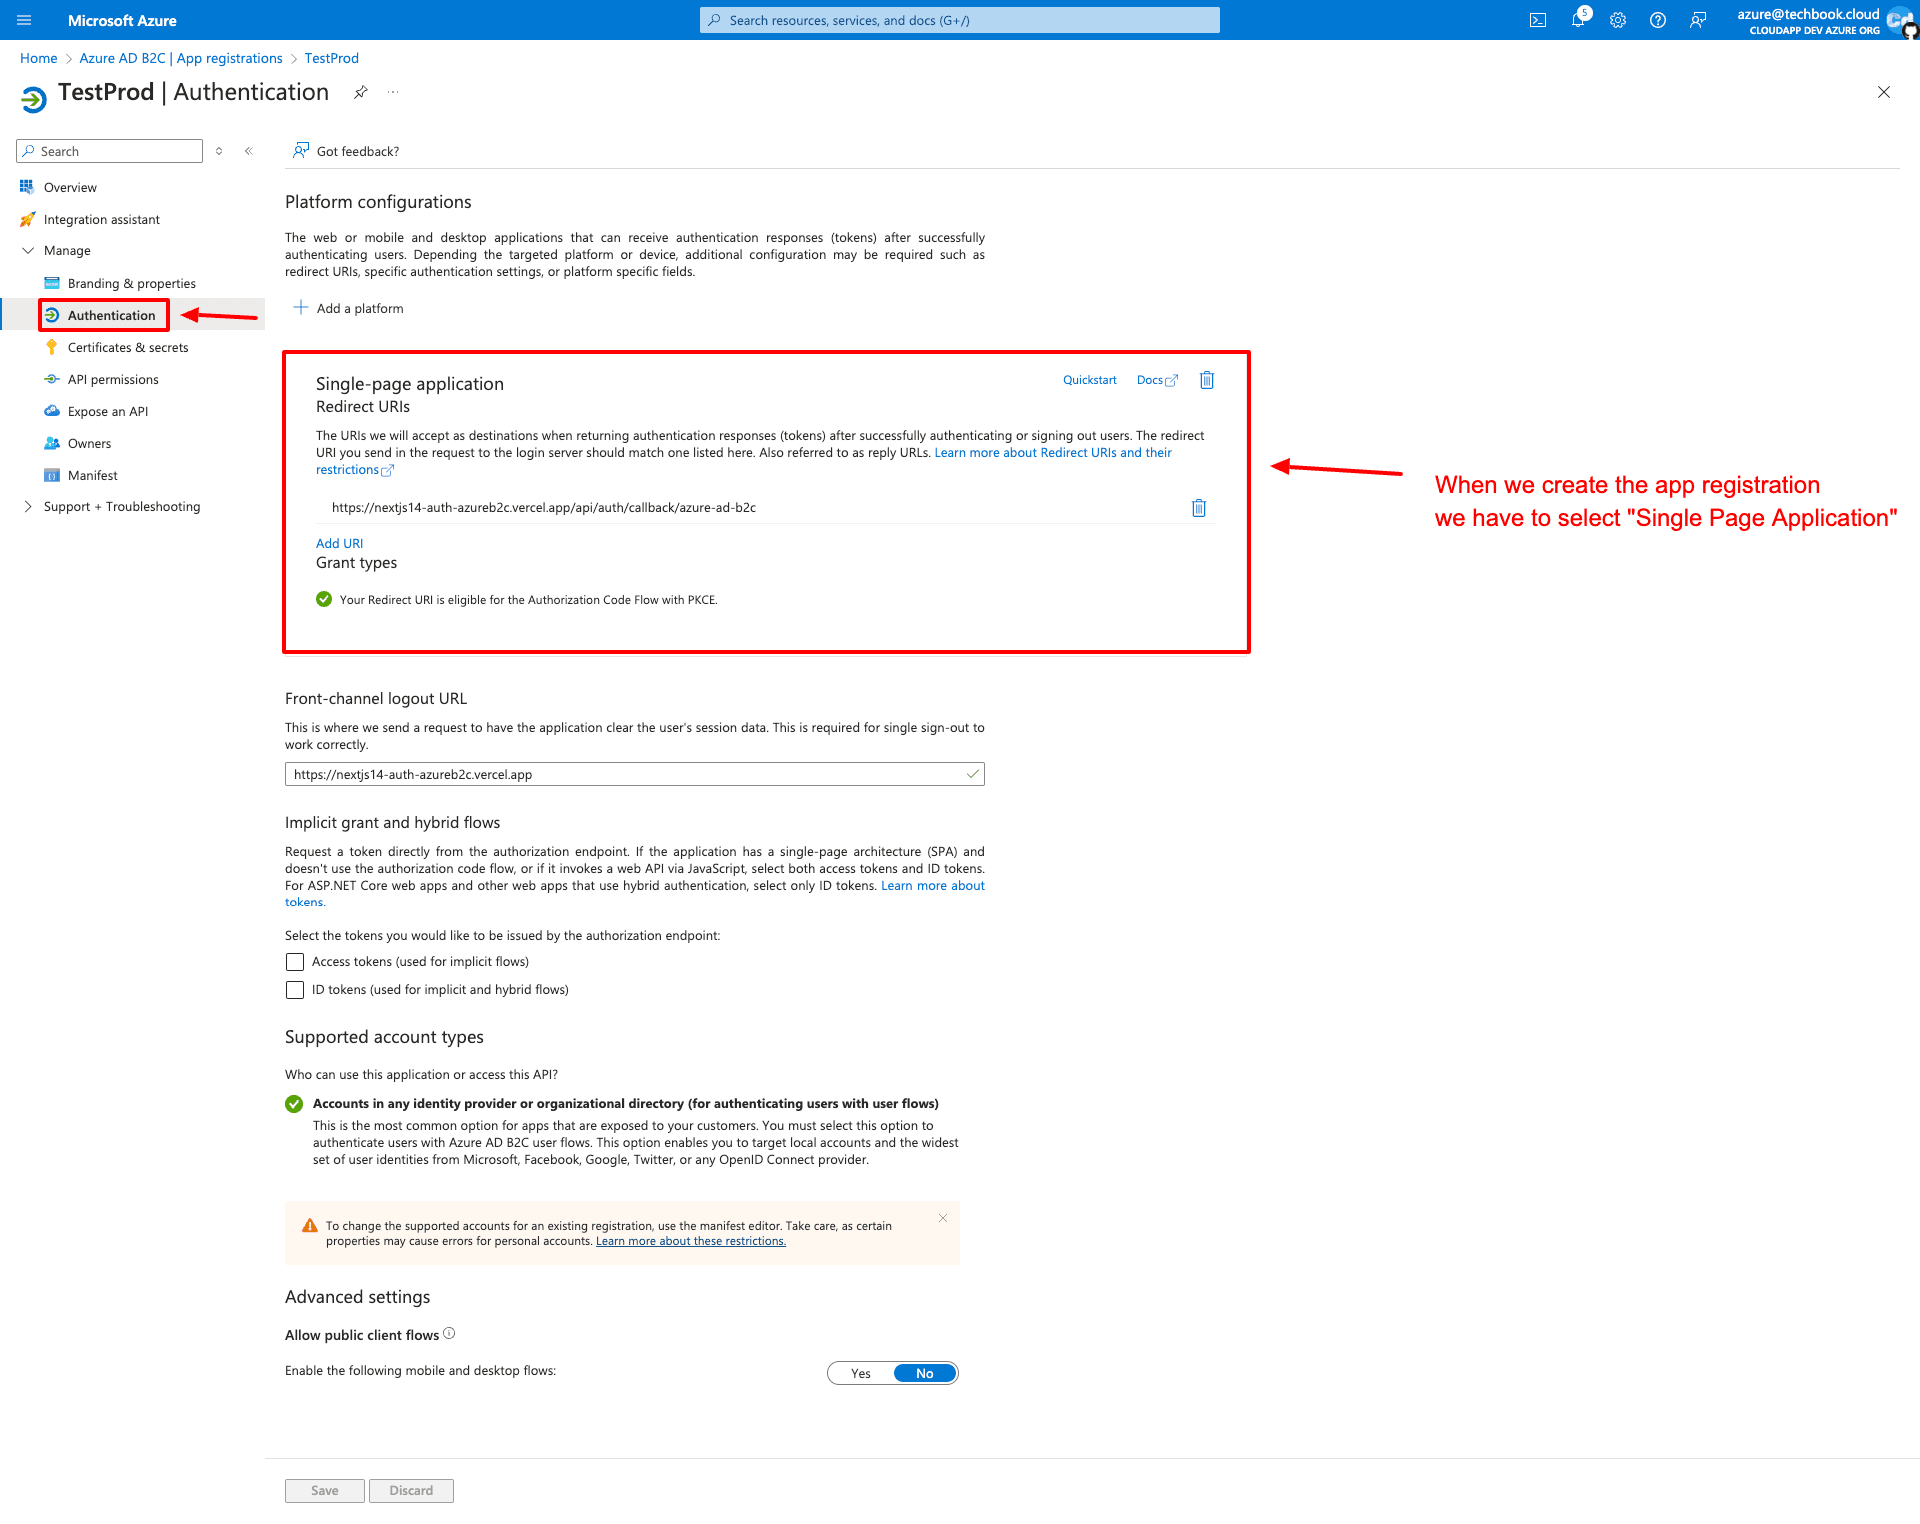
Select “Authentication” -> Add a platform -> Single Page Application
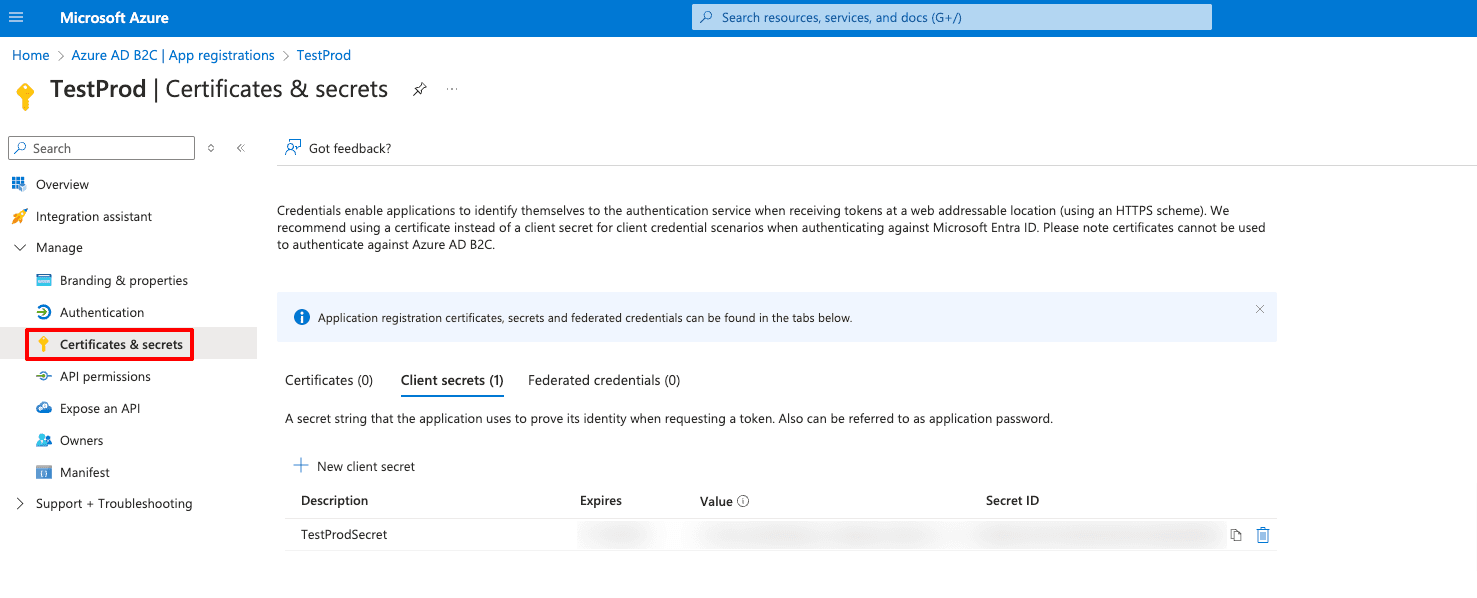
Certificates & Secrets -> Add a new Secret (Client Secret)
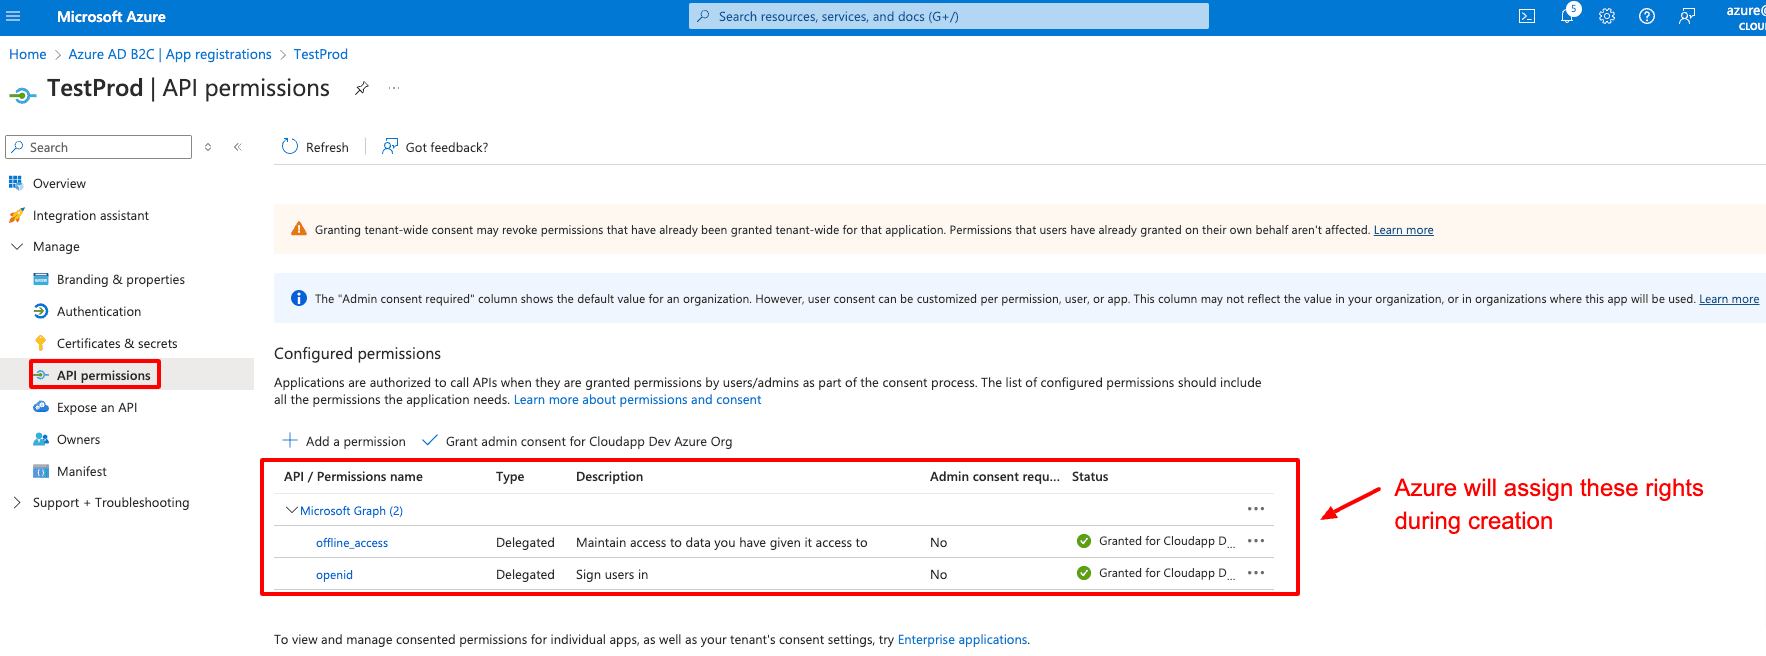
API Permissions (offline_access and openid)
Will be assigned during creation of app registration
Use these Keys/IDs as Env-Variables for your Vercel Project.
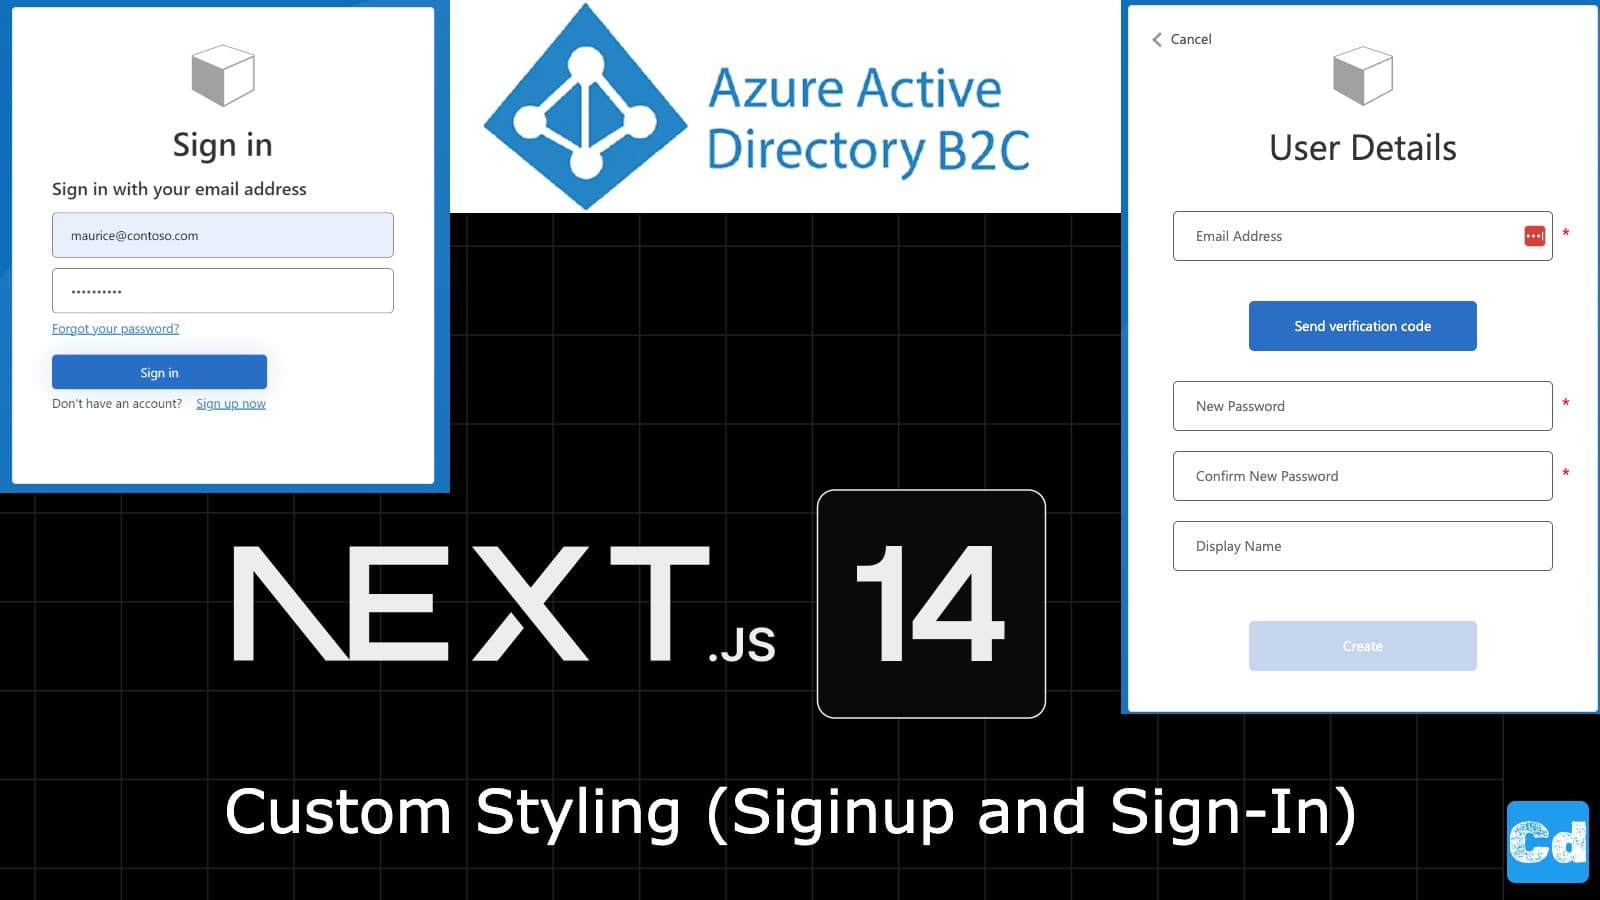
After the deployment, you will have a fully functional Auth system based on Azure AD B2C—and that’s for free. Click on the User Icon on the top right, so that the dropdown menu will be opened. Now click on “Login/Register”
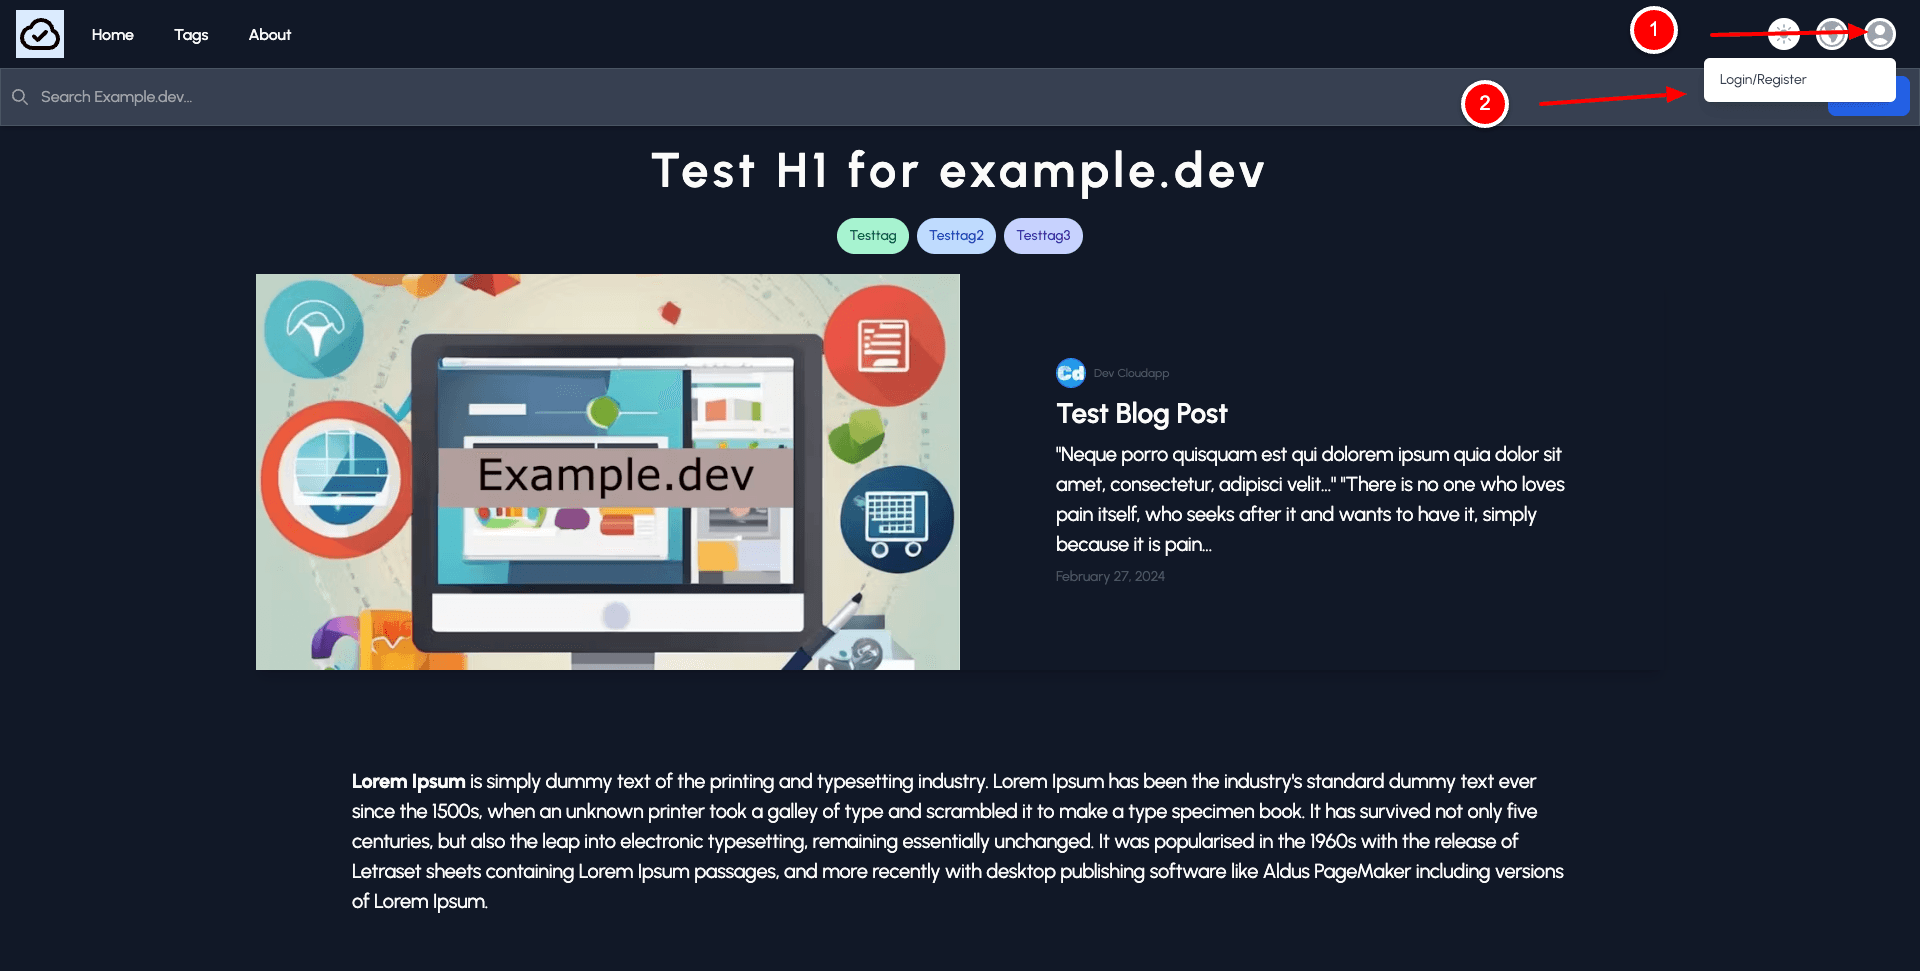
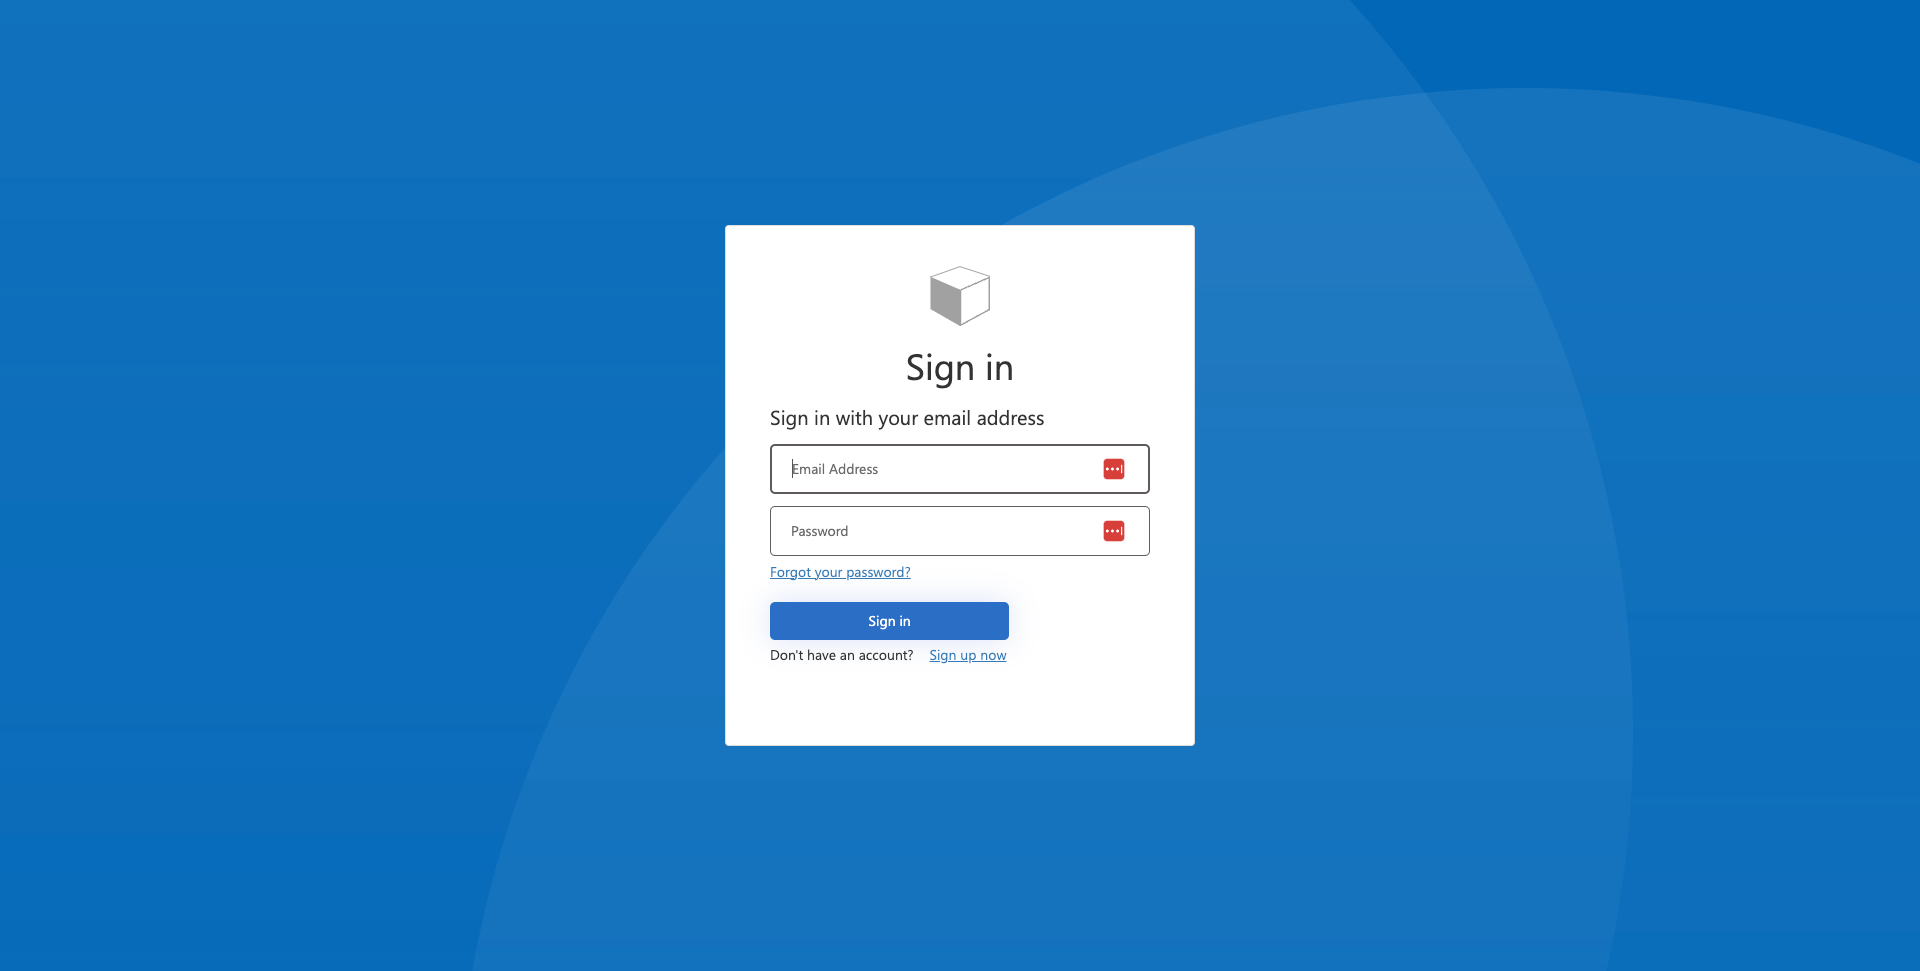
Now click on “Login/Register” to open the page provided by Azure.
As soon as you are logged in there will be a second menu item in the dropdown (top right) with the name profile. Click on it to see the details of your registration.
Enjoy it, use it for your production system, or play around to better understand it.
If you need help or you face trouble during deployment, please let me know in the comments, so that I can help you.
With this full example we implemented the basics, and in the upcoming stories, we will use it to integrate auth flows where we need it. Stay tuned.
Cloudapp-dev, and before you leave us
Thank you for reading until the end. Before you go:
Please consider clapping and following the writer! 👏 on our Medium Account