In my previous stories, I showed you comprehensive step-by-step guides on how to start with Next.js 14 from scratch. You will find advice on how to set up the project, how to style it, how to integrate an amazing CMS like Contentful with ease, and how to sync your data with Algolia (state-of-the-art AI-powered on-site search and Data Engine). All you need is a free GitHub account, which you can use for the social login on the mentioned services. They all offer generous free plans, which are enough for a normal website/blog.
But one piece is missing, and that's user registration and login (Authentication and Authorization), which is crucial nowadays.
Auth Solution ShortList
There are many offerings on the market, but let’s focus on the big ones like Auth0, Aws, Microsoft, and Google.
Auth0: Auth0 is a customizable identity management platform supporting B2B and B2C scenarios. It offers features like social login, multi-factor authentication, and fully customizable universal login pages. Auth0 is known for its developer-friendly approach and extensive documentation.
Amazon Cognito: Part of Amazon Web Services, Amazon Cognito provides a simple and secure user sign-up, sign-in, and access control for mobile and web applications. It supports integration with social identity providers as well as SAML and OpenID Connect.
Google Firebase Auth: This service provides backend support and ready-to-use UI libraries to authenticate users in your app. It supports authentication using passwords, phone numbers, popular federated identity providers like Google, Facebook, and Twitter, and more. Firebase Auth integrates seamlessly with other Firebase services and is designed to be easily implemented and managed, enhancing the user experience.
Azure AD B2C: Offers a highly scalable, secure, and customizable identity management solution. Its strengths lie in supporting diverse authentication methods, integrating seamlessly with numerous applications, and providing robust compliance features, making it ideal for organizations looking to manage large-scale consumer identities efficiently.
In this post, I will focus on the preparation of a Microsoft Azure AD B2C Tenant, which we will then use in the real-world Next.js 14 example, which has already integrated Contentful as CMS, Algolia as on-site search, Google or Piwik for analytics, etc.
Azure AD B2C offers a free plan with a limit of 50,000 MAU (monthly active users). If you exceed this limit, you can switch to a pay-as-you-go solution, but 50k Users is a lot, trust me. ;-) 50 K MAU is also the limit for Google Firebase and AWS Cognito.
Azure Account Creation
As I said at the beginning, the easiest way is to create a free GitHub account, which you can reuse to create the additional accounts you need. In this example, we will create an Azure account with a Subscription to create the AD B2C Tenant. The Azure account creation is free, but you need to provide a payment method (I used a credit card) to finish the creation process.
Go to https://signup.live.com/signup and provide your mail address, Name, Region, and birth date. After that, you will receive a confirmation mail/OTP code, and you will be done.
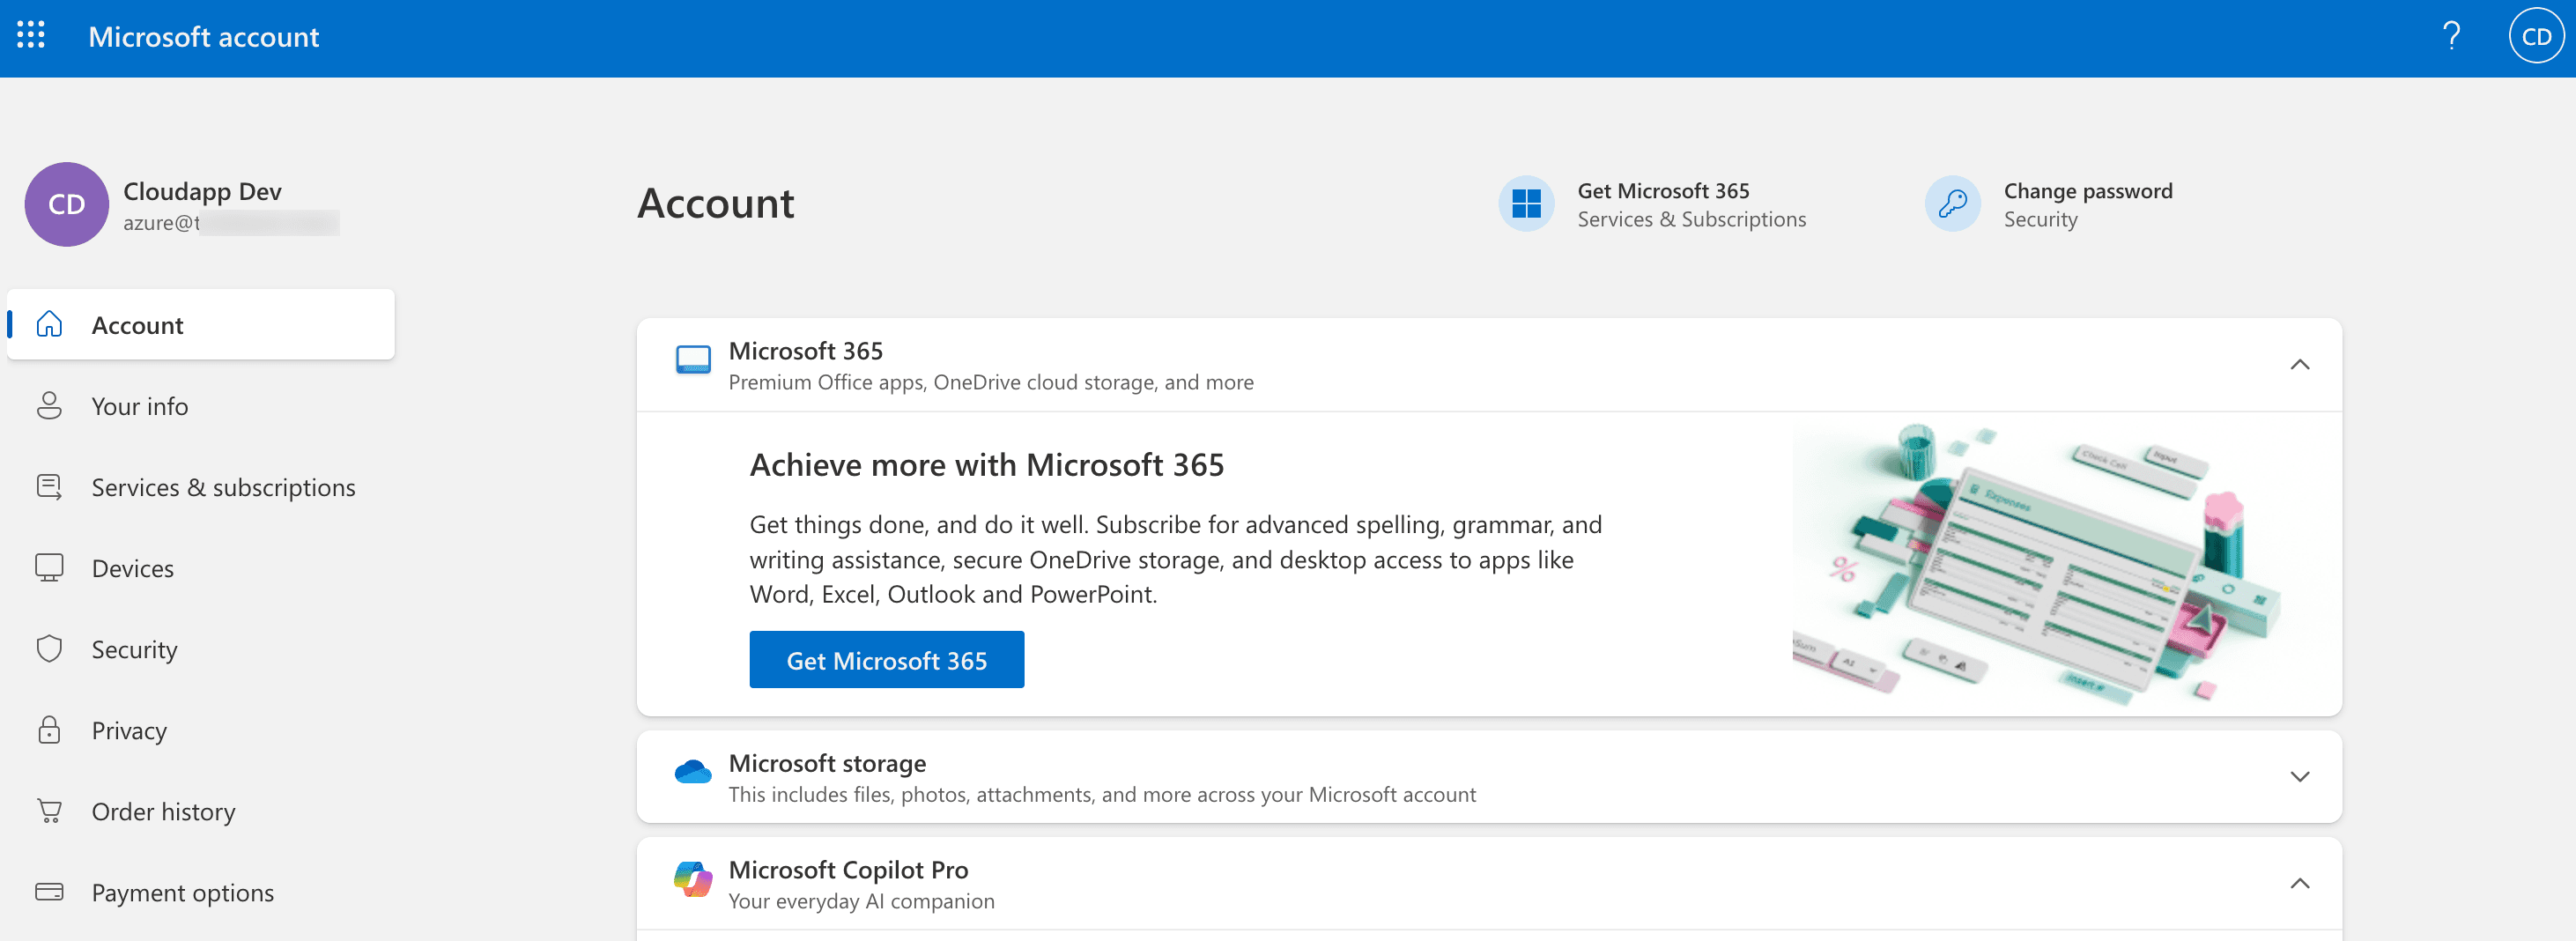
Then we go to portal.azure.com, and you're already logged in. Microsoft has already created a subscription for you that is connected to a new Azure AD Directory.
Small side note on the naming because Microsoft decided some time ago to rename the service Active Directory to Entra ID, which is kind of weird for an Auth solution, but that’s Microsoft’s secret ;-)
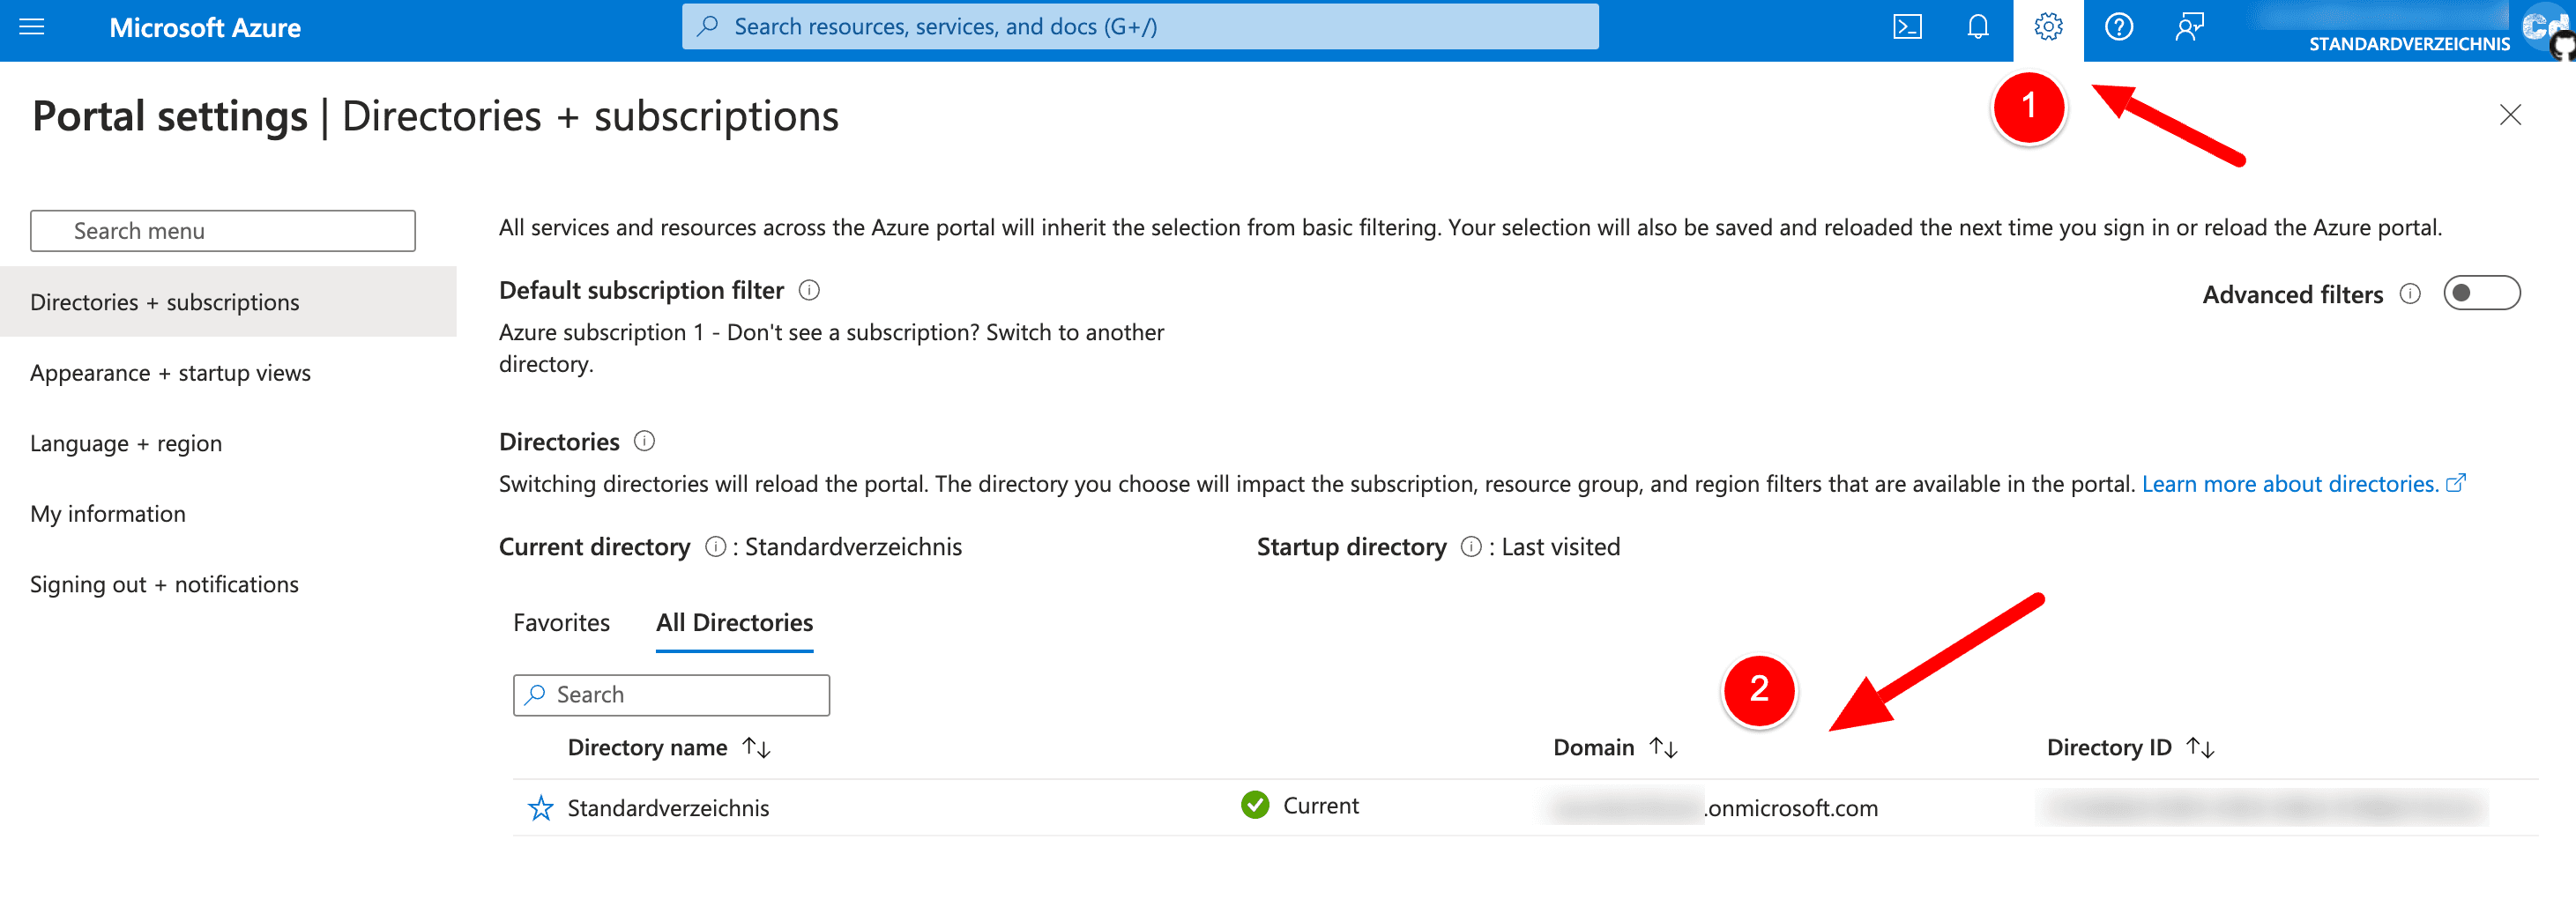
Now, we click on the hamburger menu in the upper left corner and select “Home,” which leads us to this screen.
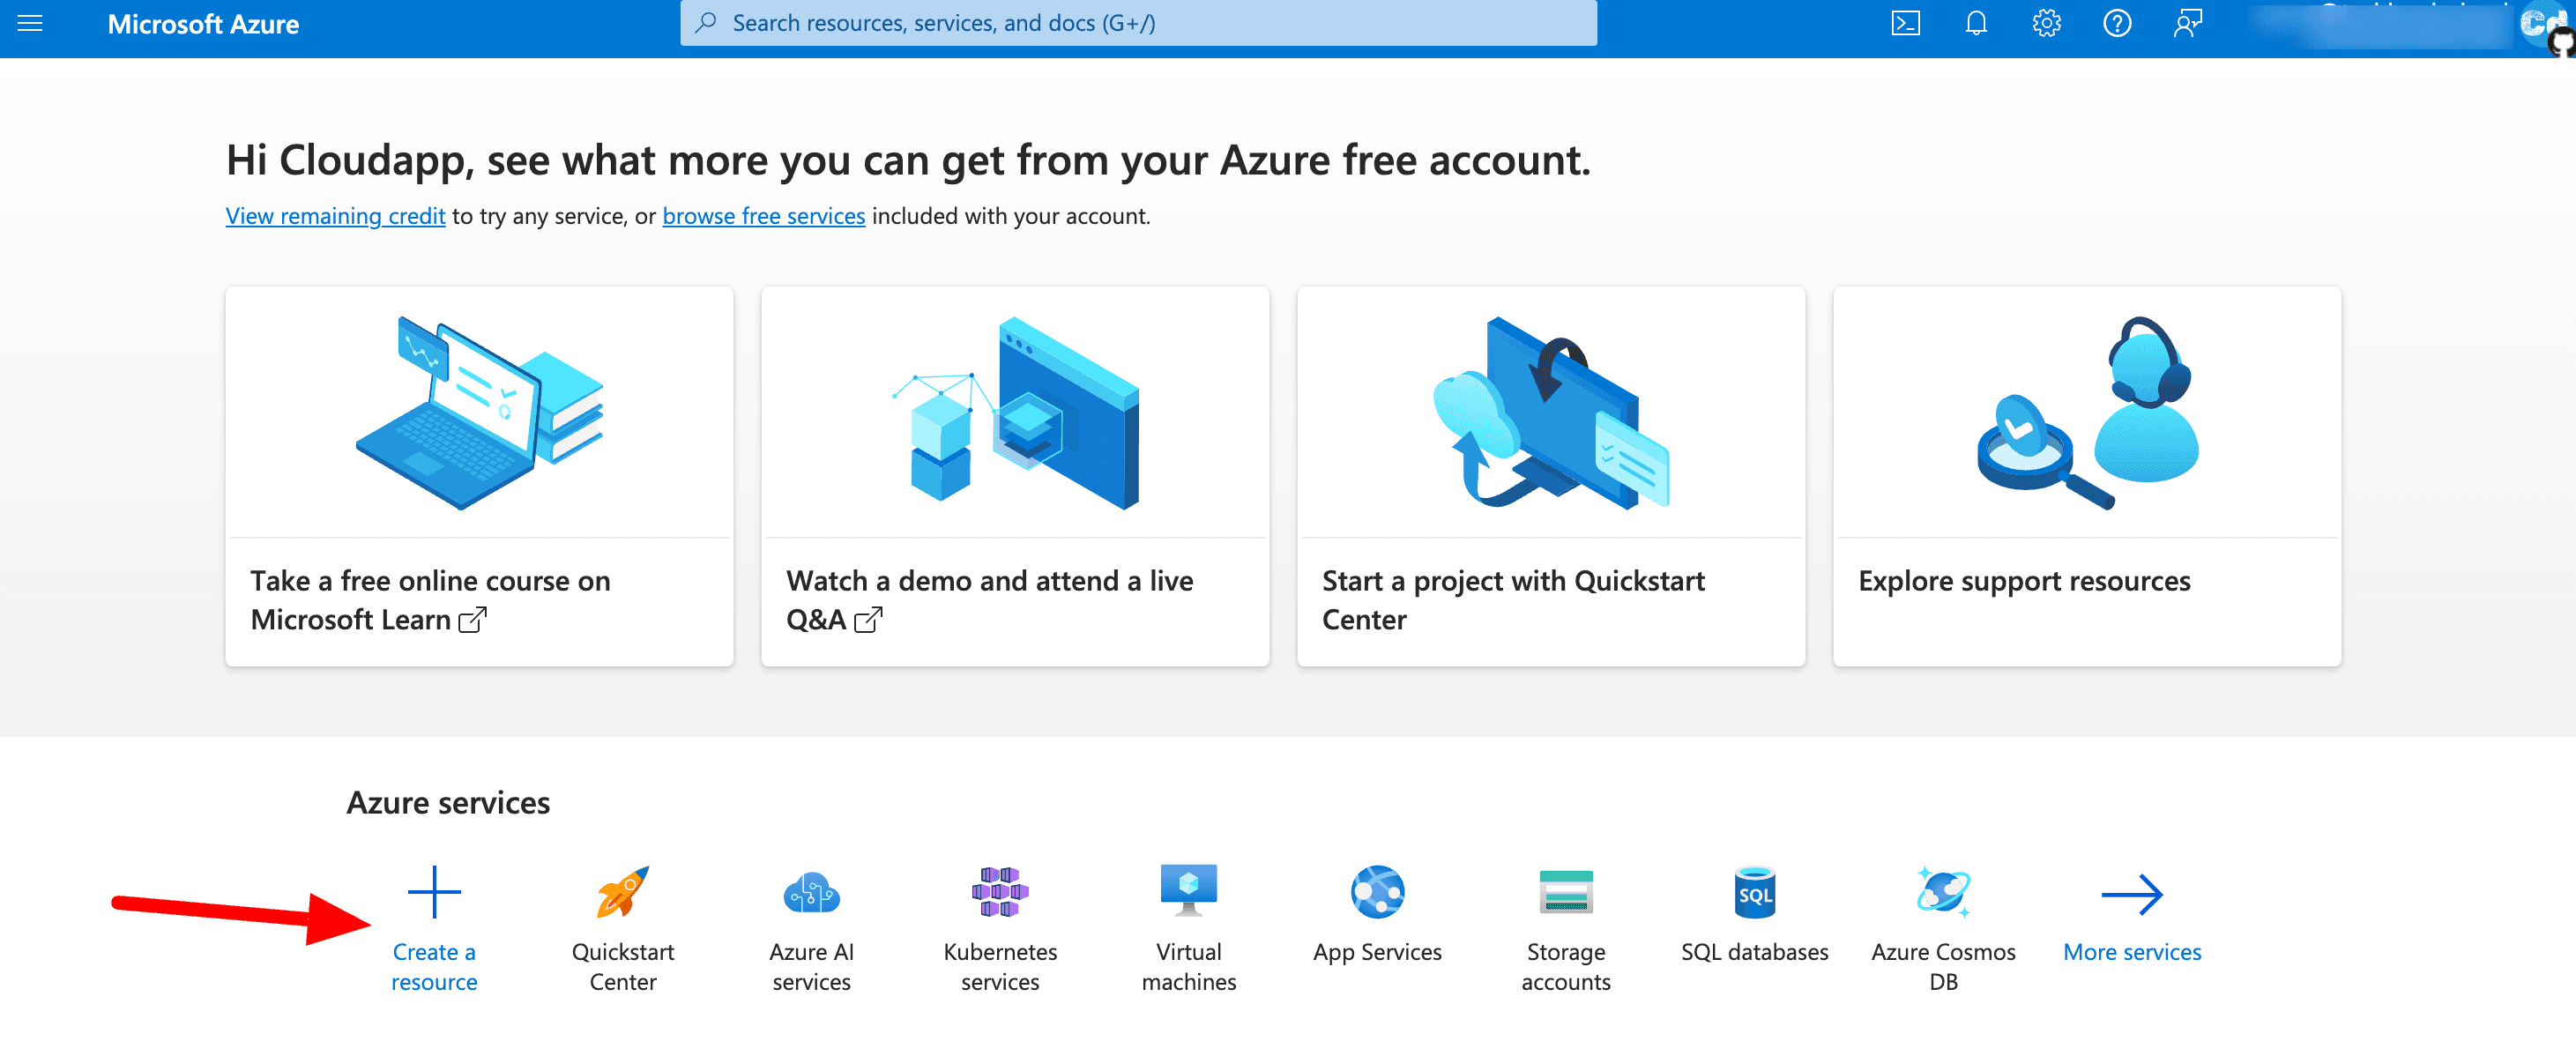
Creation of new resource “Entra ID”
We click on “Create a resource,” which leads to a new page where we can search for the service we are going to create.
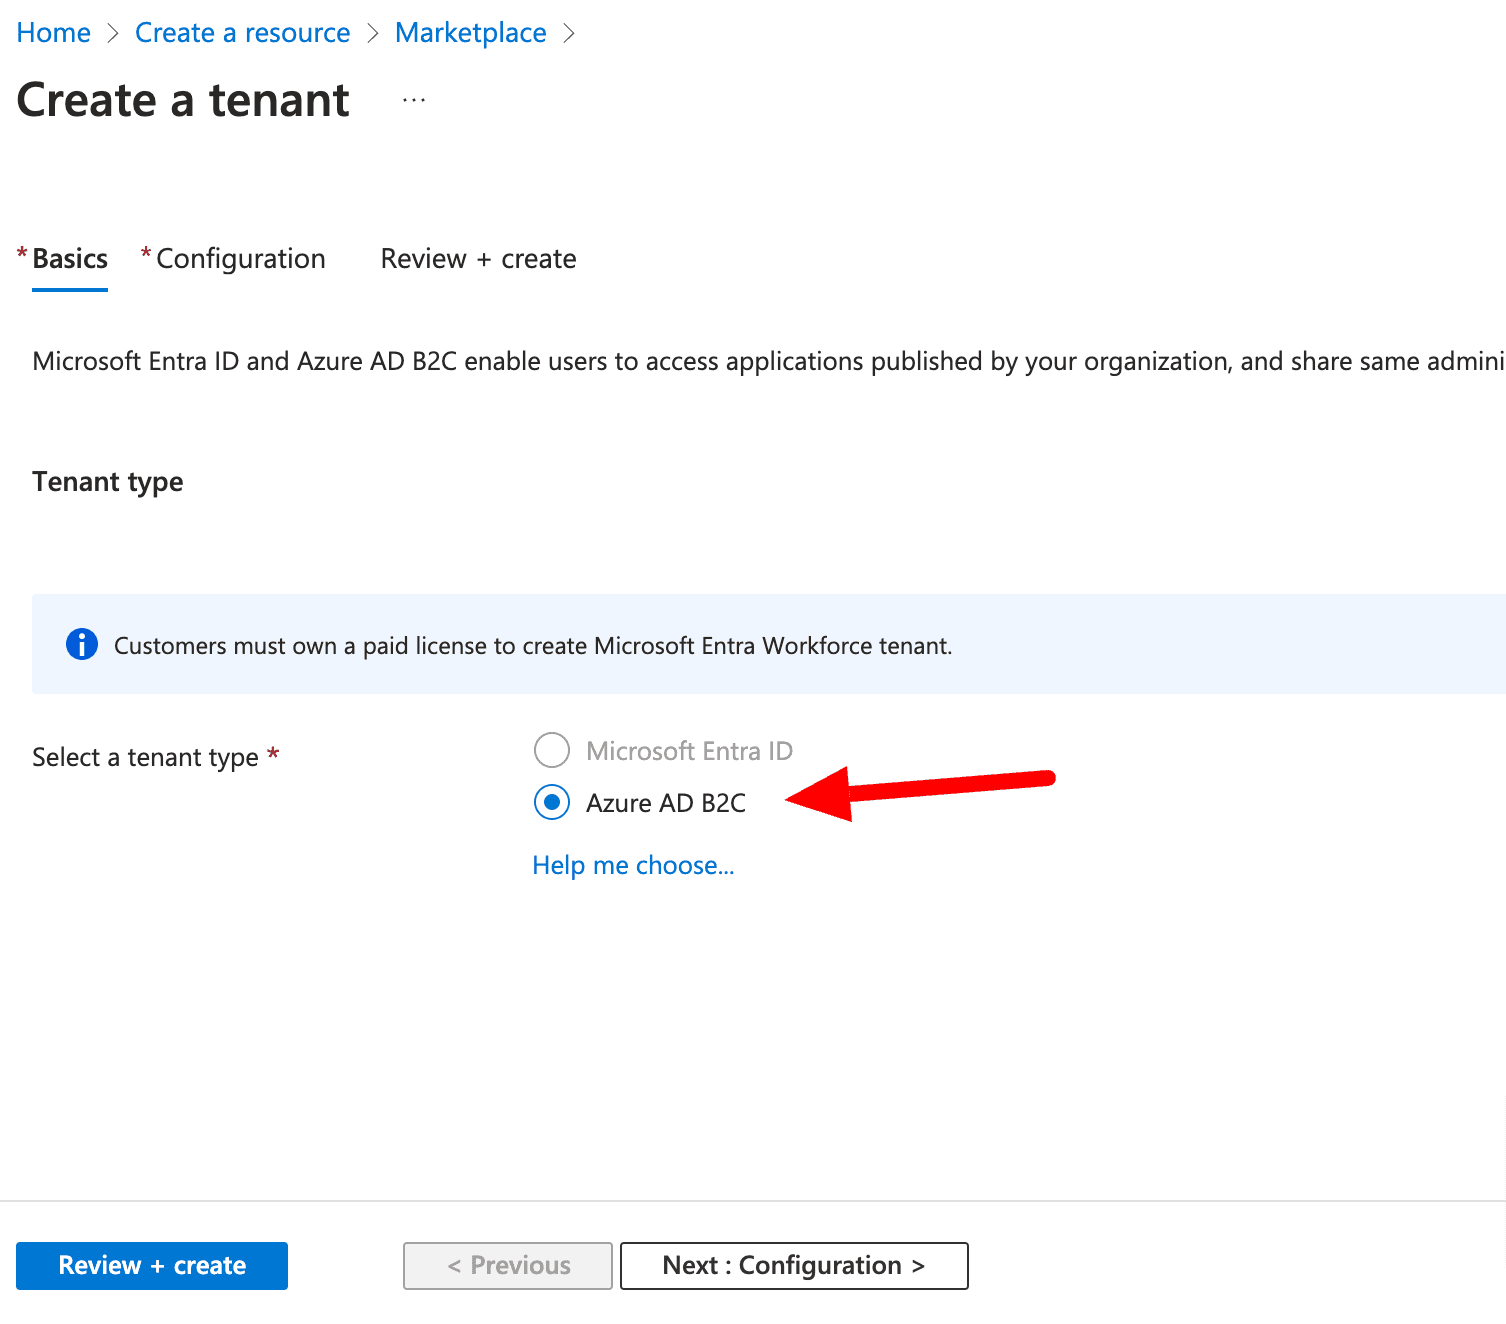
Search for Entra ID and select “Create” at the bottom of the result card.
Provide the needed data and keep attention on the “Initial domain name” because it will be reused later and will be part of your tenant url.
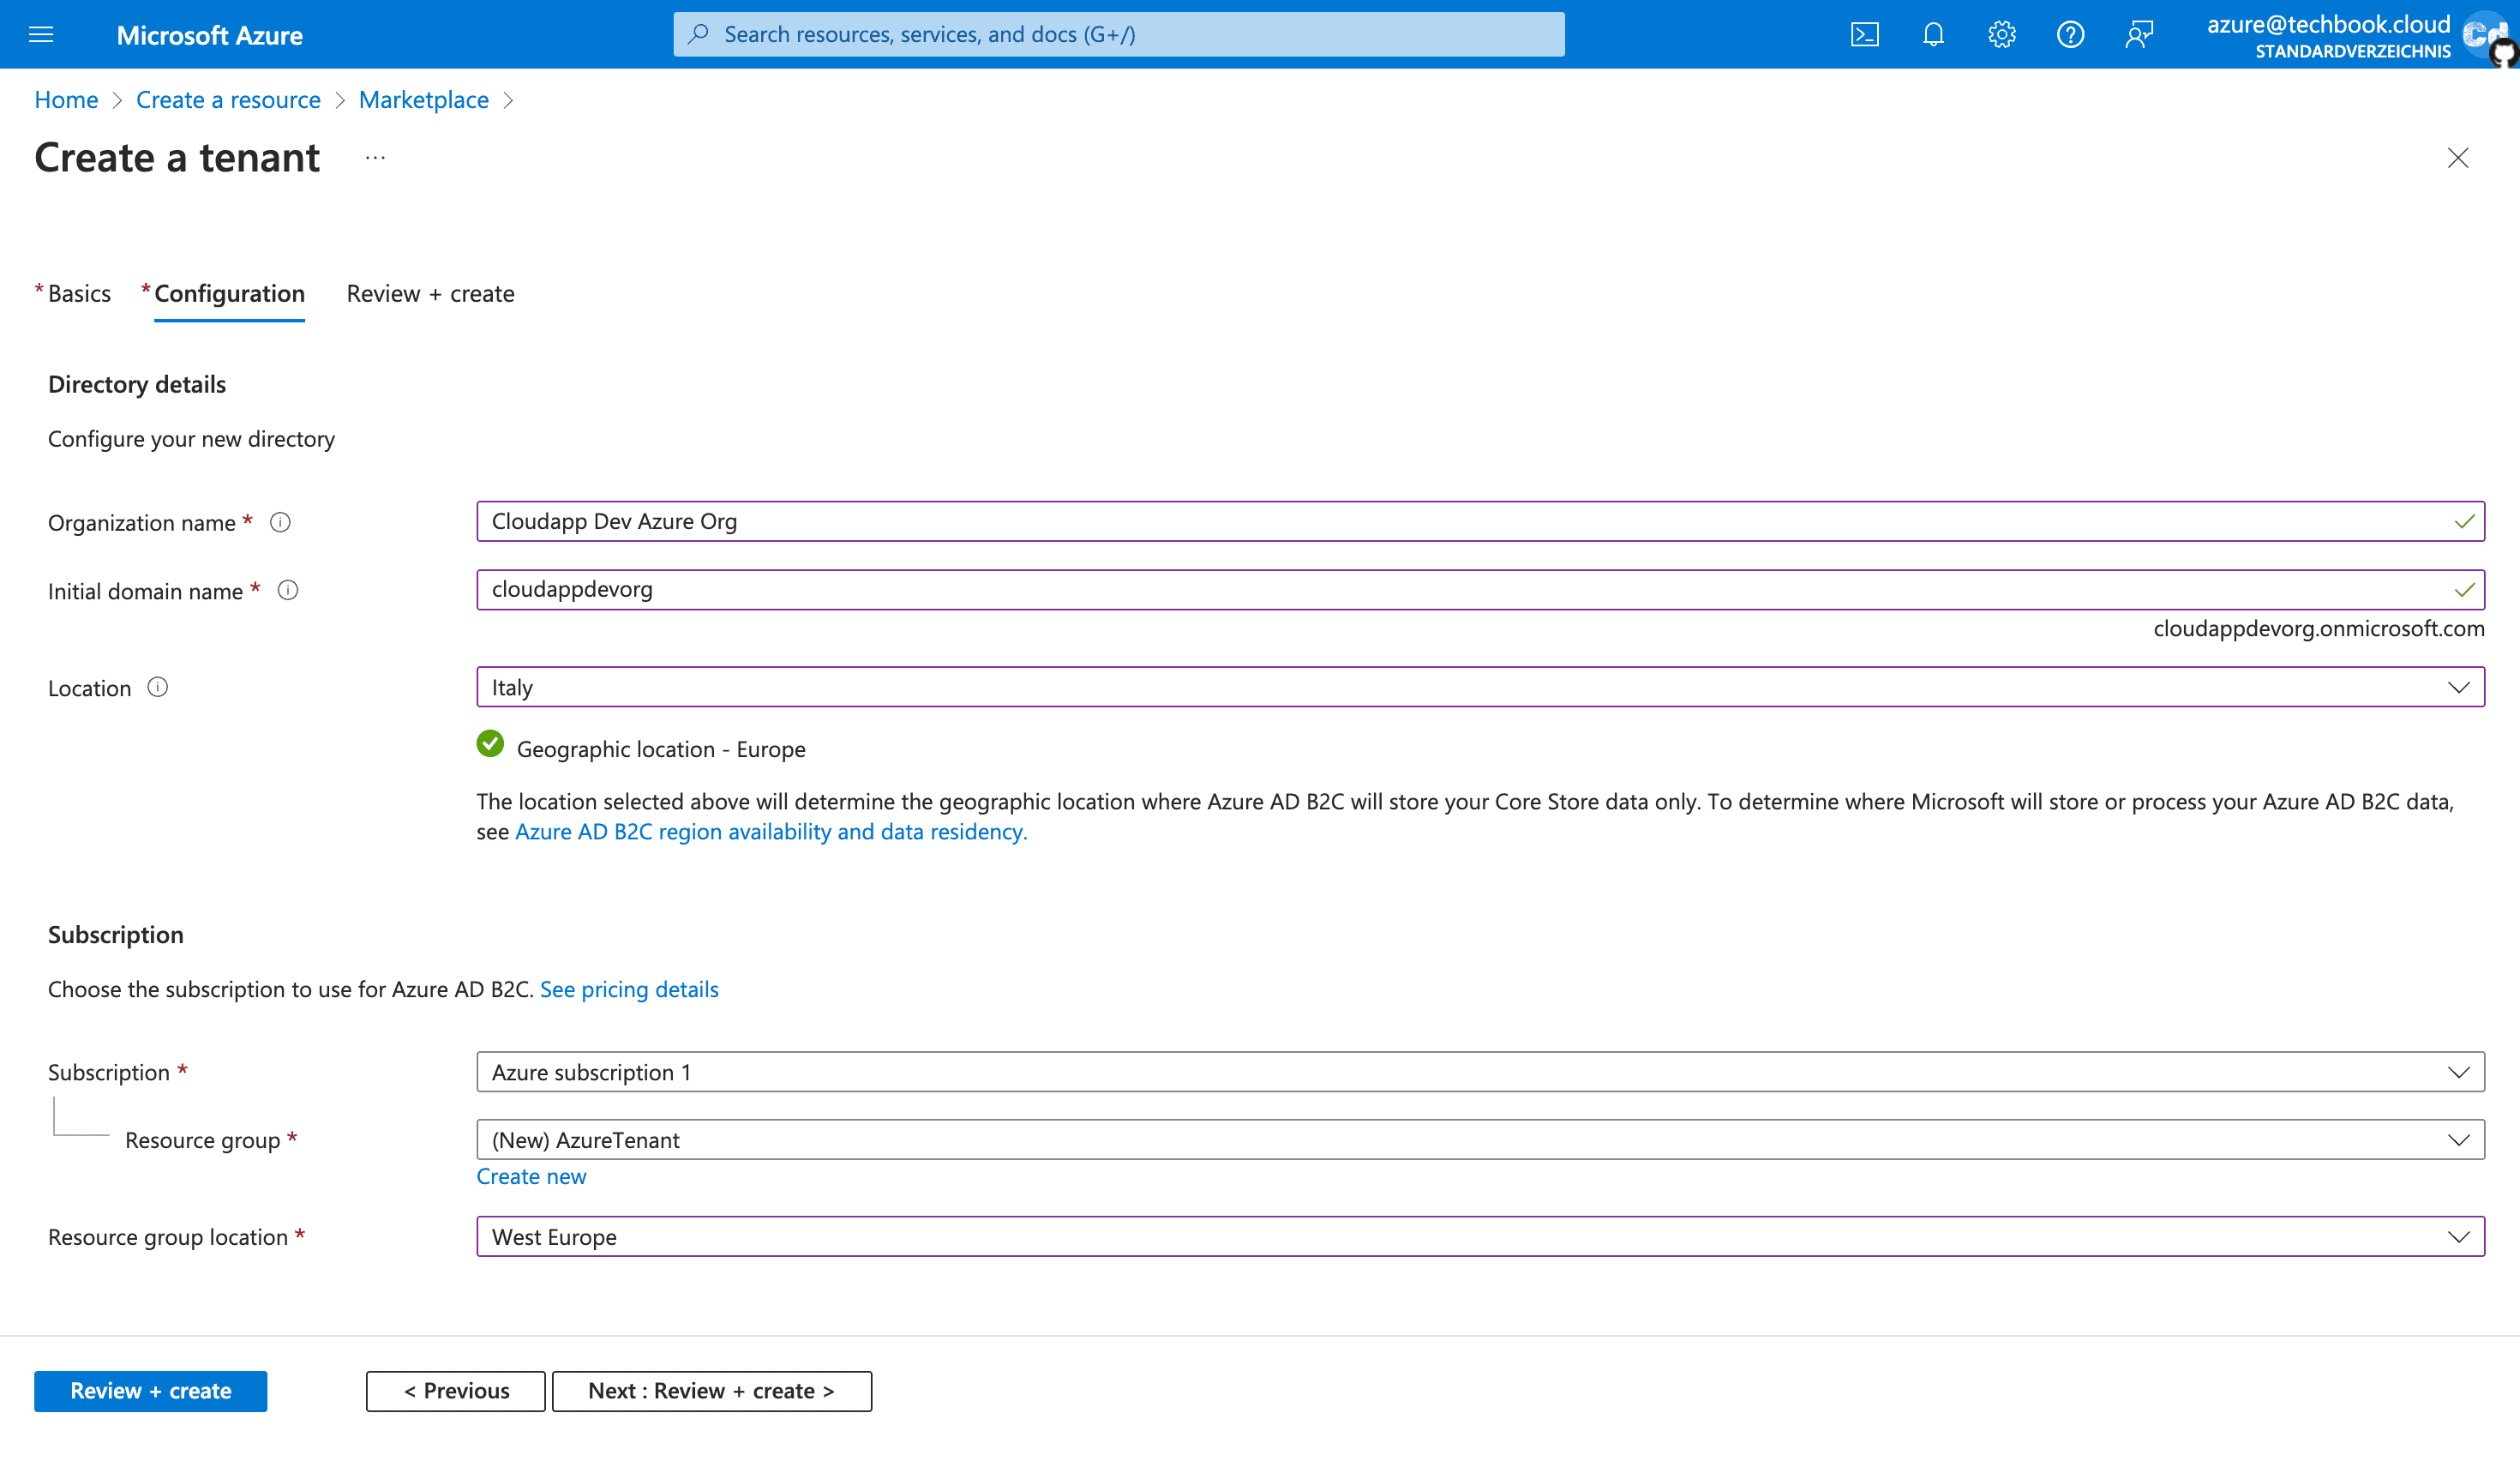
Click on “Next: Review + Create,” and as soon as the creation process is finished, you can see the second tenant under the directory overview.
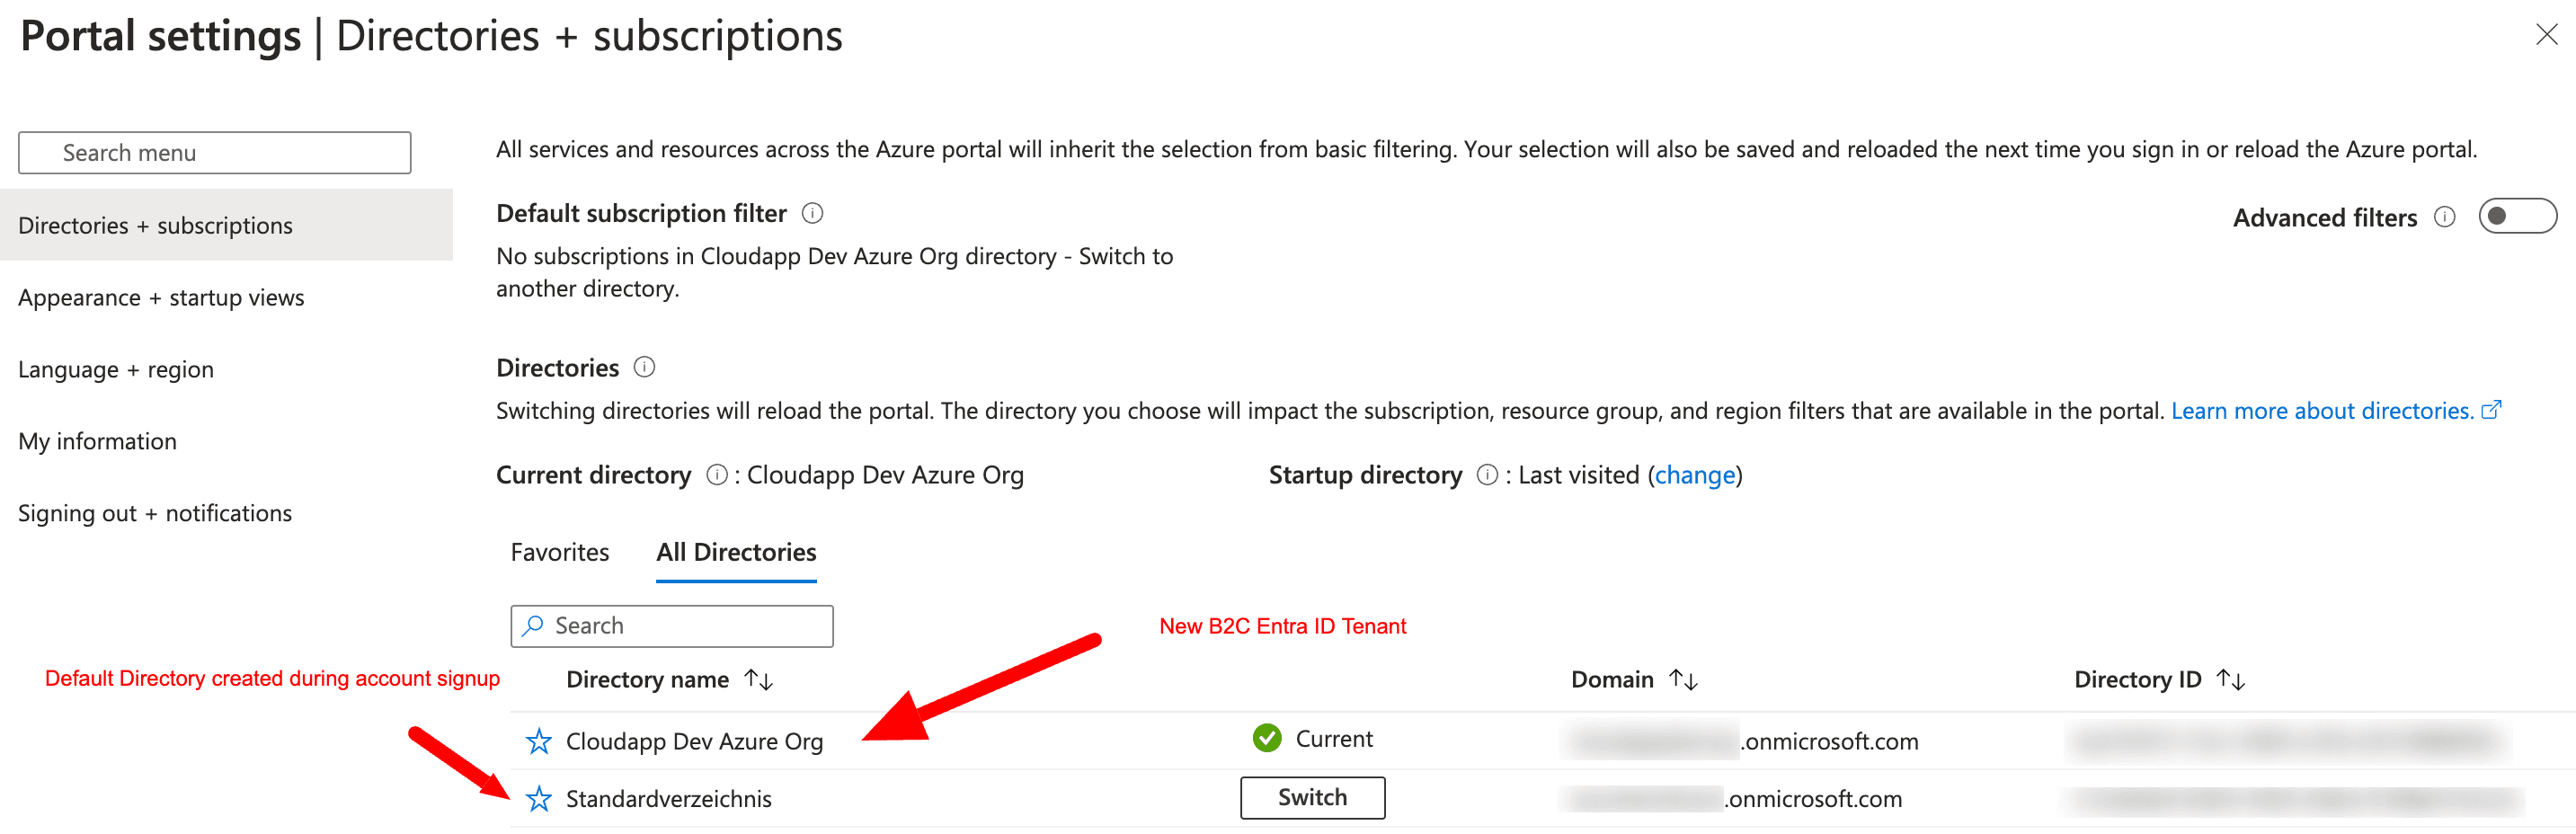
If not yet selected, select the new AD B2C tenant.
Now, we can start with the creation of two new app registrations. You find the menu point under manage within your AD B2c tenant on the left side.
1 — Localhost
2- Production Site
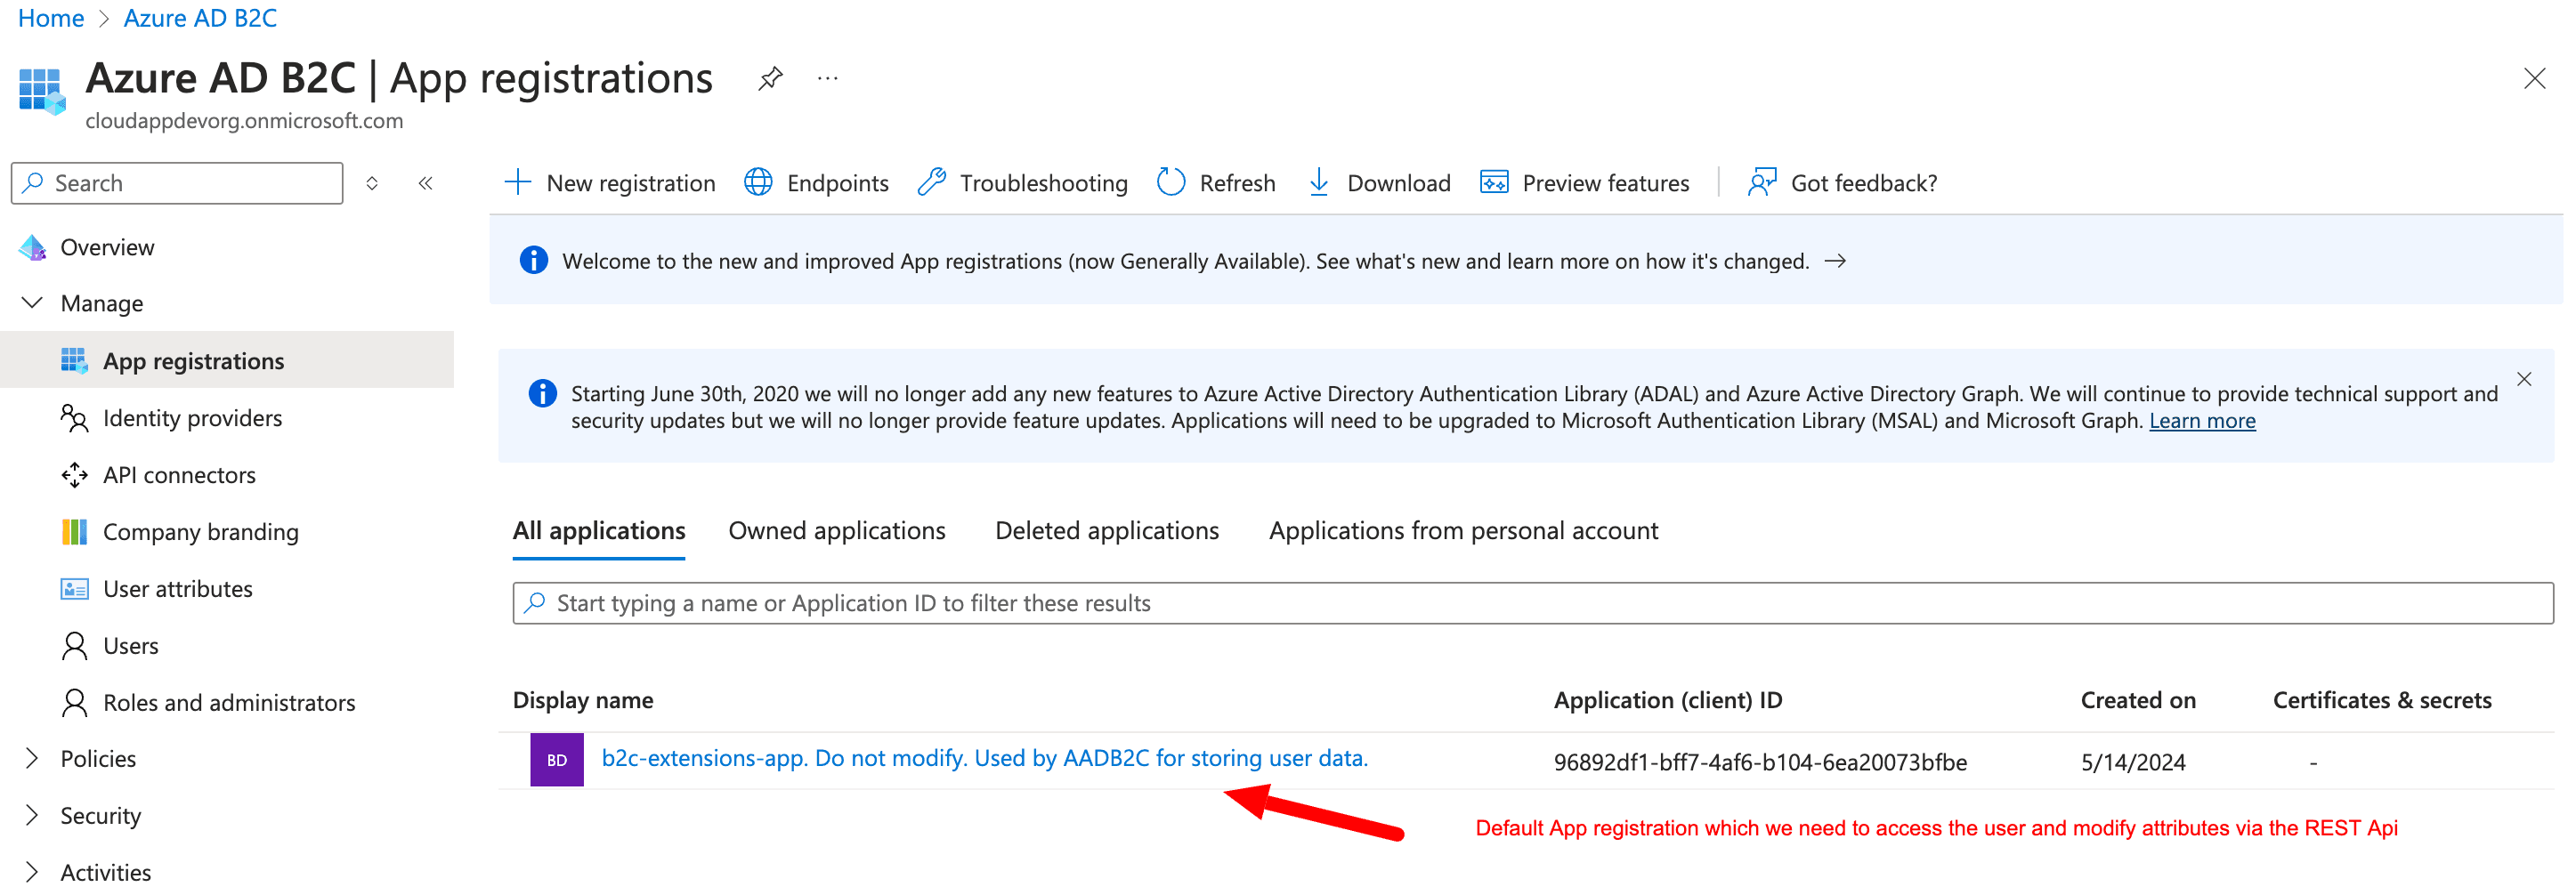
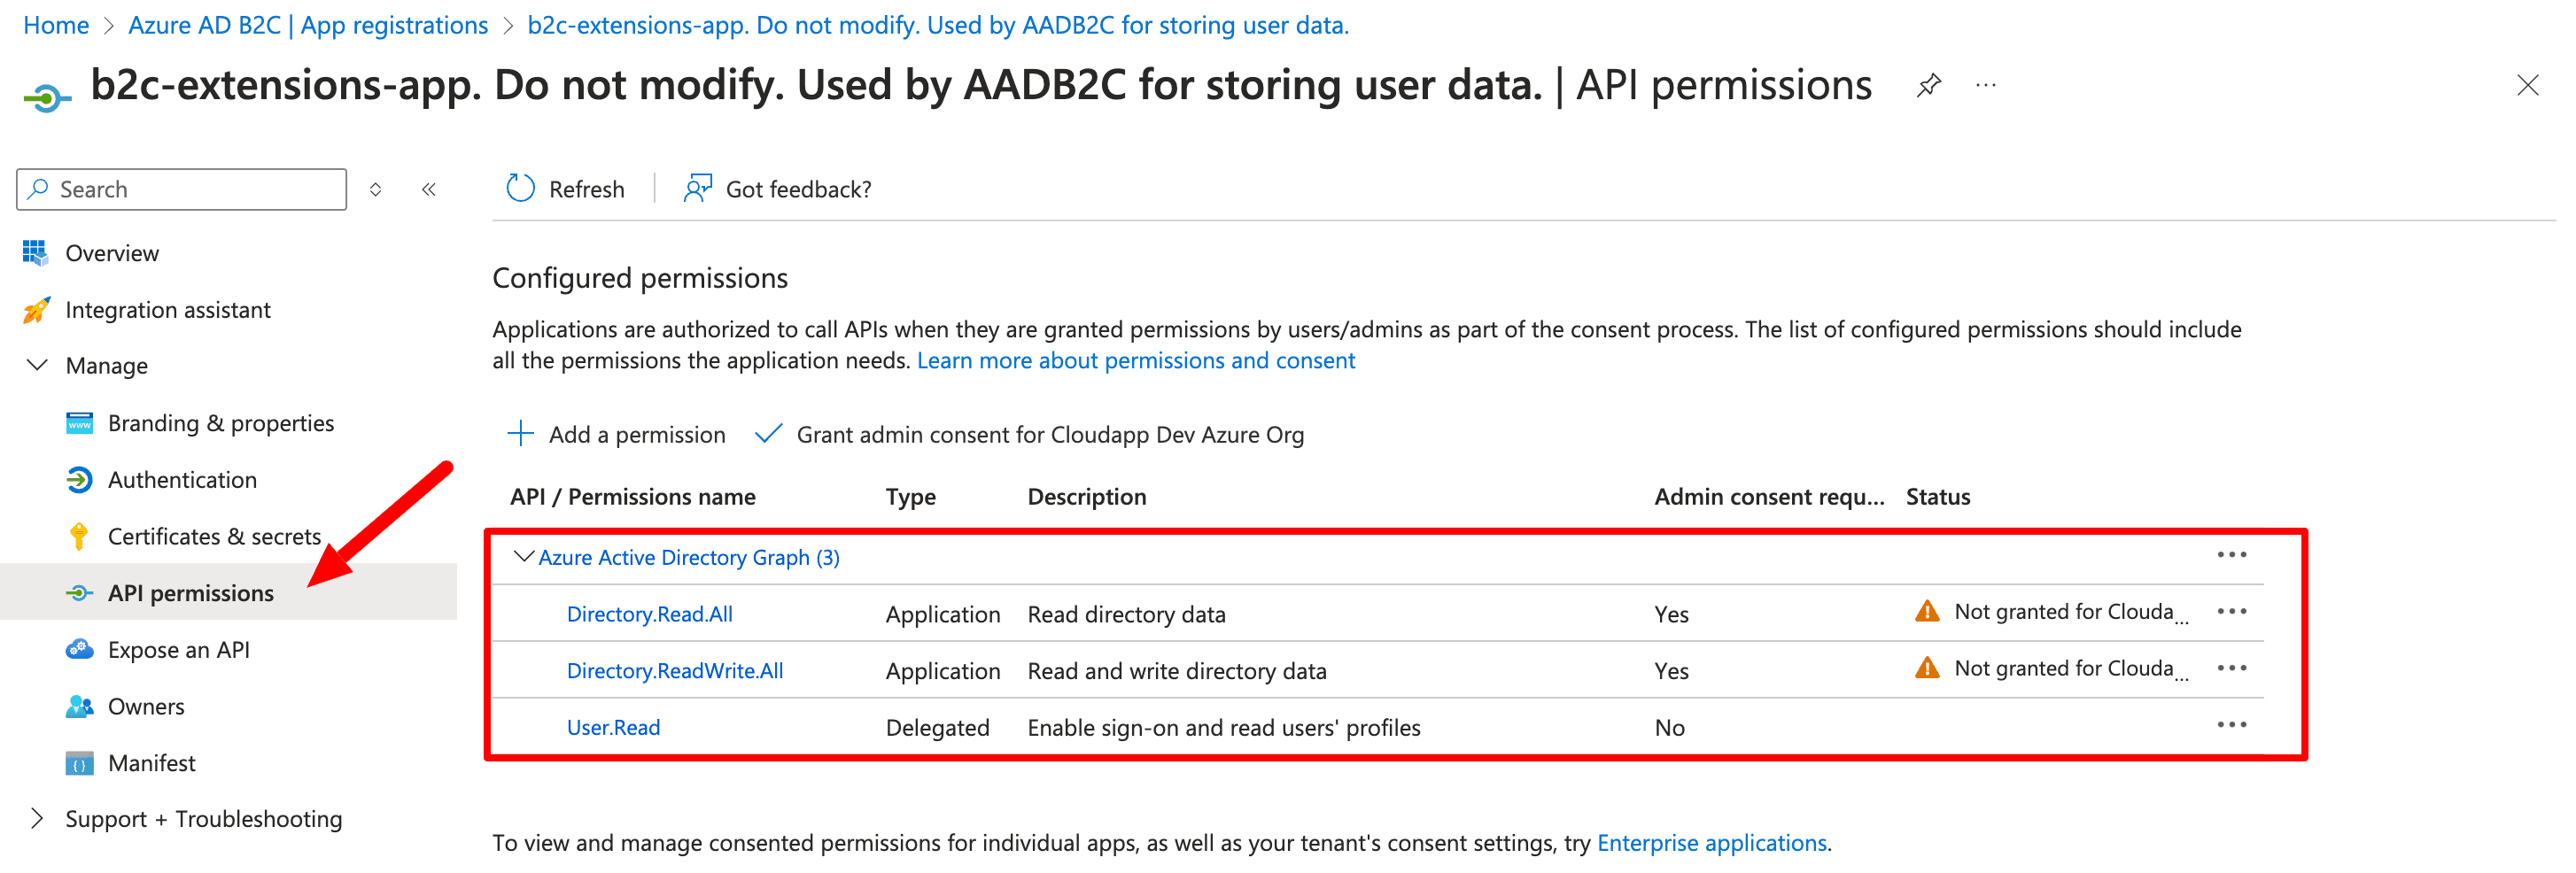
There is also one default user, already present in the directory, which we need for the certain actions. I will explain it later. Below you can see the system-assigned rights for those user.
Custom User Attributes
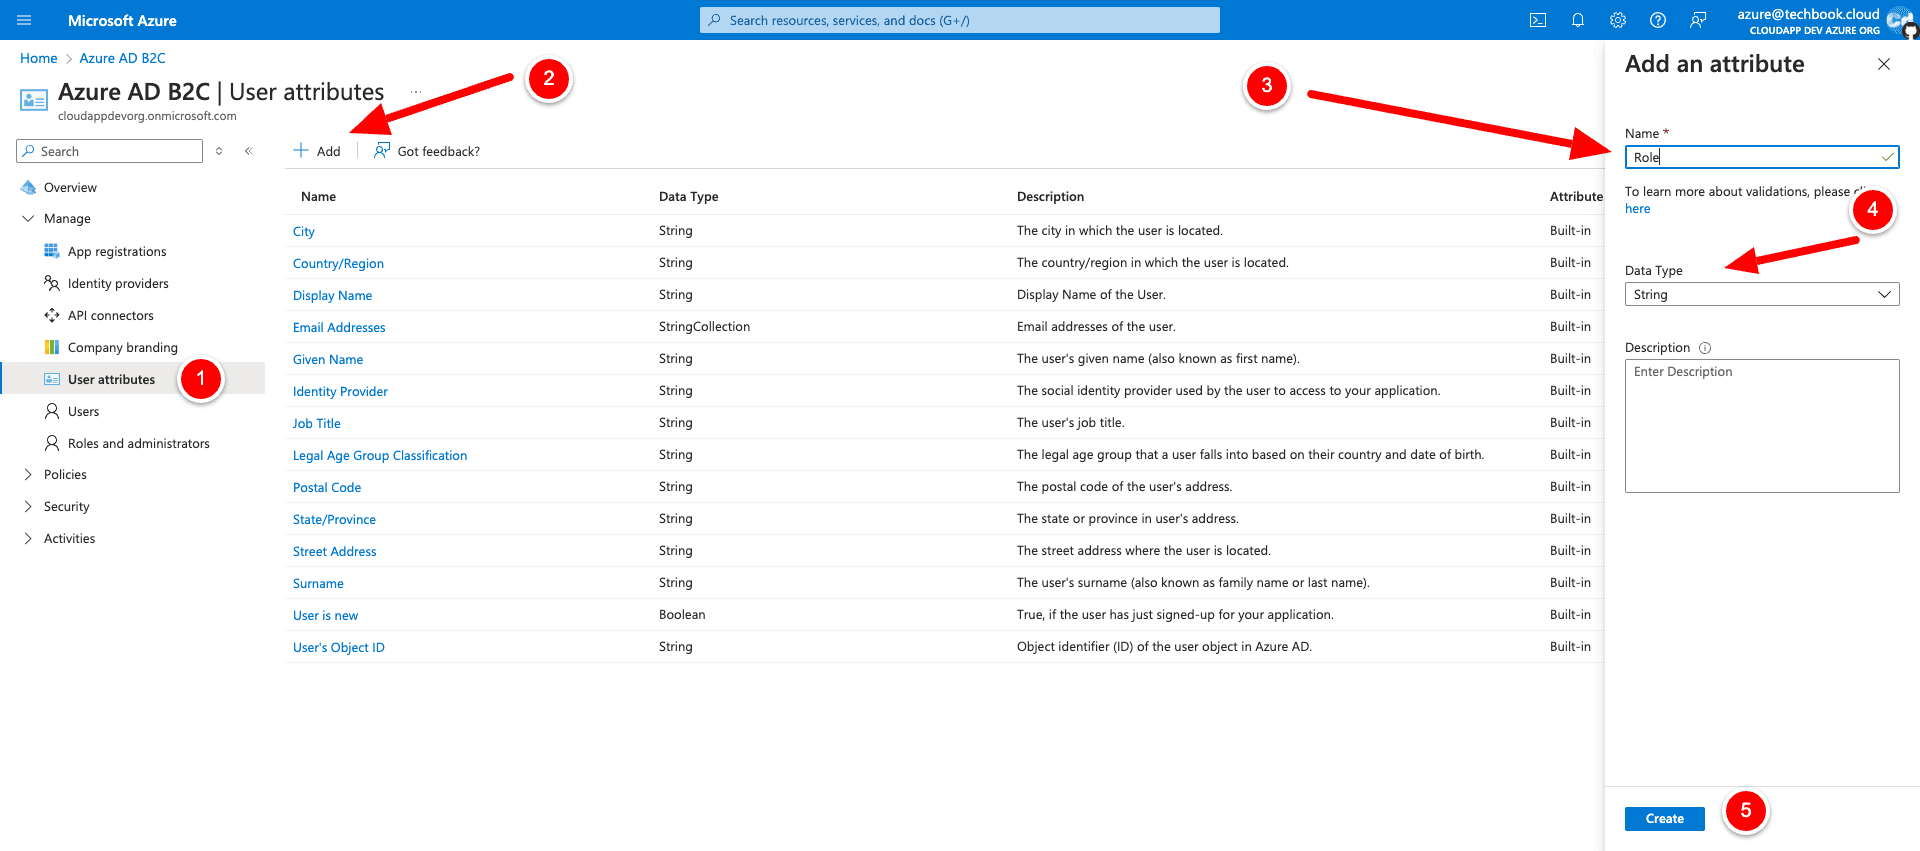
Let’s return to the Azure AD B2C Overview page and then select “User attributes” because we want to add a new custom attribute “Role”, which we will need in the next story, when we integrate the Azure AD B2C tenant into our Next.js 14 project.
Adding a new User Flow
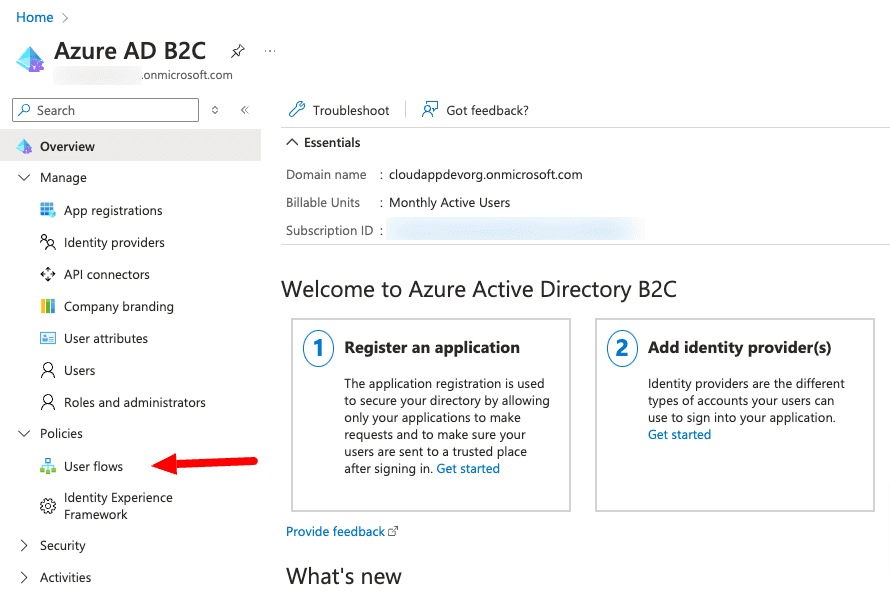
Now we click on “New User Flow” upper left
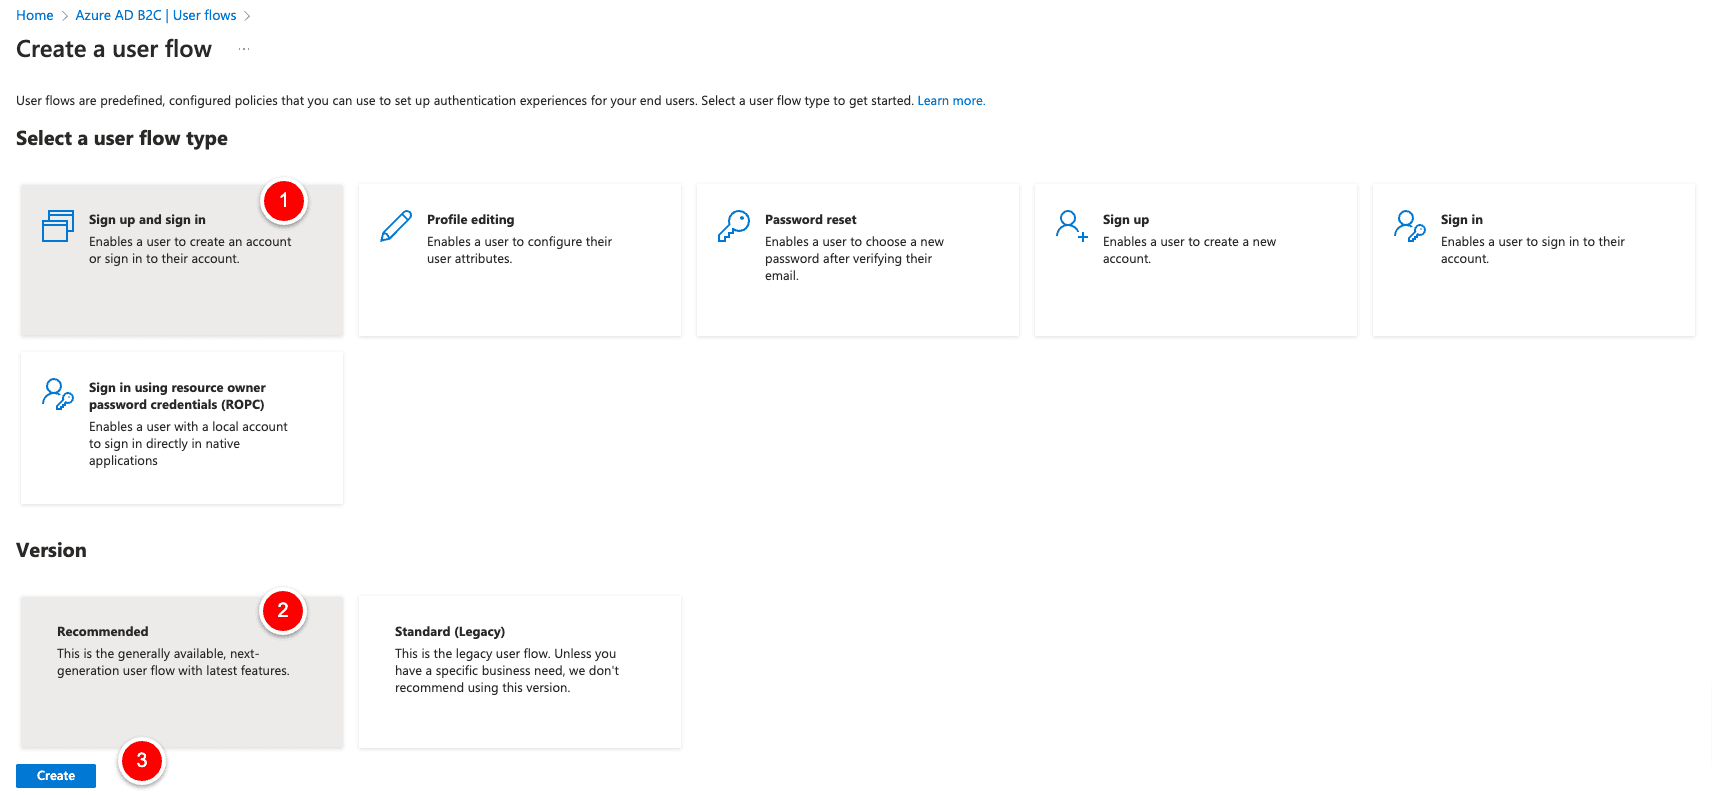
and then “Create”.
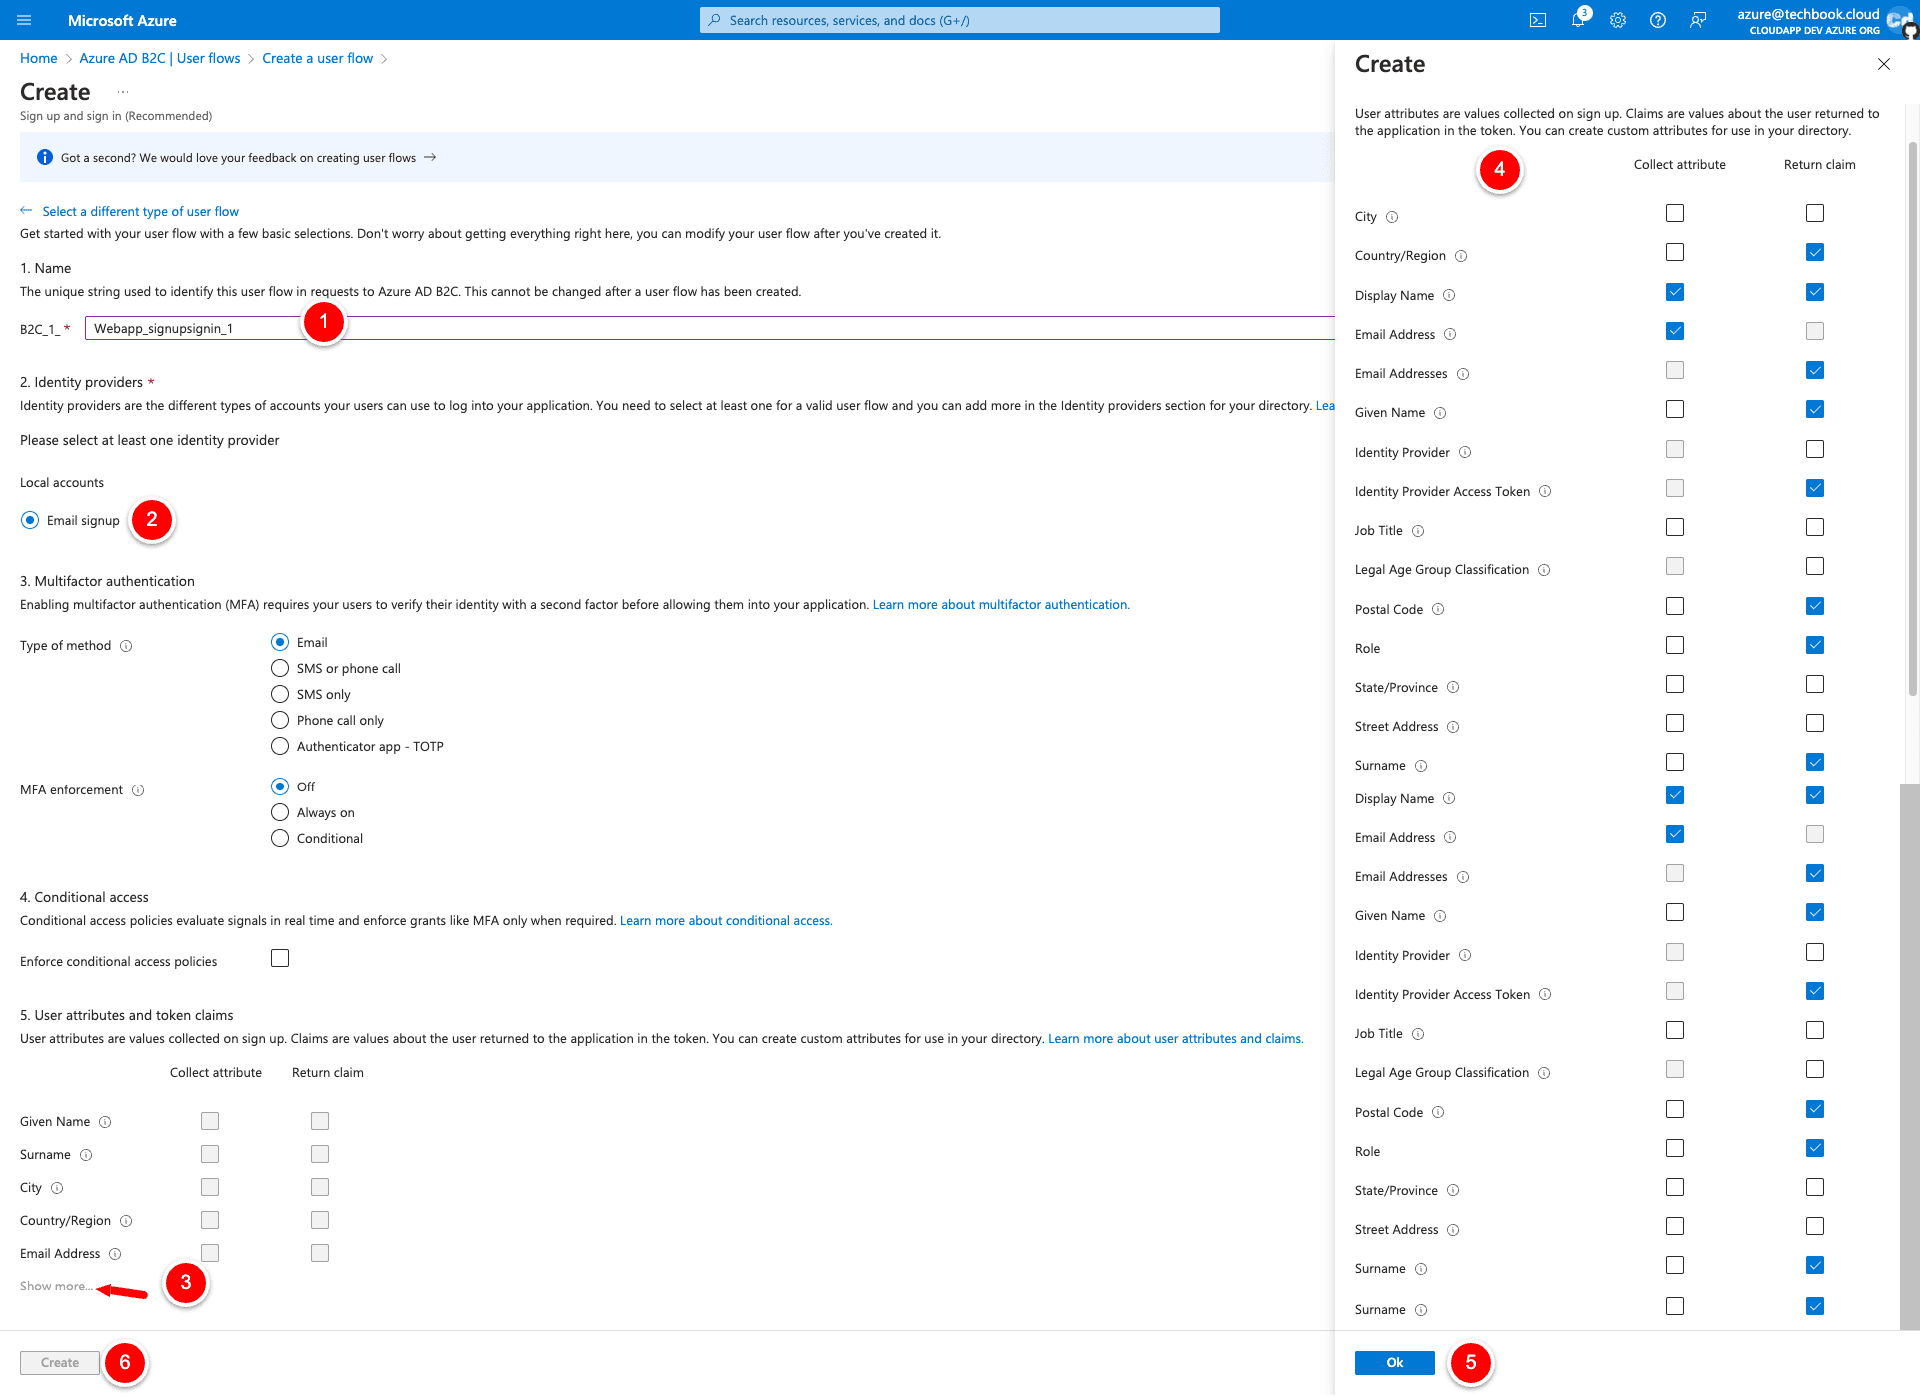
Fill out the mandatory fields and enable the correct attributes for the column “Collect Attribute” and “Return Claim”.
Collect Attribute are the attributes that we will ask during the registration process and Return claim are the attributes, which the Azure Endpoint will send us back after a successful login.
Now with the Userflow in place we can finally create the needed app registrations that we need in our Next.js14 project. So let’s go back to the Azure tenant overview and click on “New Registration” upper left.
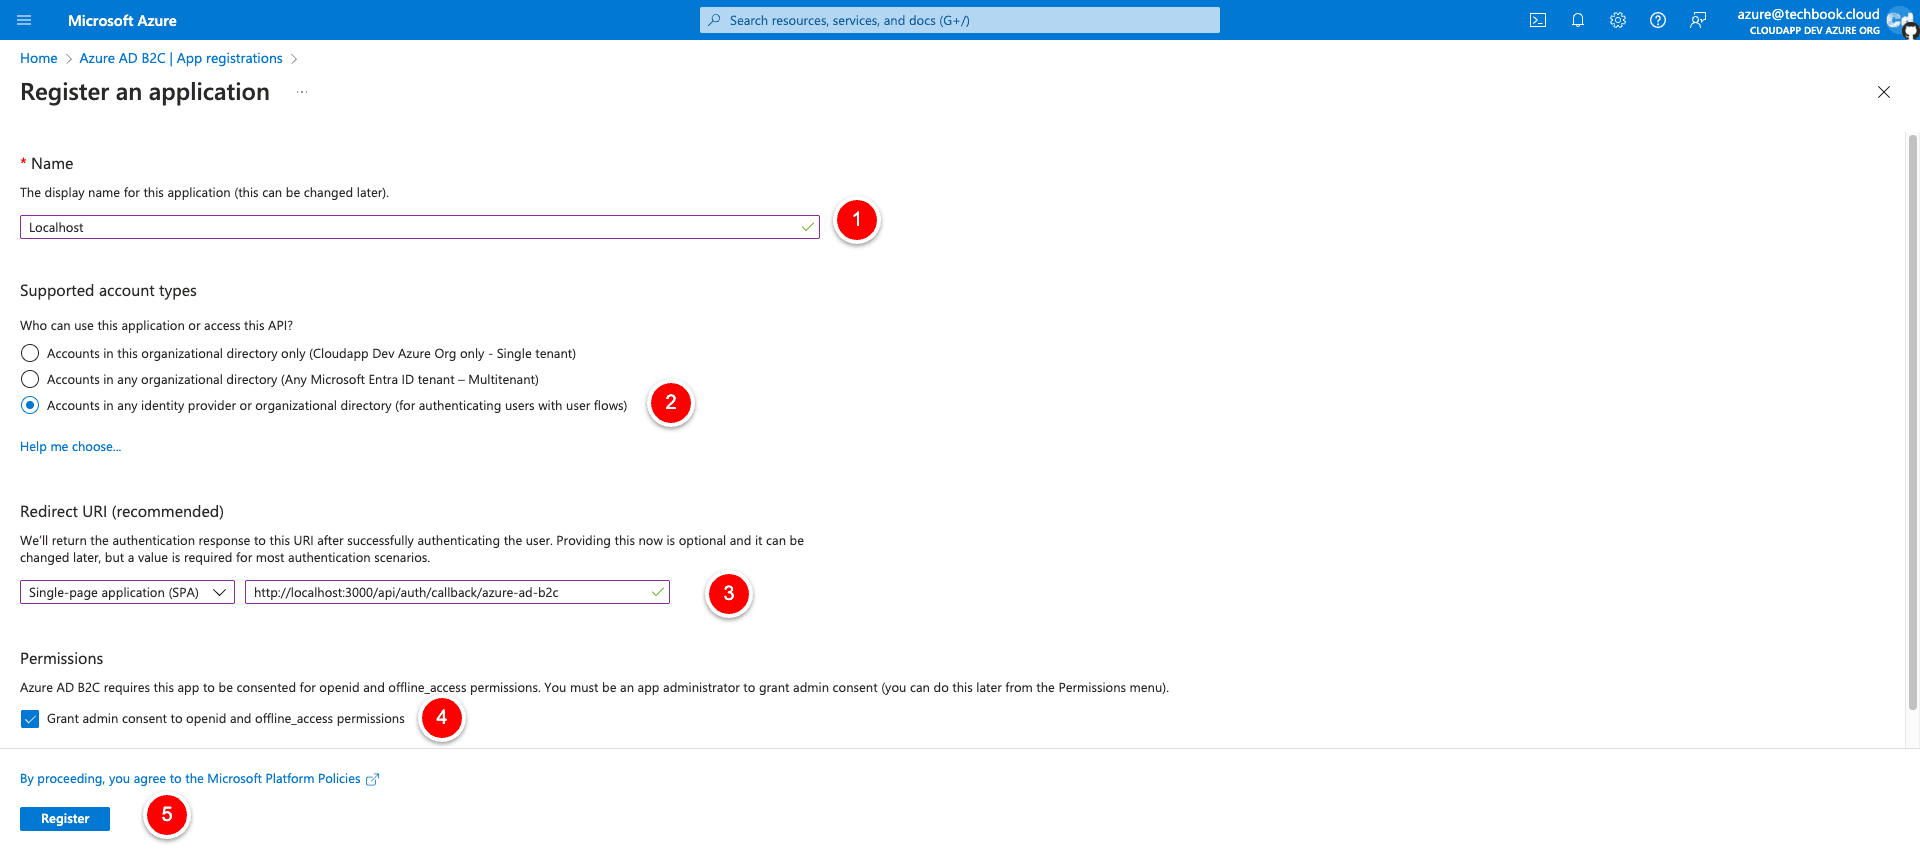
As soon as the new app registration is ready click on “Localhost” and select “Certificates & secrets” on the left menu, then select the tab “Client secrets” and click on “New client secret”.
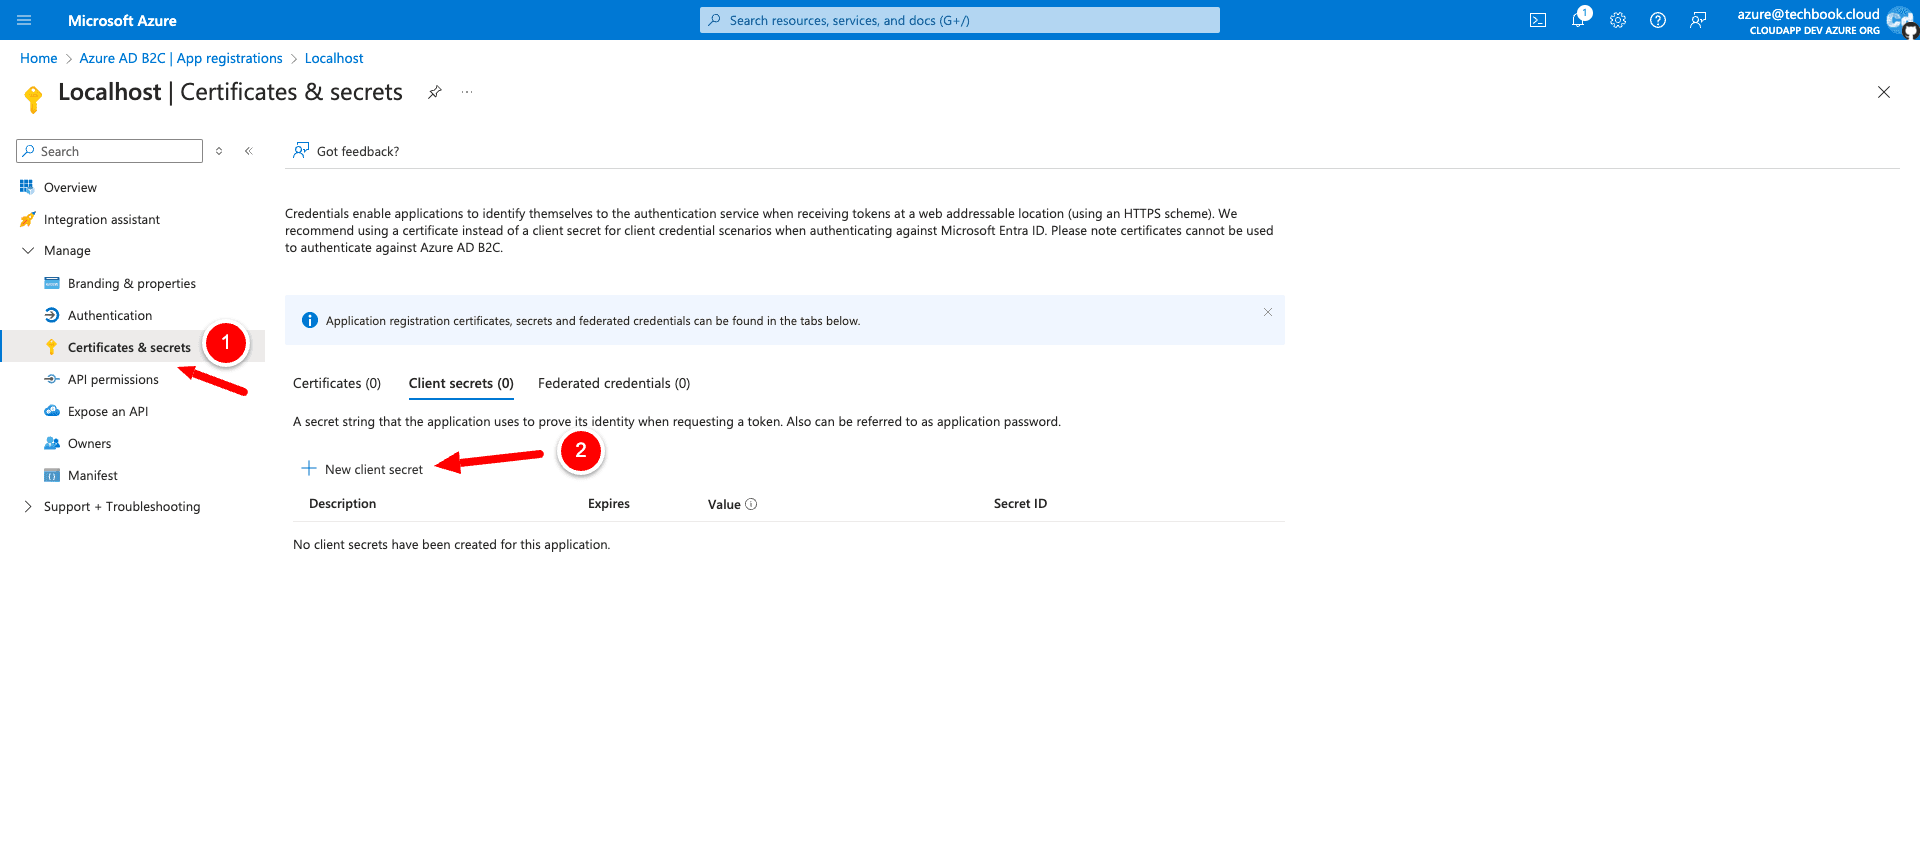
Use “Localhost” for the description field on the upper right and use the recommended expiration of 180 days. Click save and copy the “Secret Value” which you will see after the creation because we will need it for the Next.js project.
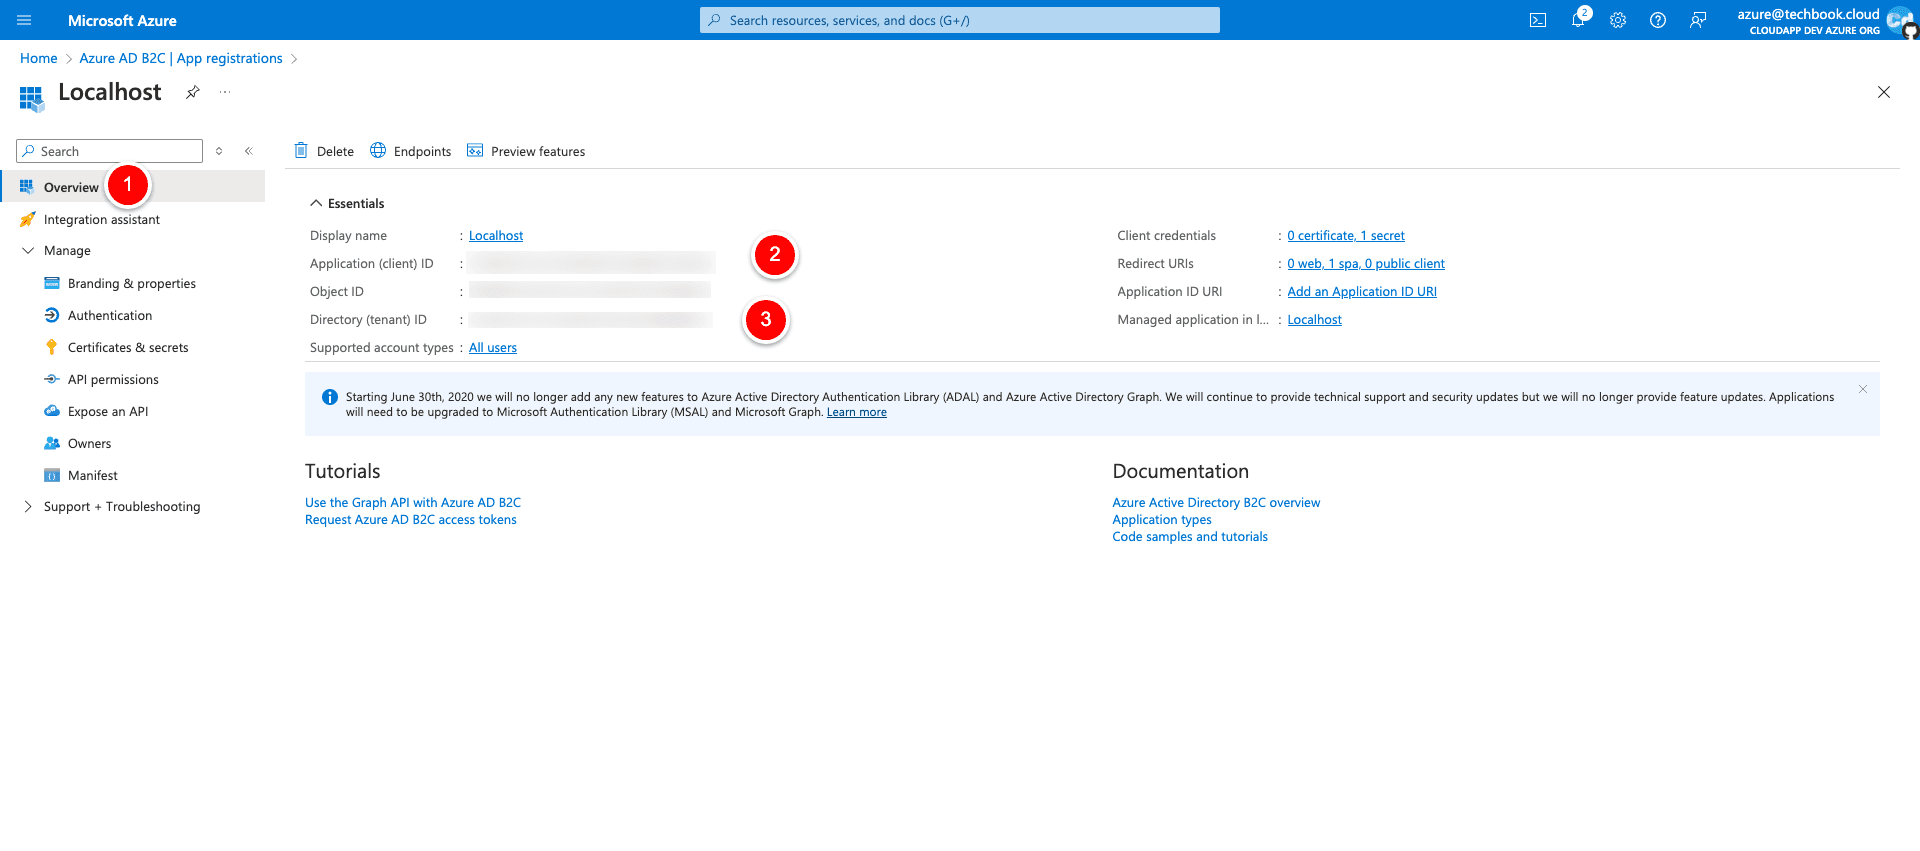
Great, now we are done, and we have the information that we need for the Next.js 14 integration.
Cloudapp-dev, and before you leave us
Thank you for reading until the end. Before you go:
Please consider clapping and following the writer! 👏 on our Medium Account