Table of Contents
- Used Stack
- Two new NPM Packages
- Get Started with the Redis Database
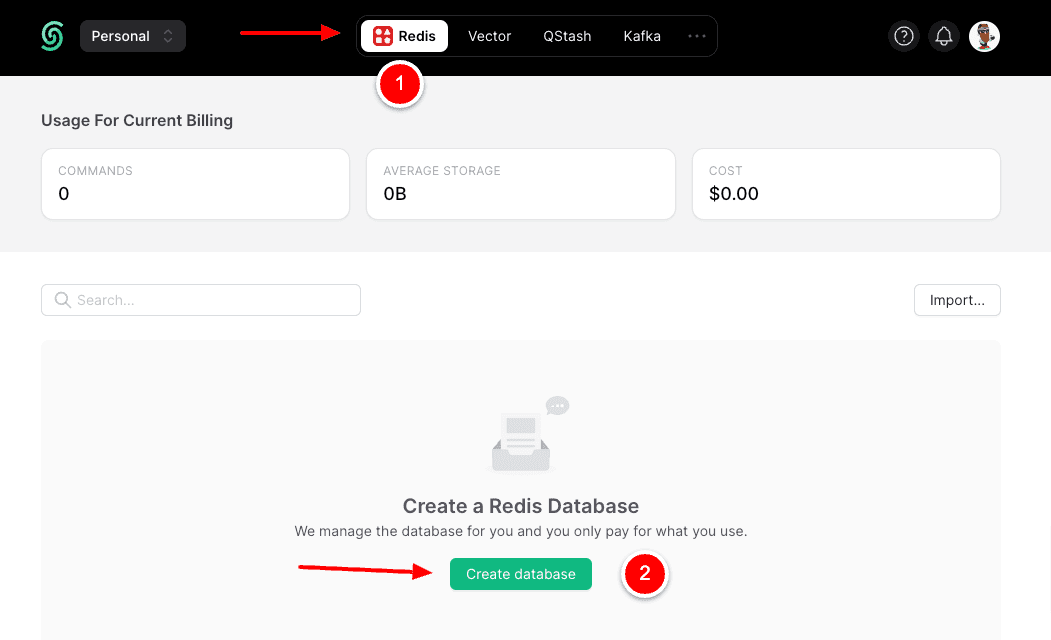
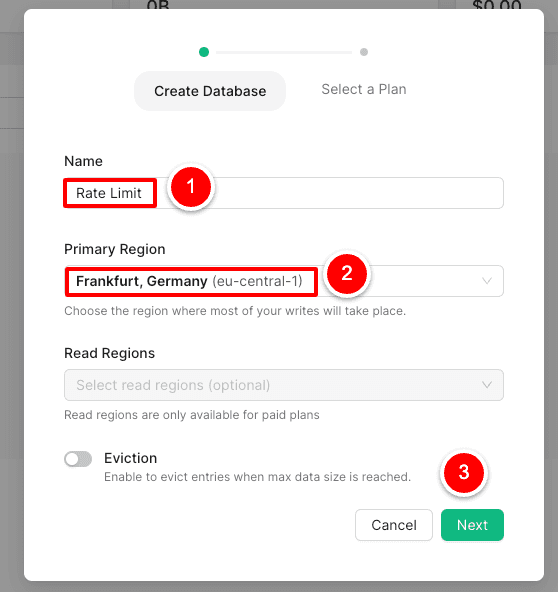
- Login and create Redis DB
- Adding Env-Variables in .env.local
- Implement Rate Limiter in existing API Route
- Definition of the rate limiter
- Rate Limit check
- Error Message
- Optimization needed for GlobalRatelimit
- Cloudapp-dev, and before you leave us
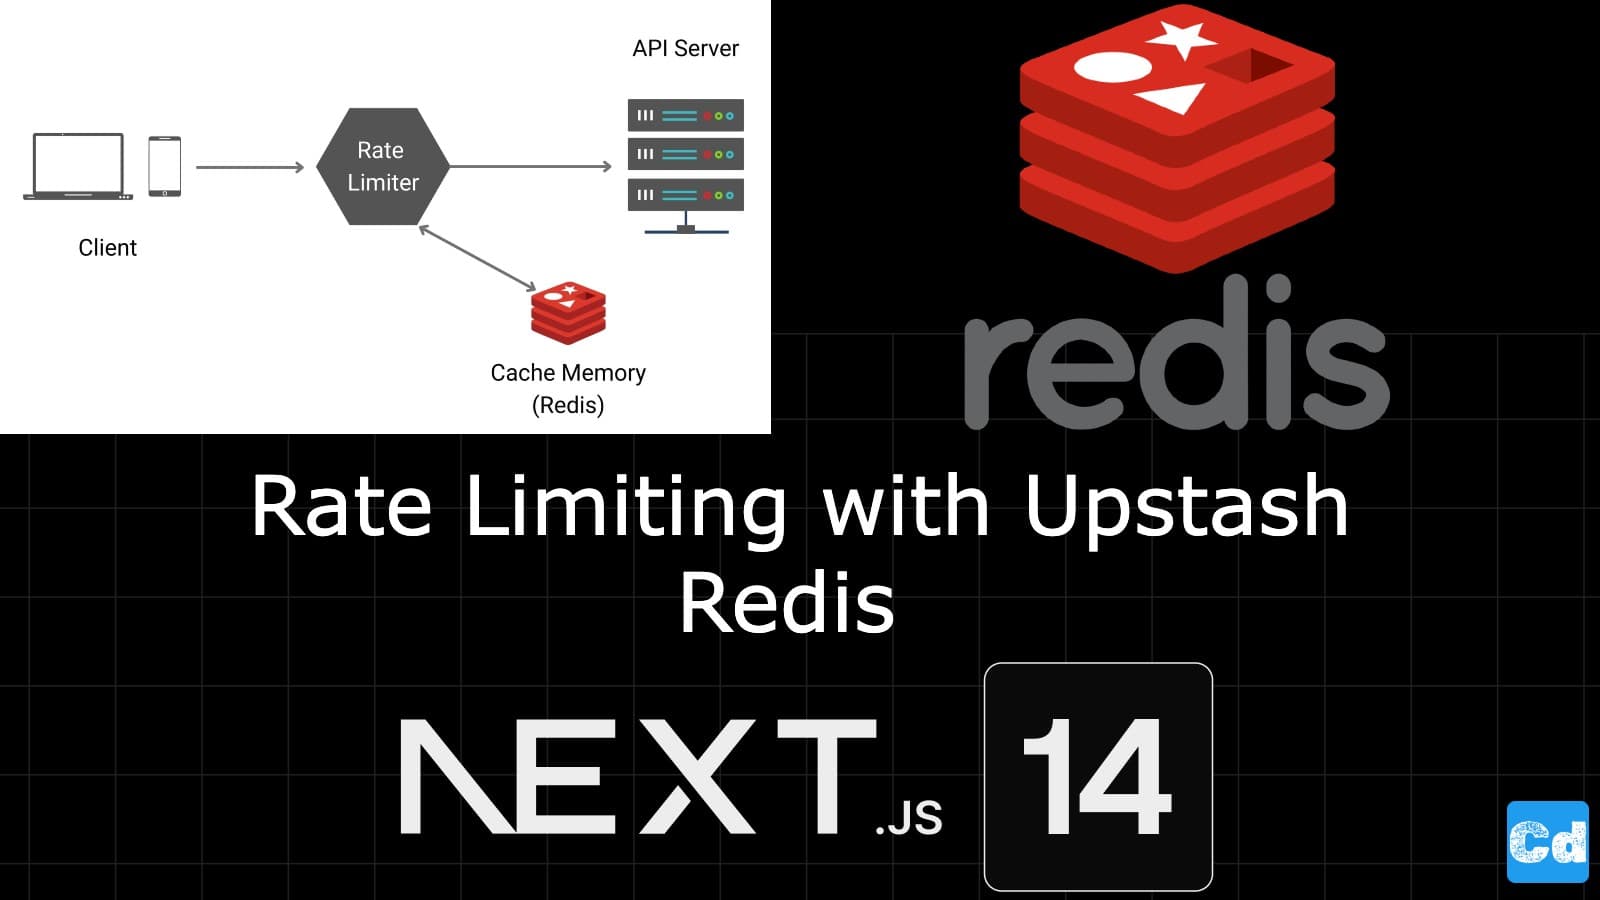
Ensuring system availability is crucial for any product. However, misuse can overwhelm resources, or you may need to control usage and implement charges. Implementing rate limiting effectively addresses these issues and can be integrated seamlessly. Since your system is already in place, you want a solution that works well in stateless environments like serverless functions without additional design time.
Here is the GitHub repo with the full code, where you can see the Rate Limiting Integration, built with Upstash Redis.
Example page hosted on Vercel -> https://nextjs14-azureb2c-prisma.vercel.app/
Used Stack
I will start with my default stack:
Next.js 14 as the web framework, and I will use the provided API routes
Upstash Redis, in combination with the NPM Packages @upstash/ratelimit and @upstash/redis
Vercel for hosting
Two new NPM Packages
@upstash/ratelimit - Implements three different standardized algorithms so far, and you can read more about them in the project's README.
@upstash/redis - Is used to read/write to the DB
Get Started with the Redis Database
Rate limiting with a single database is easy to implement. Start with the creation of a new Redis DB on Upstash:
Login and create Redis DB
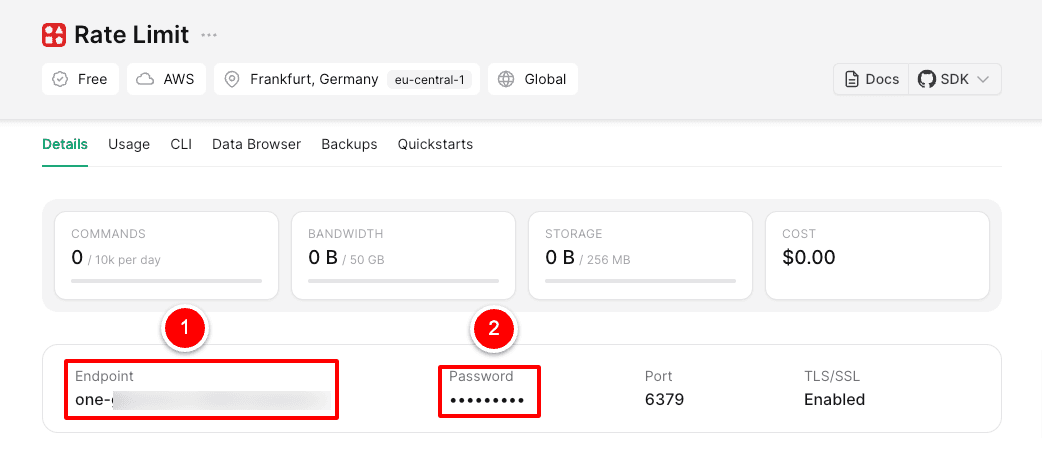
Adding Env-Variables in .env.local
Use the two values copied before for the local .env file
Implement Rate Limiter in existing API Route
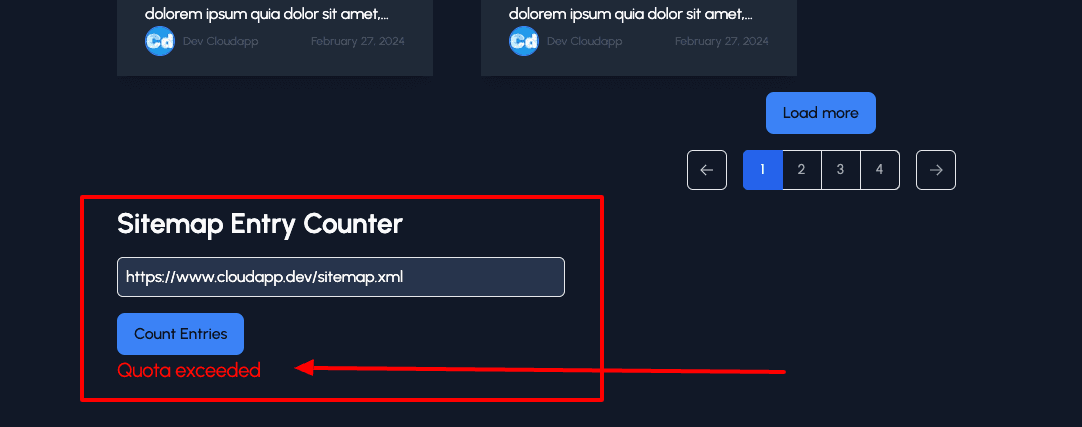
Let’s head over to an existing API Router. I will use the sitemap counter I created in a previous story.
Definition of the rate limiter
In this section, we define the rate limiter and say that only one call within 45 seconds is allowed.
Rate Limit check
As a next step, we define an identifier (which could be the public IP address, a user ID (for logged-in users), etc.
Error Message
If the check fails, we throw a “Quota exceeded” error.
Optimization needed for GlobalRatelimit
For projects on a bigger scale, you can define a “GlobalRateLimit” with nodes spread over the globe.
import { GlobalRatelimit } from "@upstash/ratelimit"; import { Redis } from "@upstash/redis";As you can see, the integration is straightforward. The same approach can be used for a billing model, where the customer pays for a certain number of API calls.
Cloudapp-dev, and before you leave us
Thank you for reading until the end. Before you go: