In the previous story, we created a Linux App Service instance in the F1 plan (Free), and now we have to secure the App Service so that only authorized requests are accepted. We use Azure AD B2C for authentication.
What is Azure AD B2C
Azure Active Directory (Azure AD) B2C is a cloud-based IAM solution that secures and manages customers beyond your organizational boundaries. Built on an enterprise-grade secure platform, Azure AD B2C is a highly available global service scaling to millions of identities. Azure AD B2C pricing is based on Monthly Active Users (MAU), helping you reduce costs.
Free goes further: Your first 50,000 MAUs monthly are free for Premium P1 and Premium P2 features.
Here, you can find a step-by-step guide regarding the creation of the Azure AD B2C tenant
Here is a comprehensive guide on easily integrating Azure AD B2C into your existing Next.js 14 project.
https://www.cloudapp.dev/integrating-azure-ad-b2c-into-nextjs-14-with-ease
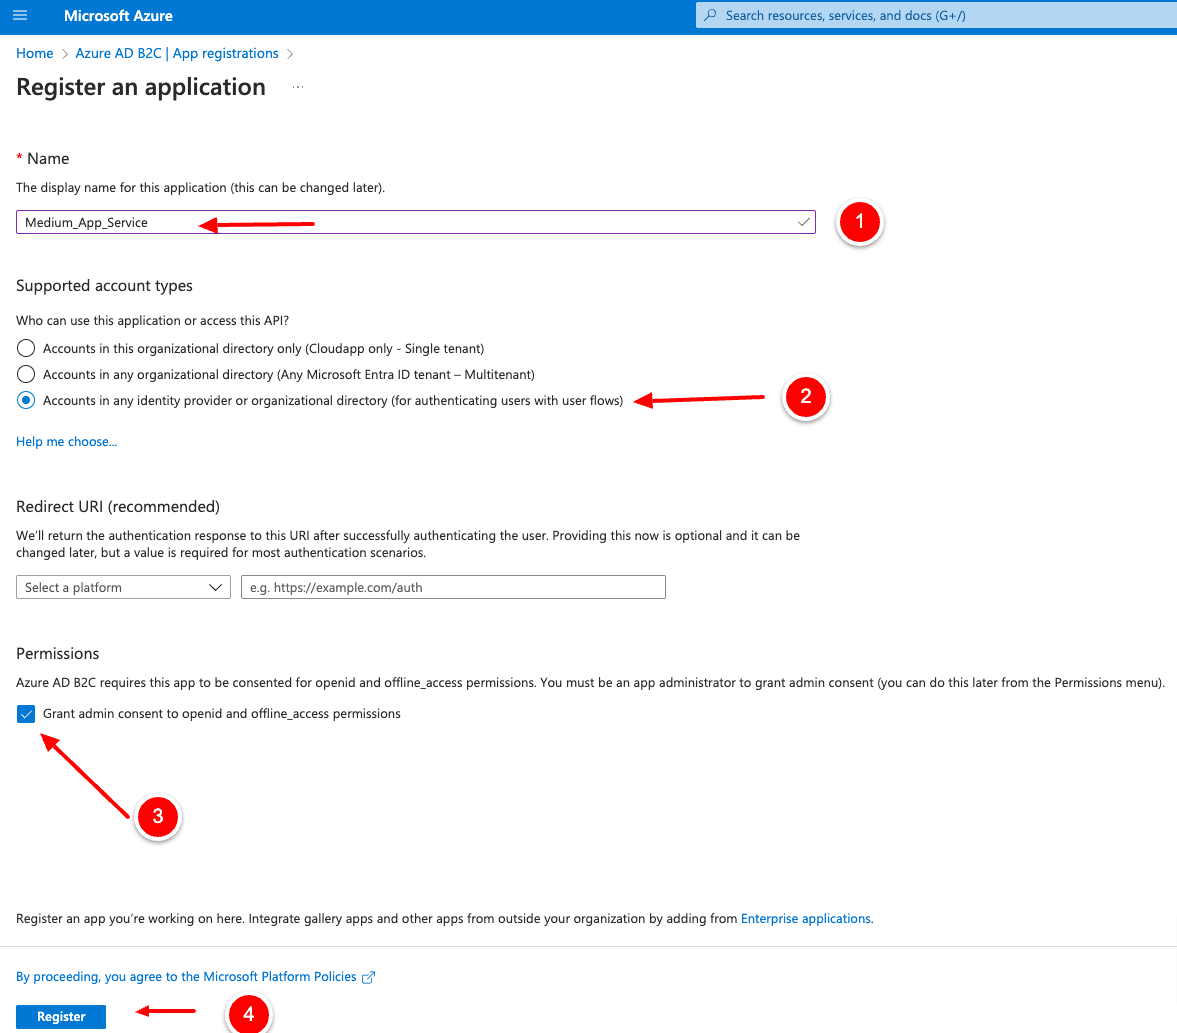
App Registration for Website/App Service
If you already created an app registration following the tutorial “Integrating Azure AD B2C into Next.js 14 with ease,” you can reuse it to secure the app service we created; otherwise, you can create a new one.
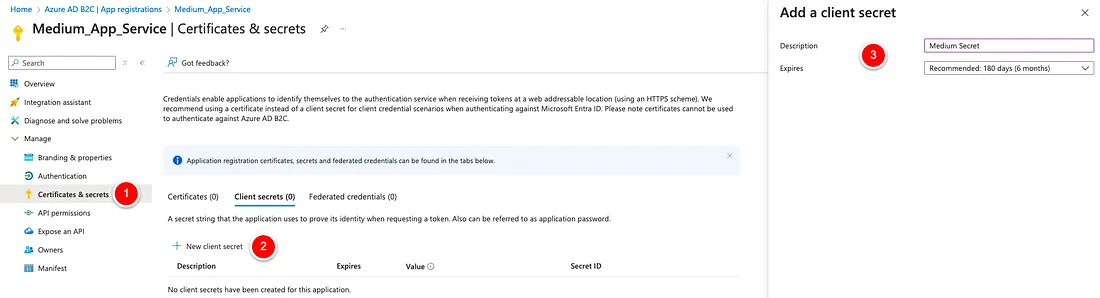
Adding Client Secret
After the creation of the app registration, we click on “Certificates & Secrets,” and we create a new client secret. Please copy and save the client secret after the creation, because you will see it only once.
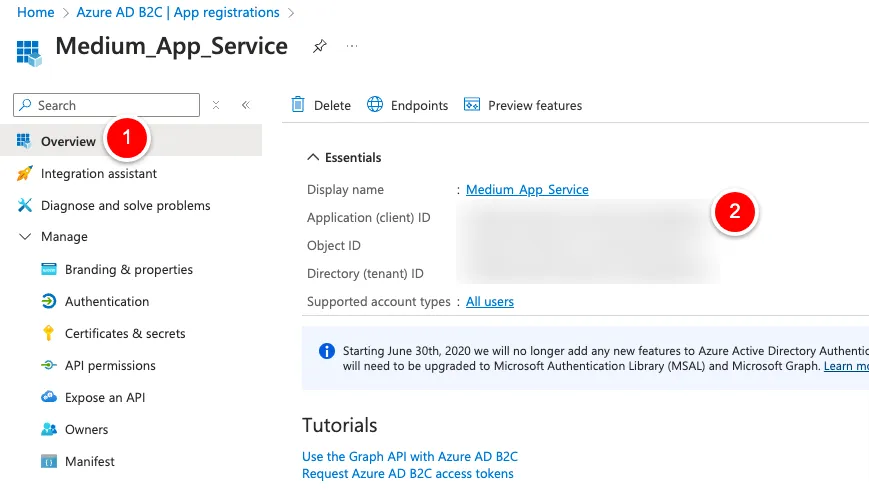
Getting App Registration Infos
Now we click on “Overview” on the left side so that we can copy the “Application (client) ID”, which we need together with the “client secret” copied before.
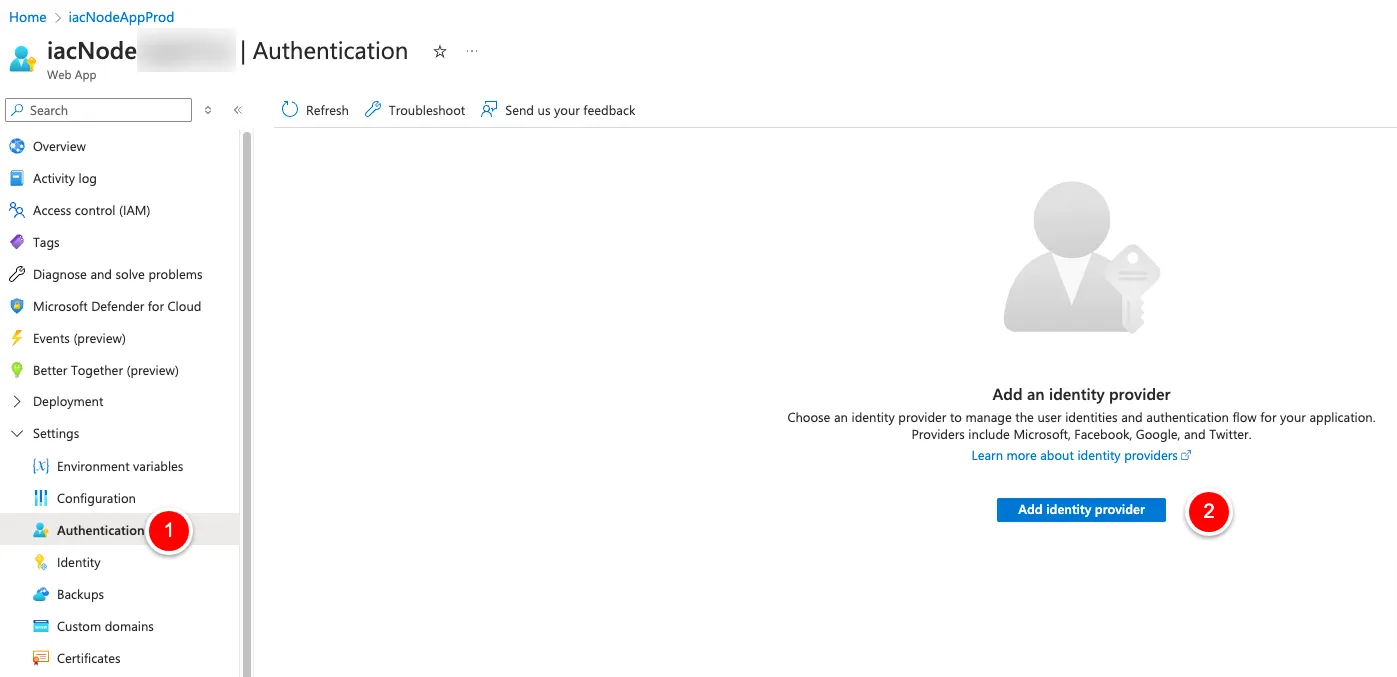
Configuring Authentication in App Service
We click on Settings->Authentication -> Button “Add identity provider”.
Setup Steps
Here, we select “OpenID Connect” from the dropdown.
OpenID provider name: I opted for “aadb2c”, but is up to you
Select “Document URL”
Metadata URL-> You can get the URL from the User Flow Overview in the Azure Portal (open the needed User Flow and click on “Run user flow”, the URL is visible in the top right corner)
Client ID: Paste the previously saved Client ID
Client Secret: Paste the previously saved Client Secret
Restrict access: Require authentication
Unauthenticated requests: TTP 401 Unauthorized: recommended for APIs
Token store: Enable it
Click on “Add” to save it.
That’s it. You can now authenticate your API Calls with the Access Token from your Azure AD B2C Tenant.
If you are using the code from the Github Repo in the previous story.
Endpoints
You can use these endpoints
Getting Storage Account using the tags
https://appserviceNameSelectedDuringCreation.azurewebsites.net/api/storage/search-resource-groups
https://appserviceNameSelectedDuringCreation.azurewebsites.net/api/storage/create-storage-account
etc.
You can test it with Postman. If you need a detailed guide for postman write a comment and I will help you.
Conclusion
You must reuse the same app registration you use in your Next.js 14 project to make it work.
Cloudapp-dev, and before you leave us
Thank you for reading until the end. Before you go: