Table of Contents
- First API Calls to App Service via Postman
- Full example to get the access token in Postman from Azure AD B2C
- Setting Redirect-URI in Azure APP Registration
- POST Request Body Post
- Providing Environment Variables to App Service
- New App Registration for Resource Creation
- Nextjs 14 logic for calling App Service
- Component - createstorageaccountform_appservice.component.tsx
- API Route CreateStorageAccountAppservice
- API Route DeleteStorageAccountAppservice
- API Route manageoperations
- Cloudapp-dev, and before you leave us
We created a Linux App Service instance in the F1 plan (Free) in the first story. In the second story, we secured the App Service to accept only authorized requests. In the third story, we will use our Next.js app to get the Azure AD B2C Access Token to create Resources on Azure via the App Service created initially.
I must admit that the ramp-up of the app service instance in the free plan is not very fast, so consider using a paid plan where the instance is “always on” if you use the service beyond the development.
First API Calls to App Service via Postman
Before integrating our Next.js project, I recommend making some test requests via Postman, which will significantly speed up the later development.
Full example to get the access token in Postman from Azure AD B2C
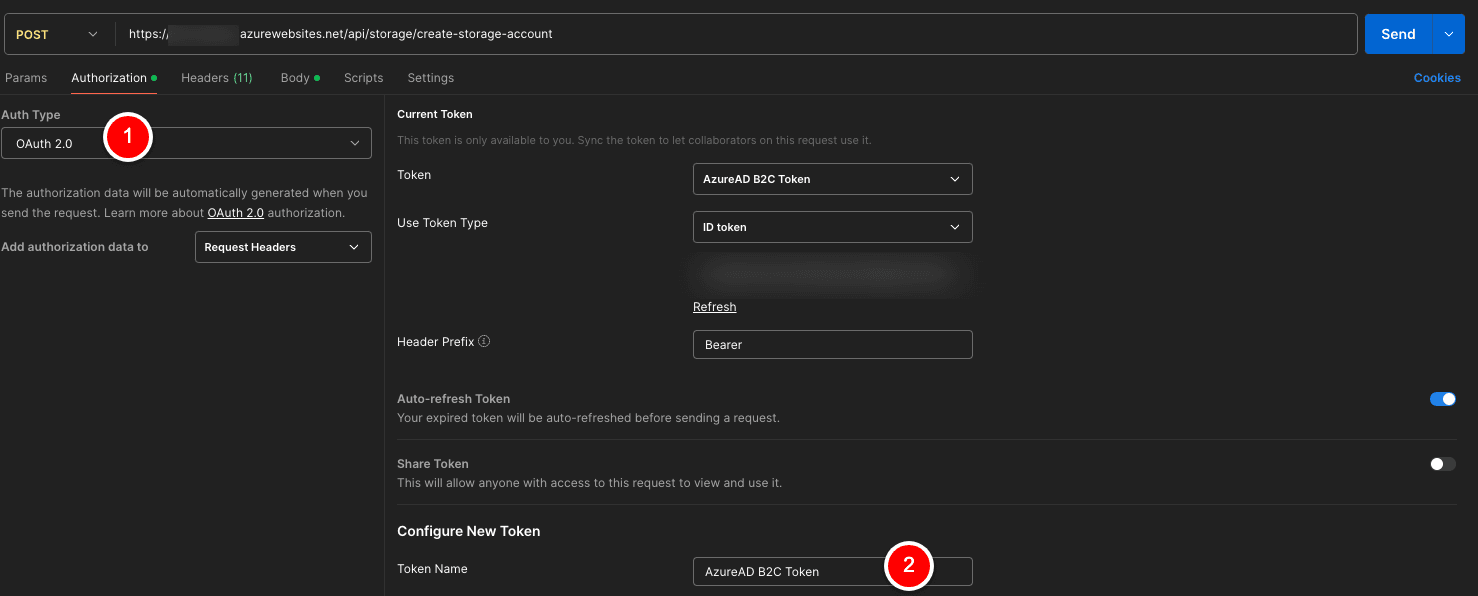
We create a new “POST” Request in Postman, and we use this endpoint: https://yourAppServiceName.azurewebsites.net/api/storage/create-storage-account
In the Authorization Tab, we select “OAuth 2.0” and add authorization data to “Request Headers”
You can define a name for the Token
Grant type -> we select “Authorization Code (With PKCE)”
Auth URL -> https://yourADB2CTenant.b2clogin.com/yourADB2CTenant.onmicrosoft.com/oauth2/v2.0/authorize?p=yourADB2CUserflow
Access Token URL -> https://yourADB2CTenant.b2clogin.com/yourADB2CTenant.onmicrosoft.com/oauth2/v2.0/token?p=yourADB2CUserflow
Client ID -> In the previous story, we created an App Registration, and we copied the Client ID (Application ID). Please reuse it here.
Code Challenge Method -> SHA-256
Scope -> openid offline_access
Client Authentication -> Send client credentials in body
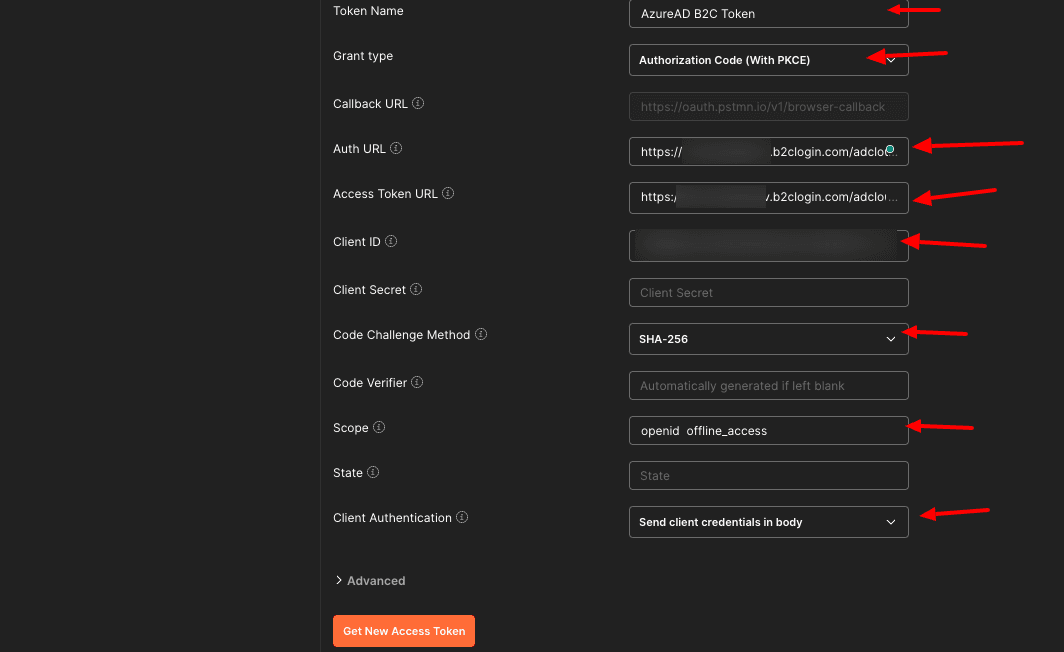
If you click on the button “Get New Access Token” Postman will open a pop-up window with the default “Azure AD B2C User Flow Web Interface”, where we can enter the username and password to get the needed Access Token via Callback to https://oauth.pstmn.io/v1/browser-callback
Setting Redirect-URI in Azure APP Registration
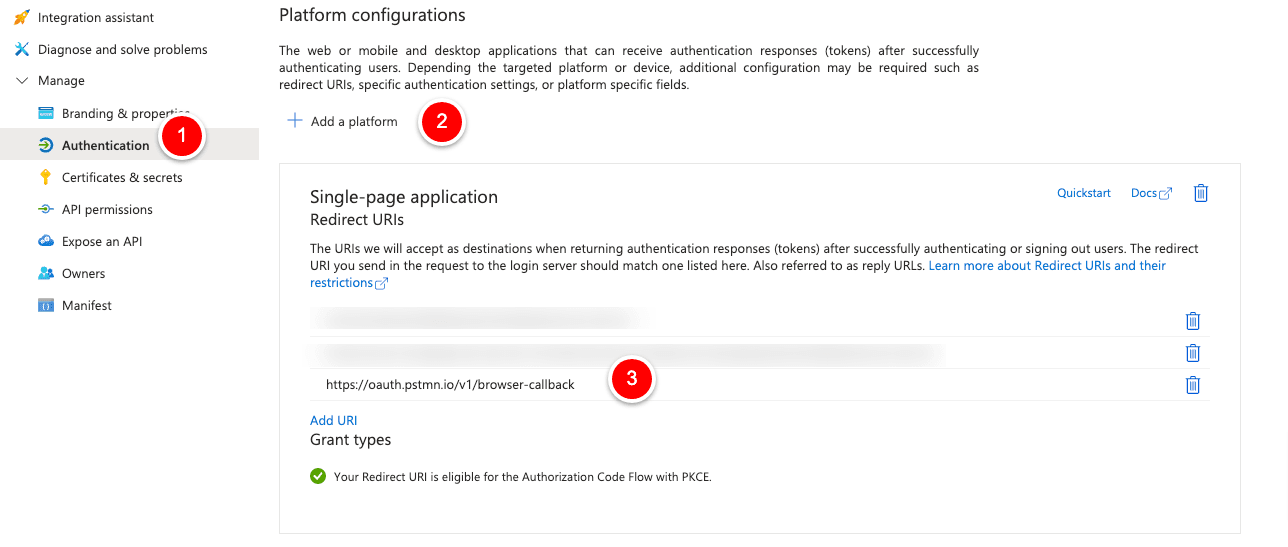
To make this happen, we must add a new setting in the previously created App Registration. We click on “Authentication” -> “Add a platform” -> “Single Page Application,” and then we add the Postman URI.
POST Request Body Post
The Json in the Raw body should look like the example data below.
“user_az_id”: -> ObjectID from an existing Azure AD B2C User
“user_email”: -> Email from an existing Azure AD B2C User, which we will use to send a confirmation mail via Resend.com
With this JSON Body in place, APP Service will create the resource.
Providing Environment Variables to App Service
But wait. We forgot to provide the right environment variables to the App Service because since the logic is creating Azure Resources, we need an APP Registration with proper rights.
Here, we have to distinguish between the App Registration that we used to Secure the App Service from the outside and the App Registration that we will use to create Resources within our Azure Subscription.
Since the securing part was handled in the previous story, you can get all the details here:
https://www.cloudapp.dev/next-js-14-building-a-saas-solution-in-azure-authentication-part-2
New App Registration for Resource Creation
Let’s create a new app registration called “iac_azure.” For “Supported account types” select -> Accounts in this organizational directory only (xxxxx only — Single tenant)
Enable “Access tokens” and “ID tokens” in the “Authentication tab. No special setting in “API permissions” is needed. Create a new Client Secret under “Certificates & secrets”.
After creating the app registration, I added the service principal (app registration) to the section “Access control (IAM)” in the subscription with the “contributor” role.
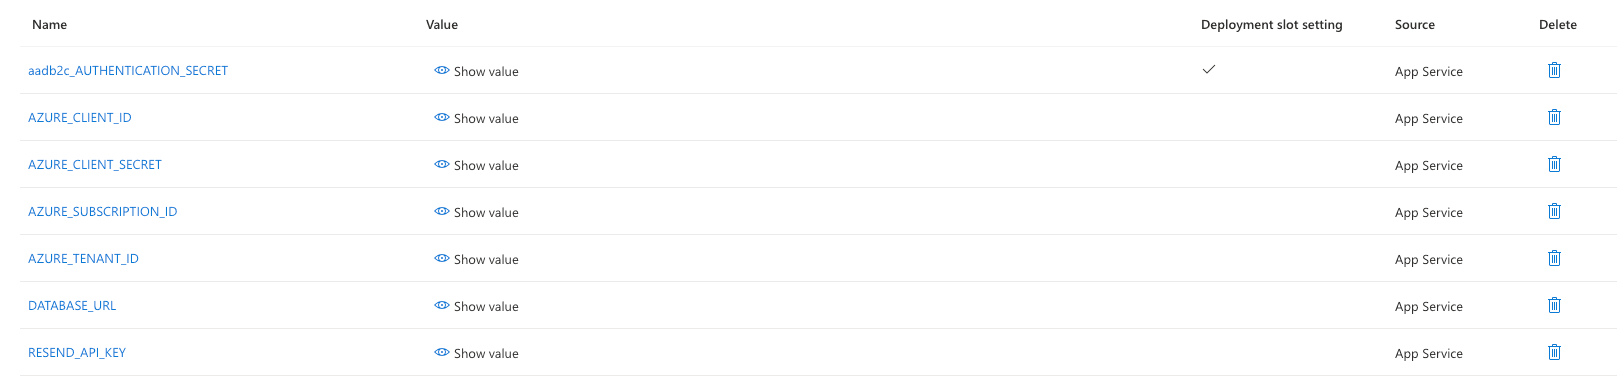
With the new app registration, we have these four env variables:
AZURE_CLIENT_ID
AZURE_CLIENT_SECRET
AZURE_SUBSCRIPTION_ID
AZURE_TENANT_ID
The variable “aadb2c_AUTHENTICATION_SECRET” was automatically added when we set up the AD Auth for the App Service. DATABASE_URL is only needed if you want to save data to a Postgres DB; if not, remove the corresponding code from the logic. RESEND_API_KEY is required by the mail sent out after successfully creating the resource.
The logic takes the values from the AZURE env variables for the authentication.
Nextjs 14 logic for calling App Service
I start with the creation of a new component, followed by several API Routes.
Component - createstorageaccountform_appservice.component.tsx
With the function checkIfUserHasStorageAccount, I check if the user already has a storage account/resource group. If yes I show the button for deleting the resourcegroup/storage account, otherwise the user can create them.
With the function generateRandomName I generate Random names for the resourcegroup/storgeaccount.
I use the accesstoken from Azure AD B2C which I get with “usesession” -> const token = session?.accessToken;
API Route CreateStorageAccountAppservice
As the Payload I send this data:
API Route DeleteStorageAccountAppservice
As the payload, I send the Resourcegroupname, TagKey, and TagValue
API Route manageoperations
It is used to interact with the Postgres DB via Prisma
I integrated the component into a “dashboard” page where the Next-Auth integration with AZURE AD B2C was already present, so I could easily use the UserID, EmailAddress, AccessToken, etc.
Now, we have a nice-looking component for creating and deleting Azure Resources, which you can extend as you want.
Here is the GitHub Repo for the AppService
https://github.com/cloudapp-dev/azure-app-service-iac
Here is the GitHub Repo for the front-end
https://github.com/cloudapp-dev/nextjs14-advanced-algoliasearch/tree/nextjs1
Play around with the code, and stay tuned for the next part of the tutorial.
Cloudapp-dev, and before you leave us
Thank you for reading until the end. Before you go: