Table of Contents
- Used Stack
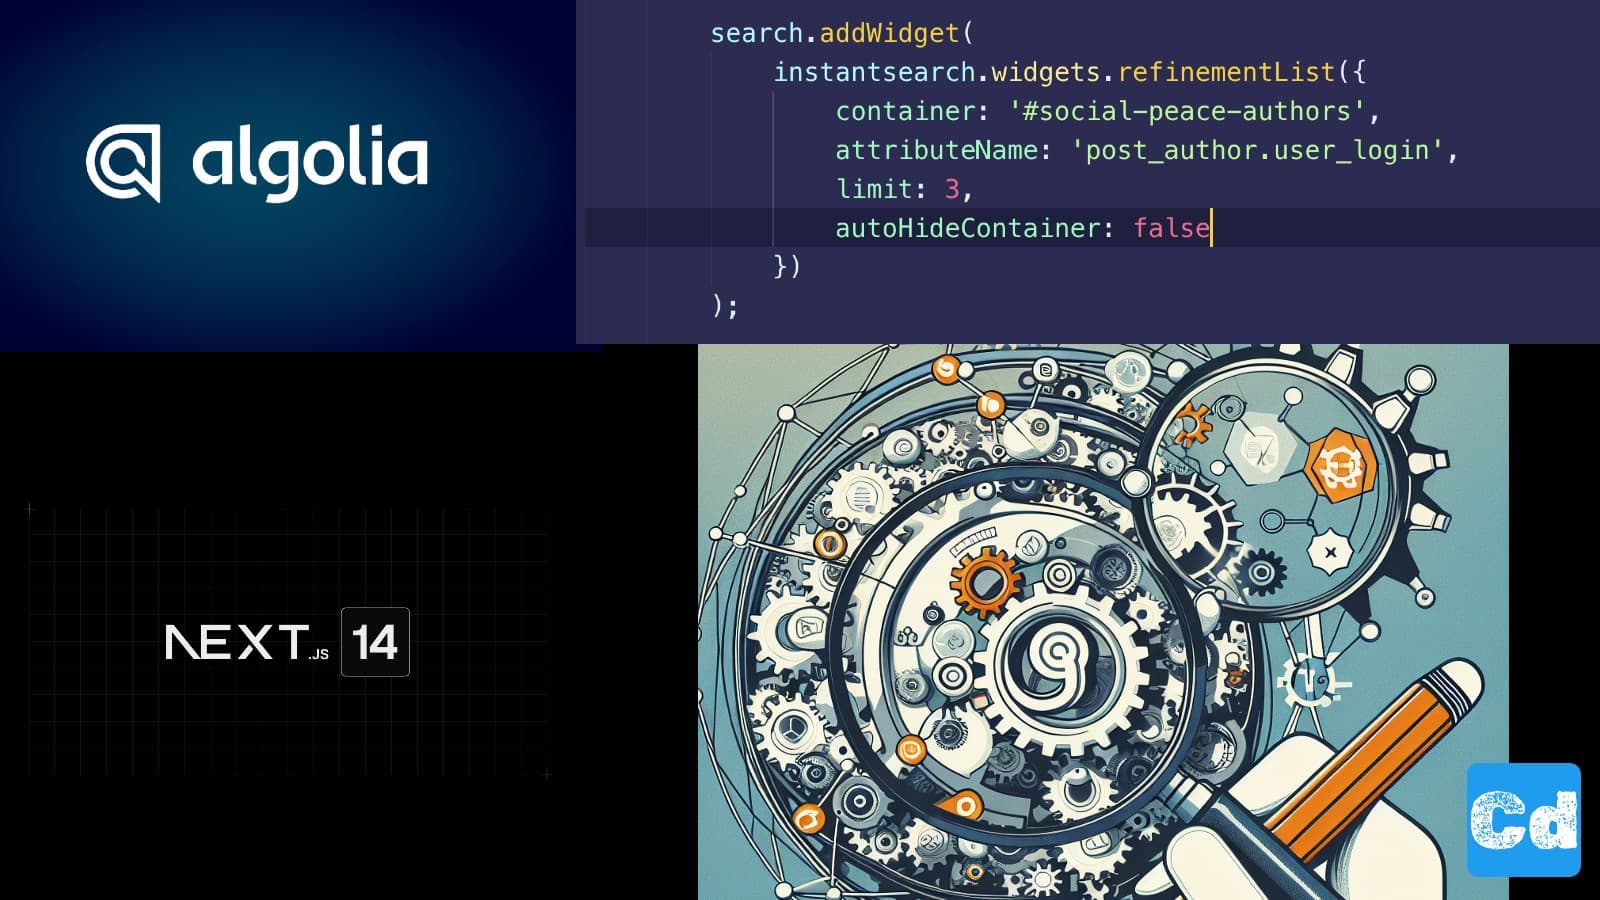
- RefinementList Widget
- NPM Packages
- Main Algolia Search Component
- Search Component used in Header Area
- Complete code after the change
- Integration of HighLight and Snippet in CardAlgolia Component
- Complete Code
- Algolia Configuration
- Highlight Attributes
- Snippet Attributes
- Cloudapp-dev, and before you leave us
In the last story, we used the native Algolia Widgets for React (Hits, SearchBox, RefinementList, and DynamicWidgets). Now we will do a deep dive into the last two (“HighLight” and “Snippet”), which we did not use in the first step.
Here is the GitHub repo with the entire code. Below, you will find the link to the example page.
Example page hosted on Vercel -> https://nextjs14-advanced-algoliasearch.vercel.app/
Used Stack
I will start with my default stack:
Next.js 14 as the web framework, and I will use the provided middleware edge function
TailwindCss for Styling
Contentful CMS (Free Plan)
Algolia as Search-Engine
Vercel for hosting
RefinementList Widget
I forgot one detail in the last story (linked above). The parameter attribute={attribute} defines the used attribute. In our case we used “tags”. limit defines the max number of visualized refinement entries (tags). showmore defines if we want show or not the “ShowMore” Button if there are more entries as we specified in limit and showMoreLimit defines the max number of refinement entries that will be visualized.
NPM Packages
We don’t need any new package since we already installed the Npm package “react-instantsearch”, which includes all that we need. Now, we need the highlight and snippet widget from this package.
Main Algolia Search Component
We can remove both imports from the main Algolia component, leaving only Hits, SearchBox, RefinementList, and DynamicWidgets. The rest of the code is fine.
Search Component used in Header Area
Here, we only change one line so that we can use an Env-Variable for the Index Name.
Complete code after the change
Integration of HighLight and Snippet in CardAlgolia Component
As a first step, we have to import the Widgets
then we replace the old Interface declaration with a new Type declaration, where we use “AlgoliaHit”, which was imported as well.
With the new type in place, we can integrate our new widgets.
Complete Code
Algolia Configuration
We have to adapt the Algolia Index Configuration so that the widgets show the data.
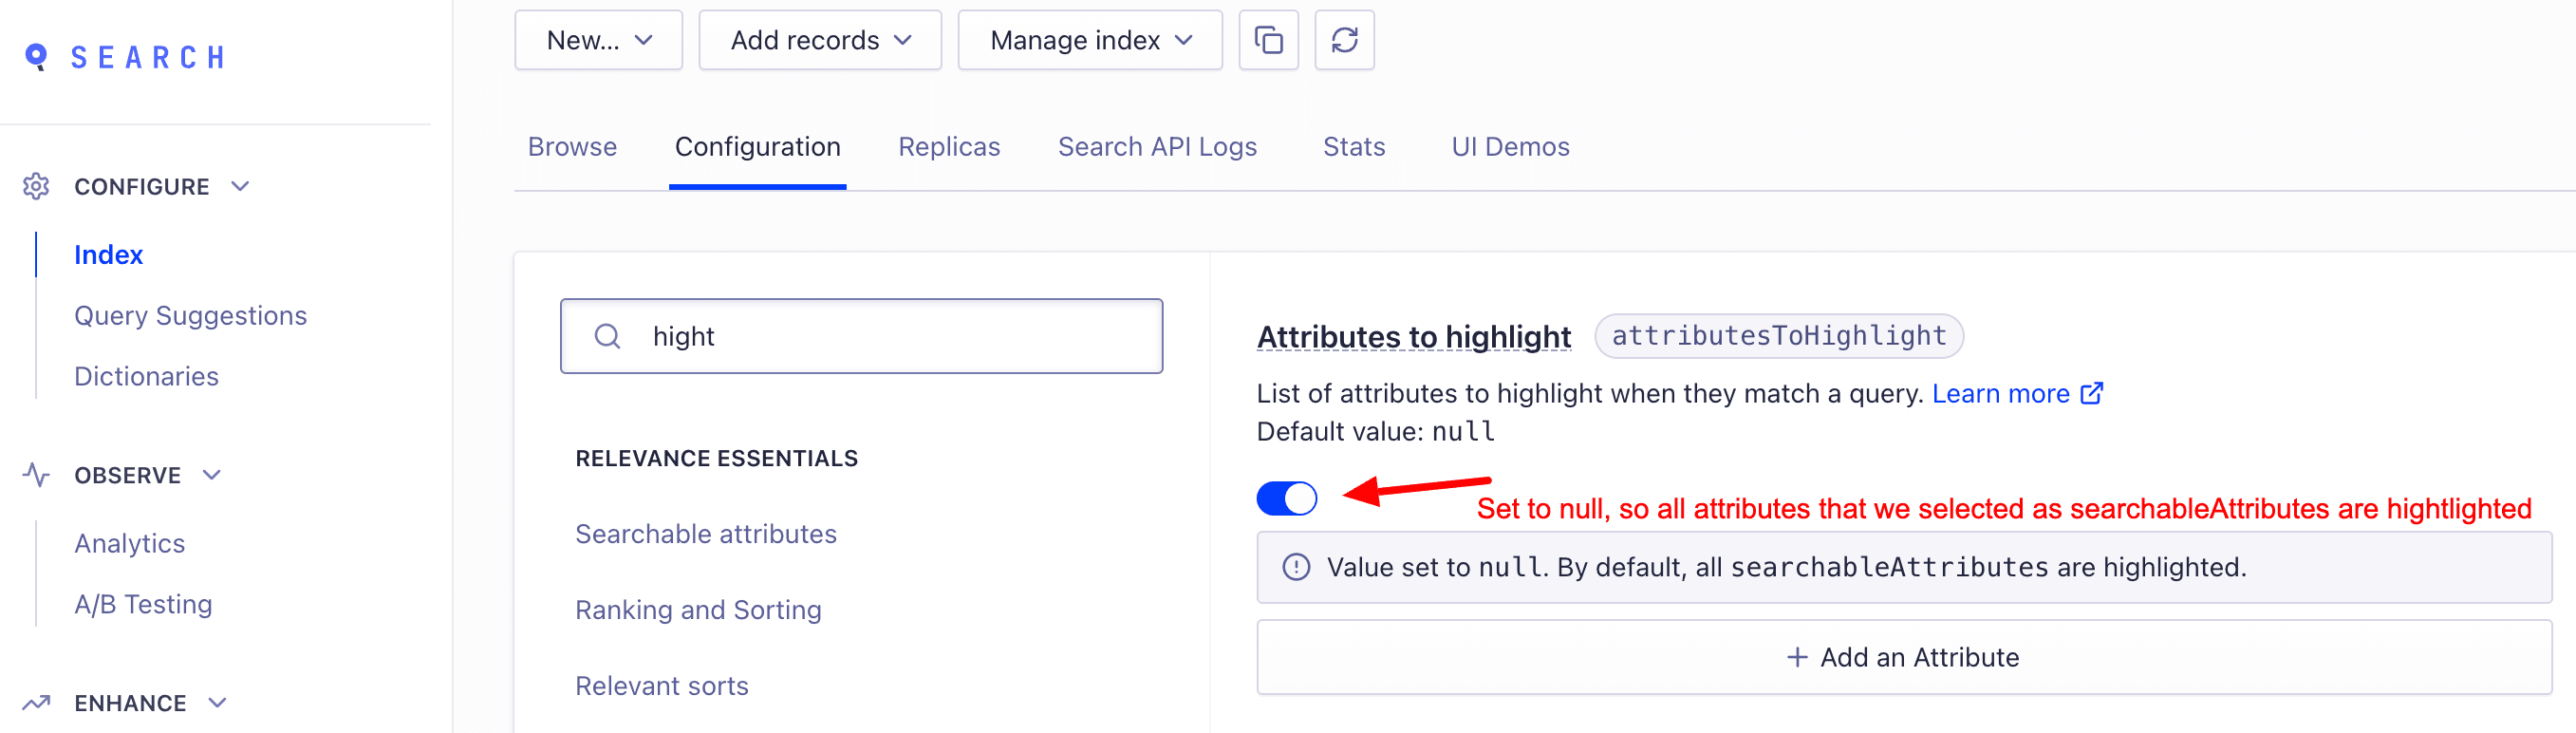
Highlight Attributes
Here, we can go with the default setup so that all attributes marked as searchable are highlighted.
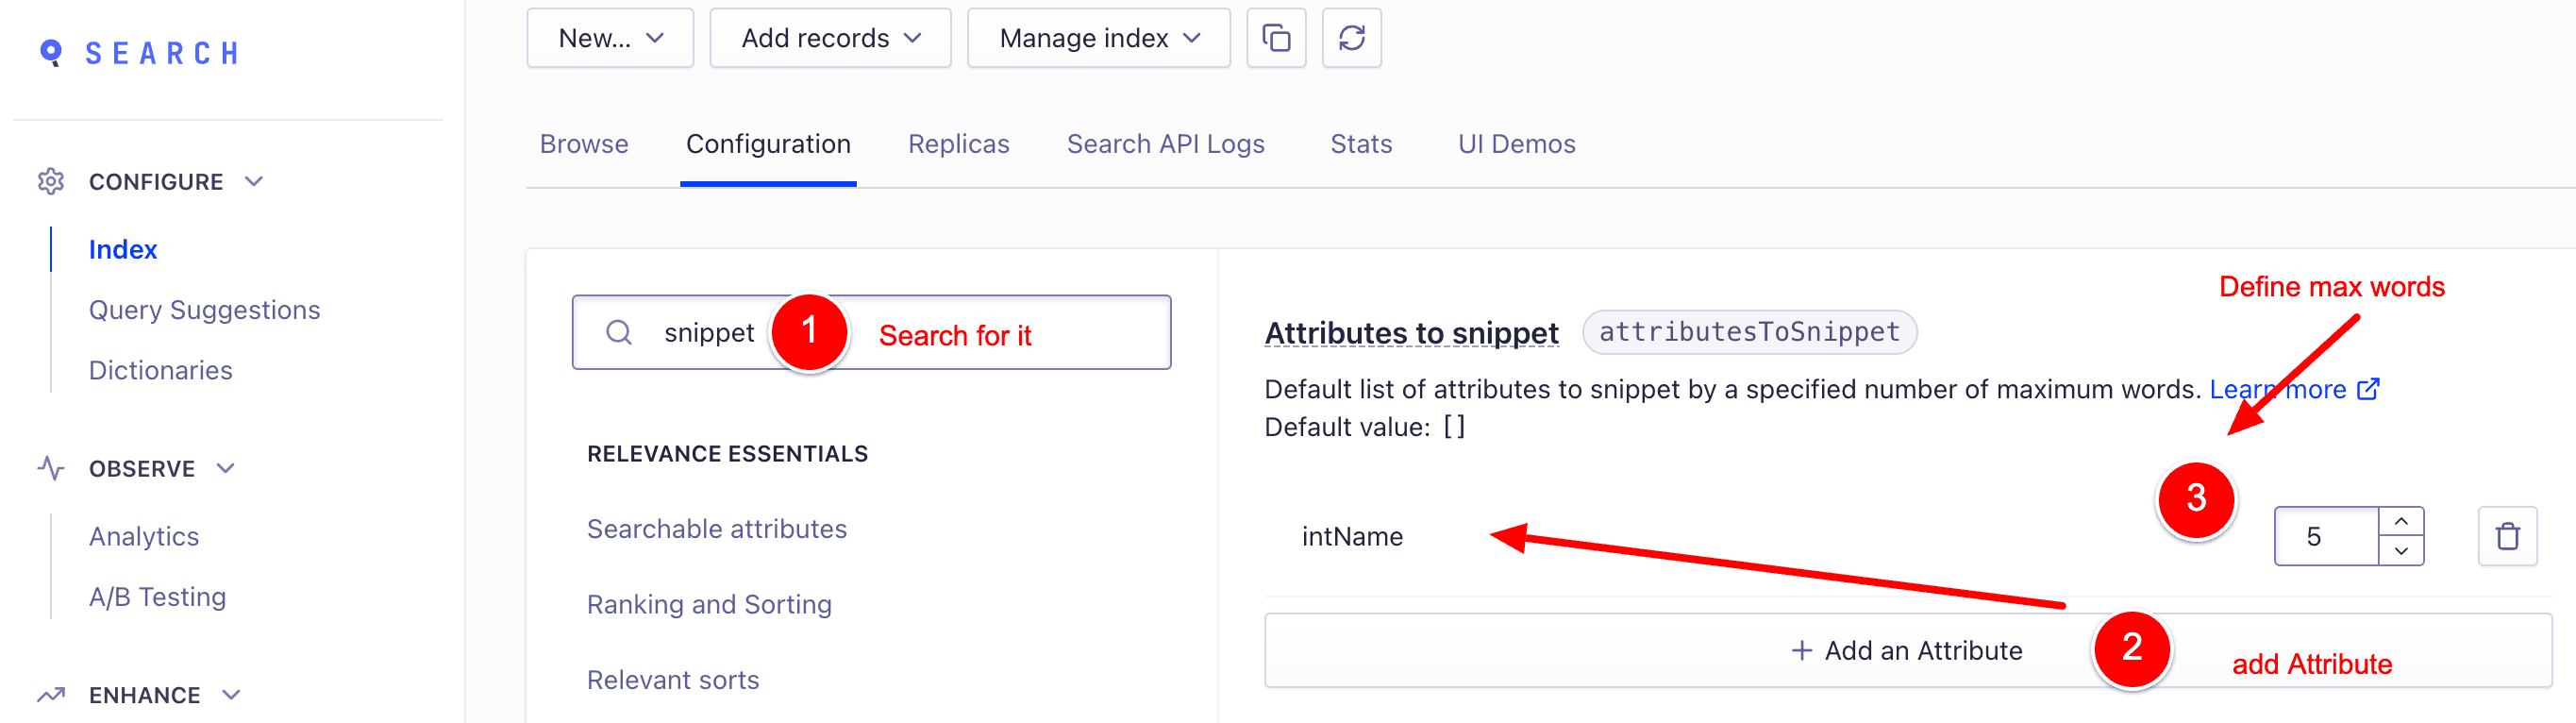
Snippet Attributes
Select the attribute for the snippet. ShortDescription or Description are default values that you can or should use.
Cloudapp-dev, and before you leave us
Thank you for reading until the end. Before you go: