Table of Contents
- Used Stack
- New API Route for Contentful Data fetch
- New Lightweight GraphQL Query the Slug Attribute
- Passing Slug to AlgoliaSync API Route
- Defining JSON Data Body for Algolia
- Using new Attributes in the Frontend
- Complete code of the Visualization Component
- Frontend with Highlight and Snippet Component
- Cloudapp-dev, and before you leave us
We will walk through the process of a complete data re-sync between Contentful and Algolia with two Custom API Routes in Nextjs 14, and we will extend the Algolia Data Model as well. The story covers the full code and the configuration in the Algolia Backend.
Here is the GitHub repo with the entire code. Below, you will find the link to the example page.
Example page hosted on Vercel -> https://nextjs14-advanced-algoliasearch.vercel.app/
Used Stack
I will start with my default stack:
Next.js 14 as the web framework
TailwindCss for Styling
Contentful CMS (Free Plan)
Algolia as Search-Engine
Vercel for hosting
New API Route for Contentful Data fetch
As a first step, I created a new API route that gets all blog posts from the Contentful GraphQL Interface. For ease of use, I get all posts without filtering (where clause in the graphQL-Query). If someone needs a real-world example, please comment, and I will provide it.
I used 40 as a limit, but you can use what you need.
New Lightweight GraphQL Query the Slug Attribute
To reduce the load on the Contentful API, I created a new GraphQL-Query (pageBlogPostCollectionSmall.graphql), which only queries the “internalName” and the “slug” attribute, so I can greatly reduce the overhead.
Passing Slug to AlgoliaSync API Route
After returning the data from Contentful, we use the “Slug” attribute from the response to pass it to the second API Route “/api/algoliasync”. This API uses the slug attribute in the POST Body to get all the details for every post, which we then use to make a PUT request to the Algolia Service to create or update the corresponding record/item.
Defining JSON Data Body for Algolia
We are completely flexible regarding the data body that we create for Algolia. Algolia is a schemaless Index, so we can add and remove attributes.
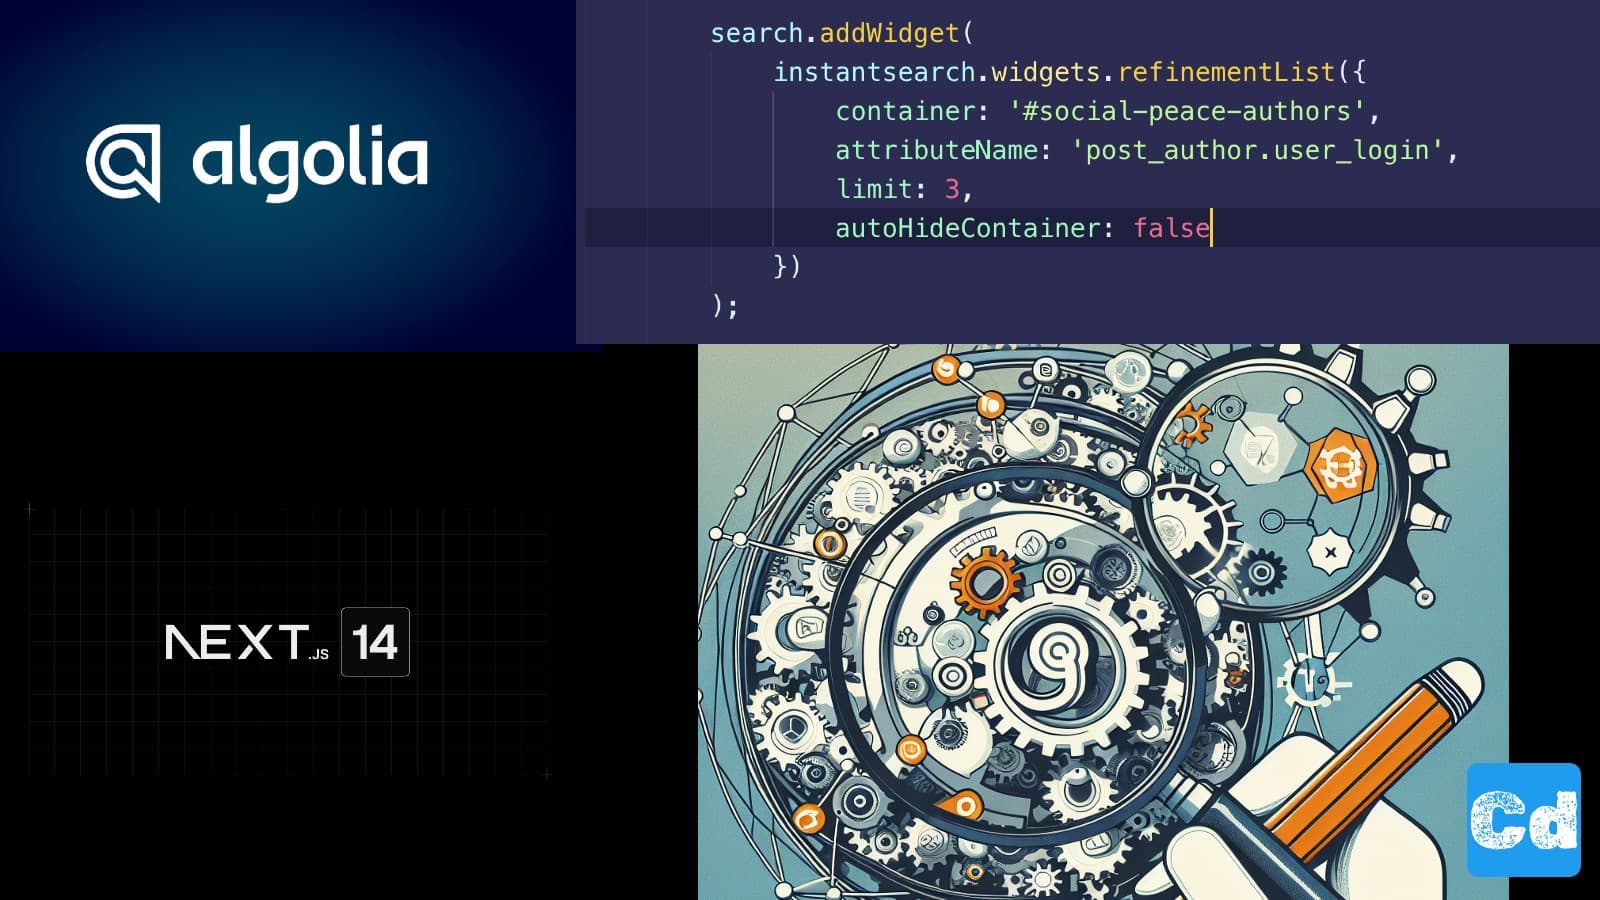
Using new Attributes in the Frontend
We adapt our type CardProps and add the six new attributes,
then I check the language with fallbackLng (“en-US”), so that I can show the right locale. On the top, I use the widget “Highlight” for the title attribute, and below that, I use the short attribute for the “Snippet” widget.
Complete code of the Visualization Component
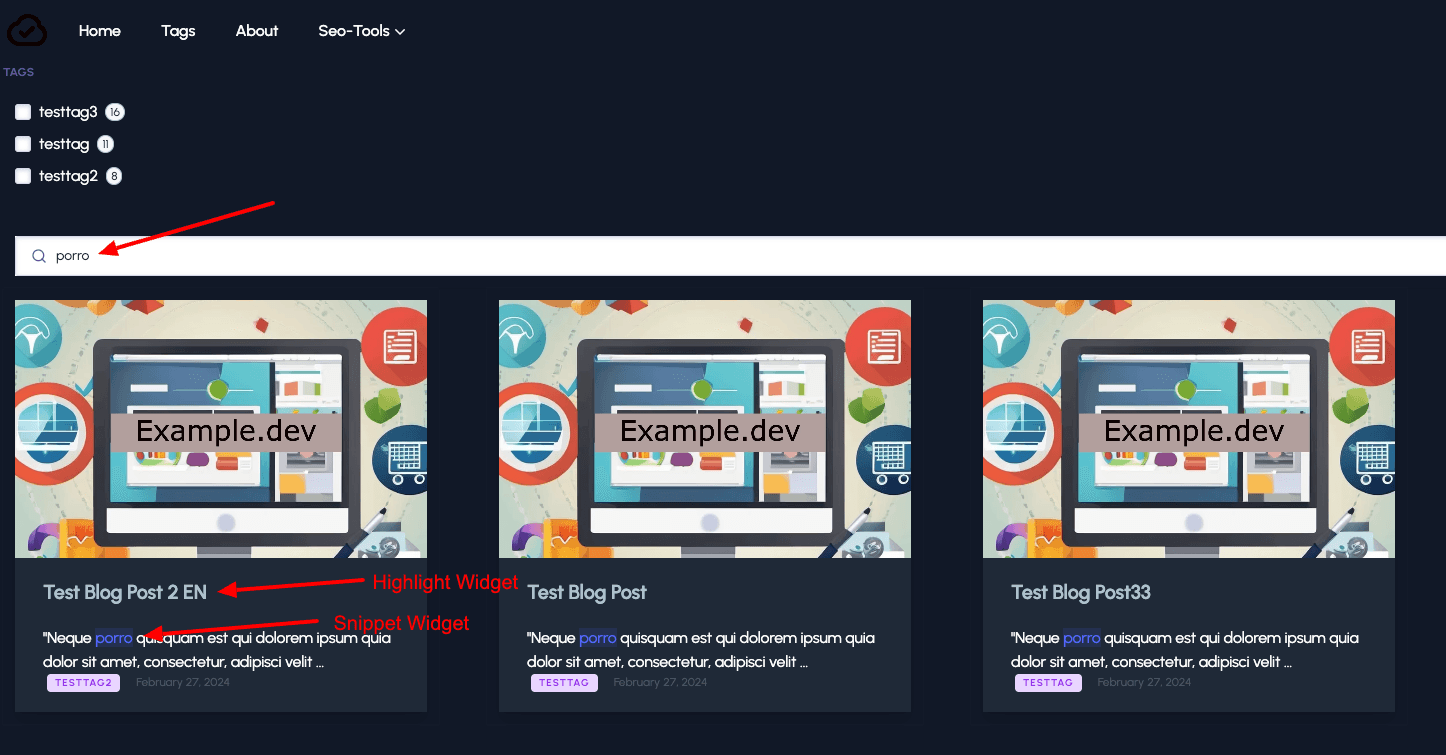
Frontend with Highlight and Snippet Component
In the screenshot below you can see the two widgets with our new attributes in action.
Cloudapp-dev, and before you leave us
Thank you for reading until the end. Before you go: